


The Complete Guide to Vintage Equipment Restoration: Sewing Machines, Watches, Cameras & More
The first time I cracked open a vintage Singer sewing machine, I was genuinely terrified. It was a 1952 Singer 99K — olive green, cast iron, and somehow still threaded with faded cotton from decades ago. I had no idea if I’d ruin the timing, strip a thread, or discover parts that simply didn’t exist anymore. Two hours later, it was humming like it remembered every stitch it had ever made. That moment changed how I think about old things. This vintage equipment restoration guide exists because that experience isn’t rare — it’s waiting for anyone willing to slow down, pay attention, and pick up a few basic tools. A good vintage equipment restoration guide walks you through every step: assessment, disassembly, cleaning, repair, and finishing. Vintage equipment restoration is the process of repairing, cleaning, and returning old mechanical devices — sewing machines, watches, cameras, typewriters, and lawn equipment — to full working condition while preserving their original design and character. It’s hands-on, deeply satisfying, and more accessible than most people think. Every piece of vintage equipment you restore is one less item in a landfill. One more mechanical marvel kept alive for another generation. That’s not a small thing.
What is Vintage Equipment Restoration? The Vintage Equipment Restoration Guide Starts Here
In any vintage equipment restoration guide, the first step is understanding what restoration actually means. Restoration, repair, and preservation are related but distinct. Repair fixes a specific broken function — you replace a worn belt and move on. Preservation means stabilizing something as-is, stopping decay without altering its state. Restoration is the full picture: bringing a piece back to functional, original condition while respecting its history. Why does it matter? Because vintage equipment is, almost universally, better built than what’s on shelves today. A 1960s Singer 66 uses all-metal gears — no plastic anywhere. A mechanical Rolex Day-Date has a movement designed to last a century with proper care. A Canon AE-1 film camera has a shutter mechanism that photographers have been servicing themselves for 50 years. These aren’t antiques to display under glass. They’re machines that want to work. The right-to-repair movement has brought new urgency to this craft. Manufacturers increasingly design products that can’t be opened, can’t be sourced with parts, and are essentially built for the landfill. Restoration is the practical answer. When you restore a vintage piece, you’re voting with your time against that system. There’s also an economic argument that’s hard to ignore. A fully restored Singer 99K sewing machine sells for $200–$400 on Etsy. The same machine in rough shape goes for $25 at an estate sale. The math works — and the skills transfer to every project after. The sustainability angle goes beyond individual cost savings. Electronics and appliances are among the fastest-growing waste streams globally. Every restored camera, every cleaned-up typewriter, every oiled sewing machine is a small but real act of environmental responsibility. This is a craft that aligns values with action.
Essential Tools and Workspace Setup
You don’t need a professional repair shop to restore vintage equipment. You need a clear workspace, decent lighting, and a modest toolkit. Here’s what actually matters. The essential starter toolkit (budget: $50–$150):
{list_html}Specialized tools worth adding as you go:
{list_html}Workspace setup: You want bright, diffuse lighting — an LED ring lamp or a Logitech magnifying lamp puts light exactly where your hands are. Work on a light-colored surface so tiny screws don’t vanish. Egg cartons, pill organizers, and small magnetic trays keep parts from rolling away. A foam mat protects delicate parts from hard surfaces. Safety basics: Nitrile gloves when handling solvents. Safety glasses when using compressed air. A small fan or open window when working with cleaning chemicals. This isn’t optional — some vintage lubricants contain petroleum distillates that aren’t pleasant to breathe in an unventilated room. For precision work, a quality screwdriver set like the iFixit Pro Tech Toolkit is worth every penny. It covers everything from electronics to mechanical assemblies in one organized case.
Safety First: Preparing Your Restoration Project
Before you touch a single screw, photograph everything. Every angle, every cable routing, every spring position. You’ll thank yourself an hour into disassembly when you can’t remember how a tension spring seated. A phone camera works fine — shoot in good light, take more photos than you think you need. Electrical safety is non-negotiable for motorized equipment. Vintage sewing machines with capacitor-start motors can hold a charge even after unplugging. Discharge the capacitor before touching internal wiring, and use a multimeter to confirm zero voltage. If you’re not comfortable with electrical systems, either learn first or stop at the mechanical work and take the motor to a specialist. Vintage lubricants — the old oil and grease still inside a machine you just acquired — can contain petroleum derivatives, lead-based additives, or compounds that have oxidized into something unpleasant. Use nitrile gloves, not latex. Dispose of used solvent-soaked rags as you would any oily rag: in a sealed metal container, not crumpled in a drawer. Create a project plan before you start. Research your specific model before disassembling it. Singer 99K timing differs from Singer 66 timing. Canon AE-1 shutter work differs from an AE-1 Program. Model-specific quirks will bite you if you treat every machine as generic. Service manuals exist for most popular vintage models — find yours before the first screw turns. Finally: know your limits. A hairspring in a Rolex movement is 0.1mm thick and hand-adjusted by professionals who trained for years. A vintage wiring harness with frayed insulation is a fire risk. Some steps belong with specialists, and recognizing that is part of good restoration practice.
Understanding Your Equipment: The Five Main Categories
This vintage equipment restoration guide covers five distinct equipment types, each with specialized techniques. Not all vintage equipment is the same — the skills transfer, but the specifics diverge quickly. Here’s what distinguishes each category and what you’re getting into.
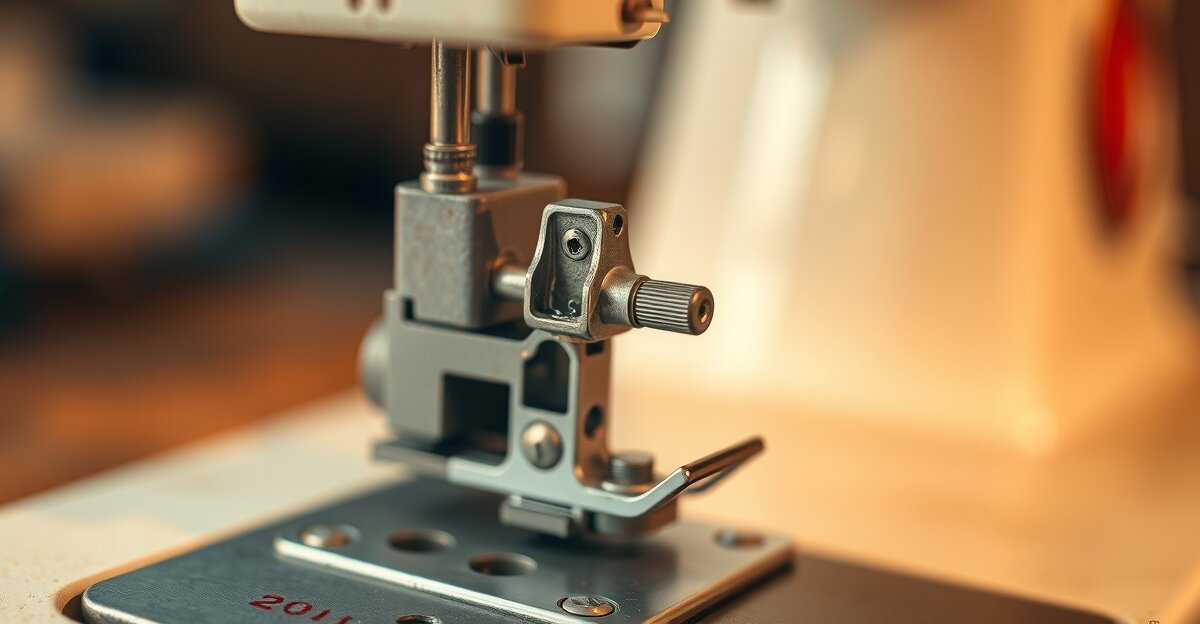
Sewing Machines
Sewing machines are the best starting point for new restorers. The mechanical systems are large enough to see clearly, the parts are widely available, and the community is enormous. The Singer 99K is the canonical beginner’s machine — compact, all-metal, simple timing mechanism, and parts are still being manufactured. Common issues: incorrect needle timing (the hook passes behind the needle instead of catching the thread), tension spring fatigue, dried oil gumming the bobbin race, and misaligned needle bar height. All of these are fixable with basic tools and a timing reference. Our post on Singer 99K timing issues goes deep on the visual diagnostic process if you’re working on that specific model.
Mechanical Watches
Watches require patience, magnification, and small-motor skill. A mechanical watch movement — whether it’s a vintage Rolex Day-Date caliber 1556 or a humble Seiko 6105 — is a marvel of miniaturized engineering. The balance wheel, escapement, and mainspring work together at tolerances measured in microns. Cleaning a movement requires proper watchmaker’s solutions and an ultrasonic cleaner or peg wood. Adjusting a hairspring is advanced work. For beginners, start with learning to replace a watch crown gasket or a cracked crystal before touching the movement internals. See our mechanical watch repair basics guide for a solid foundation.
Film Cameras
The Canon AE-1 is the Honda Civic of vintage cameras: ubiquitous, well-documented, and an ideal learning platform. Common failure modes include deteriorated light seals (the foam around the back door that keeps light out), sticky shutter blades from evaporated lubricant, and capacitor failure causing the infamous “Canon squeal” on the film advance. Light seal replacement is a 45-minute job with a foam seal kit ($8 on eBay) and toothpicks. It’s deeply satisfying. Our film camera light seal replacement guide walks through it step by step.
Lawn Equipment
Vintage Craftsman mowers and older garden machinery are honest, repairable engineering. Briggs & Stratton single-cylinder engines from the 1970s and 80s run on a simple carburetor, points-and-condenser ignition (or later, electronic), and manual everything. When one stops starting, it’s usually the carburetor float needle, a clogged jet, or a failed capacitor on the ignition coil — all $10 parts. Check our vintage lawn mower blade sharpening guide for the safety essentials before you touch spinning steel.
Typewriters
Typewriters are tactile, mechanical joy. The Underwood Standard and Royal Quiet De Luxe are the most commonly found at estate sales. Typical problems: key slugs sticking together (usually gummed oil), ribbon spools that won’t advance, and platen rubber that’s hardened and won’t grip paper properly. Most typewriter work is cleaning — the mechanisms are solid, well-built, and designed for users to service. See our Royal Quiet De Luxe typewriter repair guide for specific fixes.
The Step-by-Step Restoration Methodology
This eight-step process works across all five categories. Adapt it to your specific project, but don’t skip steps — especially documentation and testing checkpoints. Step 1: Assessment & Documentation Before touching anything, photograph every surface. Note condition: rust, corrosion, missing parts, previous repairs (look for epoxy, incorrect screws, non-original paint). Research your exact model and serial number — a Singer 99K from 1952 has different specifications than one from 1963. Find the service manual if one exists. Step 2: Disassembly & Cataloging Work systematically. Remove parts in a logical sequence and place each one in a labeled container or egg carton. Photograph after each significant disassembly step. Sort screws by location — don’t mix the screws from the top plate with the ones from the base. A magnetic parts tray is essential. Small zip-lock bags labeled with masking tape work just as well. Step 3: Cleaning & Degreasing Old lubricant becomes gummy over decades. It needs to come out before fresh oil goes in. For metal parts, a quality degreaser like Zep or Simple Green cut 50/50 with water works well for most mechanical components. Ultrasonic cleaners (available for under $50) are transformative for small watch and camera parts. Avoid soaking painted surfaces or parts with rubber seals in solvent — it lifts paint and swells rubber. Step 4: Inspection & Parts Evaluation Clean parts reveal what worn parts look like. Check gears for chipped teeth. Inspect springs for cracks. Look for scoring on bearing surfaces. Test the movement of every mechanism by hand — it should move freely and return to position cleanly. List every part that needs replacement before you start ordering. Step 5: Parts Sourcing (See the next section for full details.) Order everything before reassembly. Waiting for a backordered bobbin race while a disassembled machine sits in pieces is deeply frustrating. Have all parts in hand before Step 6. Step 6: Lubrication & Adjustment Use the right lubricant. Sewing machines need pure, thin sewing machine oil (Tri-Flow or equivalent) — not WD-40, not 3-in-1, not cooking oil. Watches need specific watch oils (Moebius 9010 for high-speed parts, 9020 for keyless works). Camera shutter blades need near-zero lubrication — a breath of naphtha to clean, nothing re-applied. Using the wrong lubricant causes more damage than using none. Step 7: Reassembly & Testing Work in reverse of disassembly. At each stage, test the mechanism before proceeding. Don’t fully reassemble a sewing machine before checking timing — do a slow, hand-driven test cycle first. Don’t close up a camera body before checking shutter accuracy with a phone’s slow-motion video. Catching issues mid-reassembly is far easier than catching them after the case is screwed shut. Step 8: Final Finishing Touch up paint chips with period-correct colors (vintage machine paint is available from specialty suppliers). Polish chrome with a fine metal polish like Flitz. Protect finished surfaces with a thin coat of Renaissance Wax. Replace decals if originals are badly faded — reproduction decals exist for most popular Singer and Olympia models. Want a head start? Download our free Restoration Safety Checklist — a 20-point pre-disassembly checklist used by experienced restorers.
Sourcing Parts and Supplies: Where to Find What You Need
Finding parts is often the make-or-break challenge of vintage restoration. Here’s where to look and how to evaluate what you find. eBay is the largest marketplace for vintage mechanical parts. Search by model number and part name specifically — “Singer 99K bobbin race” returns very different results than “Singer parts.” Completed listings show what parts actually sell for, which protects you from overpaying. Buy from sellers with restoration-specific feedback when possible. Etsy has emerged as a surprisingly good source for reproduction and NOS (new-old-stock) vintage parts. Many small shops specialize in Singer sewing machine parts, vintage camera seals, and typewriter ribbons. The quality is often better than random eBay lots, and sellers tend to be knowledgeable. You can frequently ask a question before buying and get a real answer from someone who knows the equipment. Specialty forums and communities are irreplaceable for rare equipment. The Vintage Sewing Machine group on Facebook has members who’ve been restoring machines for 30+ years. FORA (Film Camera Repair) groups have members who’ve stockpiled NOS Canon and Olympus parts. The Antique Typewriter Collectors group on Facebook is a goldmine. These aren’t just sourcing channels — they’re knowledge bases. Buying broken units for parts is a legitimate and often cost-effective strategy. A non-running Singer 99K for $15 at a garage sale might have a perfect bobbin race, intact tension assembly, and usable needle plate. “Parts or repair” listings on eBay are worth watching. 3D printing has made genuine inroads for restorers. Plastic knobs, levers, and non-load-bearing brackets that are simply unobtainable can often be printed from community-designed files on Thingiverse or Printables. Don’t use printed parts for structural or high-stress applications — but for a missing typewriter knob or a cracked camera back latch, it’s a viable solution. A set of good parts storage trays, small labeled drawers, and a few packs of resealable coin envelopes will keep your parts organized across multiple projects. This sounds trivial. It isn’t — mixing parts from two machines of the same model is an easy way to create an assembly that works worse than either original.
Cleaning Techniques That Preserve History
How you clean vintage equipment determines whether you preserve its character or erase it. There’s a real difference between removing decades of grime and removing original finish. Dry cleaning first. Always start with dry methods — soft brushes, a blower bulb, compressed air in short bursts. This removes loose dust and debris without introducing any moisture or chemicals. A natural-hair paintbrush is perfect for dusting complex mechanical areas. A dental pick helps clear packed debris from screw slots without scratching. Solvent selection matters enormously. Naphtha (lighter fluid) is the go-to for removing old oil from metal parts without damaging most finishes. Isopropyl alcohol (90%+ concentration) works well on electrical contacts and optical elements. Never use acetone on painted surfaces, rubber, or plastic — it dissolves them. WD-40 is a water displacer and very thin lubricant, not a cleaning solvent; using it as a cleaner leaves a residue that attracts dust. Rust removal options:
{list_html}The patina question is real. Original patina on brass camera bodies, vintage watch cases, and sewing machine decals represents authenticity. An over-polished 1940s Leica is worth less — and looks wrong — compared to one with its original warm oxidation. The rule: clean to functional cleanliness, not cosmetic perfection. Remove grime, fingerprints, and corrosion. Leave the honest wear. Optical cleaning requires its own approach. Camera lenses need lens-specific solution (never window cleaner) applied to a microfiber cloth, worked in gentle spirals from center to edge. Our post on removing fungus from camera lenses covers the more advanced cases where fungus has etched the glass. Leather care for cases and bellows: saddle soap to clean, followed by a leather conditioner like Lexol. Avoid petroleum-based products on antique leather — they can accelerate deterioration of older tanning compounds.
Model-Specific Restoration: Your Vintage Equipment Restoration Guide in Practice
General principles get you started. Specific knowledge gets you to a working machine. Here are the most common models you’ll encounter and what they actually need.
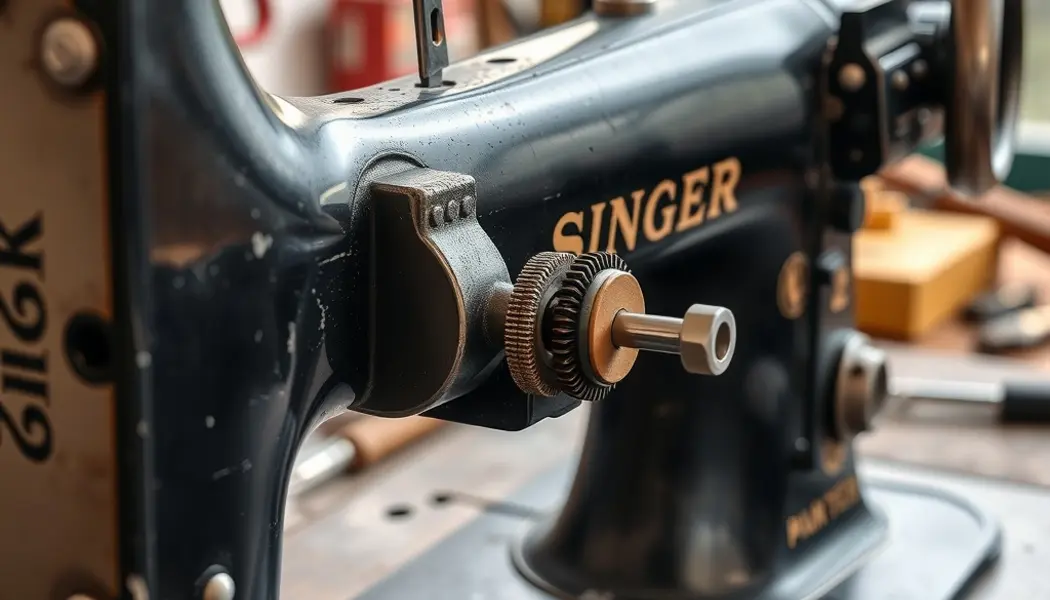
Singer 99K Sewing Machine Restoration
Expected restoration time: 3–5 hours for a first-timer. The 99K is a 3/4-size machine from the 1920s through 1960s, and it’s remarkably forgiving to restore. Start by removing and cleaning the bobbin race — it collects lint and dried oil into a gummy paste that creates tension problems. Clean it with naphtha, dry completely, and apply two drops of pure sewing machine oil. Timing: the hook should pass behind the needle at exactly 2.4mm above needle-lowest-position on the upstroke. If it doesn’t, the timing needs adjusting via the hook gear nut on the lower shaft. Our detailed guide on Singer 99K timing walks through the visual verification process. The tension spring — the thin, curved spring inside the tension disc assembly — fatigues over decades. Replacements cost $3 and fix most persistent tension problems.
Canon AE-1 Film Camera Restoration
Expected restoration time: 2–4 hours for light seals and basic service. Canon AE-1 light seal foam deteriorates into sticky black powder that contaminates the film chamber and causes light leaks. Replacement foam kits are $8–12 on eBay and include pre-cut strips. Remove old foam with a toothpick and isopropyl alcohol. Apply new foam with the included adhesive. This single repair makes most non-working AE-1s usable again. For the “Canon squeal” — a grinding noise on film advance — the culprit is the electromagnetic shutter mechanism’s coil. Some are fixable with a new capacitor; others need the shutter assembly replaced. Start with the Canon AE-1 battery corrosion fix before condemning the shutter — corroded contacts mimic many AE-1 failure modes.
Rolex Day-Date Watch Restoration
Expected restoration time: this is advanced territory. Plan for a full day if you’re servicing the movement yourself — or find a qualified watchmaker for anything beyond case and bracelet work. A Rolex Day-Date running a caliber 3155 movement needs a full service every 5–7 years: disassembly, ultrasonic cleaning in appropriate watch-cleaning solution, inspection of the hairspring under 40x magnification, replacement of worn jewels if needed, fresh oil on every contact point, and pressure testing to confirm water resistance after reassembly. If the watch is keeping good time but running slightly fast or slow, start with our mechanical watch mainspring replacement guide before assuming a full service is needed. For cost comparison context, our post on Rolex vs. Seiko repair costs breaks down the real-world service economics for both.
Underwood Standard Typewriter Restoration
Expected restoration time: 4–6 hours for a complete cleaning and adjustment. The Underwood Standard’s type slugs stick together when the connecting links and type bars get gummy with old oil. The fix is almost entirely cleaning: apply naphtha to the type bar pivot area, work each key repeatedly by hand until it moves freely, then wipe away the dissolved residue. Don’t re-oil the type bars — they work better dry. Ribbon spool mechanisms fail when the ratchet pawl spring loses tension. Replacement springs can be fabricated from clock spring stock or sourced from other machines. The platen (the rubber roller) hardens over decades; recovering it with new rubber is a specialty job, but replacements are available from suppliers like Ames Supply.
Craftsman Lawn Mower Restoration
Expected restoration time: a weekend for a full engine restoration. Briggs & Stratton engines from the 1970s–1990s are among the most rebuildable small engines ever made. Carburetor rebuild kits ($12–18) include a new needle, seat, float, and gaskets. Drain the old fuel completely — varnished gasoline is the number one cause of no-start conditions. Clean the carburetor jet with a thin wire or fine nozzle cleaner. Check the blade adapter for cracks — this is a safety-critical part that shouldn’t be reused if damaged. Our vintage lawn mower blade sharpening guide covers safe blade work and the right file angles for Craftsman blade geometry.
The Right-to-Repair Philosophy and Why It Matters
The machines we’re restoring didn’t become unfixable — they were made unfixable. Modern printers have chips that refuse third-party ink. New iPhones send error messages if you replace the battery yourself. Tractors encrypt their diagnostic systems so farmers can’t fix their own equipment in a field during harvest. This isn’t accidental design. It’s a business model. And vintage restoration is one of the most concrete ways to push back against it. The right-to-repair movement has achieved some legislative wins — dozens of US states have passed or are considering repair-rights bills, and the EU has begun requiring companies to supply spare parts for appliances up to 10 years after manufacture. Organizations like iFixit publish free repair guides for thousands of devices. Repair Cafés — volunteer-run community repair events — exist in hundreds of cities globally. Restoring vintage equipment connects you to this movement in a tangible way. Every machine you keep running is a data point against the “it’s cheaper to replace” argument. And when you share your work — on YouTube, on Instagram, in community forums — you’re multiplying the effect. Someone watching you restore a 99K learns they can do it too. The knowledge doesn’t die. There’s also something quieter at stake: mechanical literacy. The ability to look at a machine, understand what it does, diagnose what’s wrong, and fix it. That skill is becoming genuinely rare. Vintage equipment restoration is one of the last places where ordinary people still practice it.
Advanced Tips: Taking Your Skills Further
Once you’ve completed a few restorations, a natural question emerges: what do I do with this skill? Documentation for rare models is valuable work. If you’ve restored a Pfaff 130 and documented every step, you have something the community genuinely needs. Our Pfaff 130 repair guide exists because a restorer took the time to photograph and describe what they found. Custom modifications vs. preservation integrity is a real tension in the community. Fitting a vintage sewing machine with a modern servo motor is a practical upgrade — but it changes the machine’s character. Most experienced restorers keep their restorations reversible: document modifications, keep original parts, and don’t do anything that can’t be undone. Monetization paths are real if you want them. Restored vintage Singer machines sell for $200–$600 on Etsy. Restored film cameras sell quickly to photographers who want analog tools that work. If you can restore typewriters and verify they type cleanly, creative writers pay a premium for them. This isn’t a get-rich path, but it covers tools and parts while doing something you enjoy. Teaching and mentoring multiplies your impact. Repair Cafés always need people who know how to fix sewing machines. Local makerspaces welcome volunteers with mechanical skills. The knowledge you’ve accumulated is genuinely useful to others — and teaching it cements your own understanding.
Troubleshooting Common Restoration Mistakes
Even experienced restorers make these. Knowing them in advance saves you time and prevents real damage. Over-lubricating. One drop of oil per oiling point. Two drops on a sewing machine becomes a lake of oil that wicks into fabric, attracts lint, and gums the mechanism within months. Our vintage sewing machine oiling guide details exactly where each drop goes on the most common Singer models. Forcing stuck parts. If something won’t move, there’s a reason. Apply penetrating oil (PB Blaster, not WD-40), wait, and try again. A stripped screw on a camera body or a snapped type bar pivot makes a fixable problem unfixable. Patient soaking beats impatient force every time. Mixing parts from different eras. A Singer 66 bobbin won’t work in a Singer 99K — they’re close but not interchangeable. Model number matters. Era matters. If you’re sourcing parts from multiple units, verify compatibility before reassembly. Underestimating electrical issues. A vintage motor that runs but trips immediately, smells burnt, or buzzes abnormally is telling you something. Don’t ignore it and hope. A capacitor replacement is $4. A motor fire is not recoverable. Skipping reassembly testing. It’s tempting to snap the case back on and call it done. Don’t. Test the mechanism at every stage of reassembly. The Singer 99K stitch test before the top cover goes on. The Canon AE-1 shutter test before the baseplate goes on. Catching problems before final assembly is always easier. Not documenting the process. If something goes wrong and you need to retrace your steps, photos are the only reliable record. Even experienced restorers photograph as they go. It’s a 10-second habit that saves hours.
Frequently Asked Questions
What's the difference between restoration and repair?
Repair fixes a specific broken function — you replace a worn part and stop there. Restoration is a complete process: cleaning, inspecting, replacing worn components, lubricating properly, and returning the piece to original working condition. Preservation means stabilizing something as-is without altering its state. Most vintage equipment projects are restorations — you’re doing the whole job, not just patching a symptom.
How long does a typical restoration project take?
A sewing machine like the Singer 99K typically takes 3–5 hours for a first-timer. A Canon AE-1 light seal and basic service runs 2–4 hours. A full mechanical watch service is a full day. A carburetor rebuild on a vintage Craftsman mower is 2–3 hours. Expect the first project to take twice as long as you think — that time is learning, and it compresses quickly with experience.
Can I restore vintage equipment without a lot of tools?
Yes. A $30 screwdriver set, some cotton swabs, isopropyl alcohol, and sewing machine oil will get you through most basic restorations. Specialized tools (ultrasonic cleaners, lens spanners, watchmaker’s staking sets) add capability but aren’t required to start. Buy tools as specific projects require them.
What's the most common mistake beginners make?
Over-lubricating. New restorers assume more oil means better performance. It doesn’t — it means gummed mechanisms, stained fabric, and a machine that runs worse than before. One drop per oiling point, only on metal-to-metal contact surfaces. That’s the rule.
Is it worth restoring vintage equipment versus just buying new?
Almost always, yes — on multiple grounds. Vintage mechanical equipment is built better than modern equivalents in most categories. A restored Singer 99K sews better than a modern $100 plastic machine. The skills you develop have value beyond the individual project. And if you’re restoring to sell, the economics work in your favor at every price point.
How do I find parts for rare or obscure vintage equipment?
Specialty forums and communities first — someone has almost certainly encountered your model. Search eBay by exact model number and part description. Contact dealers who specialize in your equipment category. For truly unobtainable parts, 3D printing and metal fabrication are increasingly viable options.
Do I need specialized training or certifications?
For most hobbyist-level restoration, no. Service manuals, YouTube, and active online communities provide everything you need. Watch movement work and electrical systems are the exceptions — those require more systematic learning before you touch an expensive piece.
Can I start with no experience at all?
Absolutely. Start with a sewing machine. They’re large, well-documented, inexpensive when broken, and forgiving of beginner mistakes. The Singer 99K, Singer 66, and Pfaff 130 are all excellent first projects with huge communities around them. You’ll make mistakes. That’s fine. The machines are built tough enough to survive your learning curve.
14 thoughts on “The Complete Guide to Vintage Equipment Restoration: Sewing Machines, Watches, Cameras & More”