


Singer 66 Bobbin Winder Repair: 4 Easy Fixes Under $30
The Singer 66 has been in continuous production (in one form or another) since 1902 and built in numbers that dwarf almost any other domestic machine. Millions of them are still out there, and they run beautifully — when everything is working. The bobbin winder is one of the first things to fail. It’s a friction-driven mechanism that depends on a small rubber tire staying soft and grippy, a straight shaft with no wobble, and a trip mechanism that knows when to stop. After 50 to 120 years, any of those three components might have given up.
The good news: all four of the most common bobbin winder failures on a Singer 66 are fixable for under $30, usually under $10, with basic tools and an afternoon of work. This guide covers each failure mode and each fix in order of how often they occur.
How the Singer 66 Bobbin Winder Works
Before diagnosing problems, it’s worth understanding the mechanism — because it’s elegant and simple once you see it.
The bobbin winder on a Singer 66 consists of:
- The winder shaft — a steel rod that the bobbin sits on top of, projecting up from the winder arm
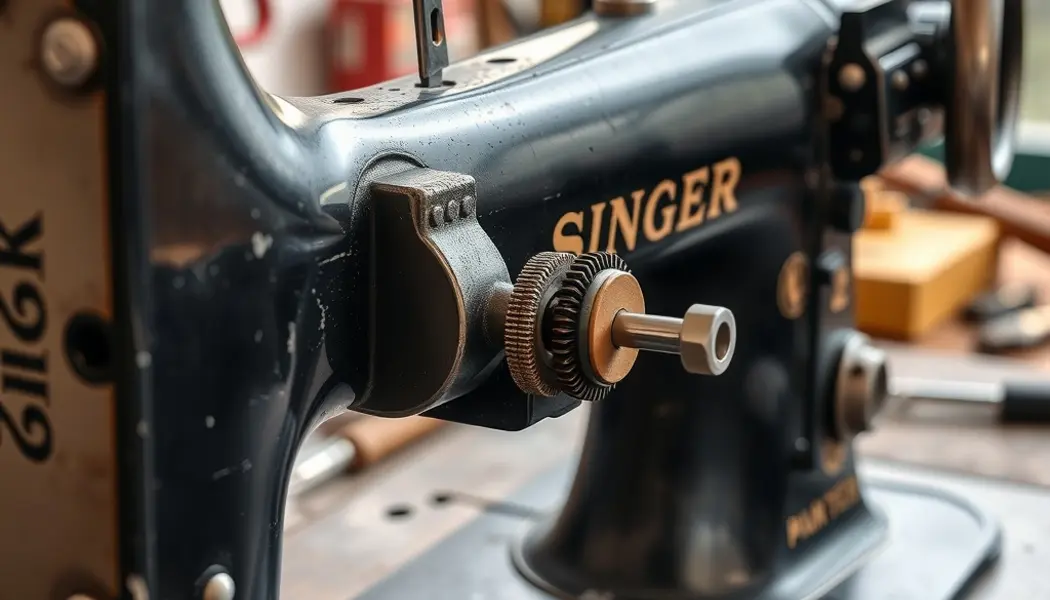
- The rubber tire — a small rubber ring around the base of the winder shaft assembly, which makes contact with the handwheel rim when the winder is engaged
- The winder arm — a pivoting arm that swings the tire into contact with the handwheel when you press the bobbin down and to the right
- The trip lever — a small spring-loaded lever that contacts the bobbin as it fills. When the bobbin thread reaches the correct fullness, it pushes the trip lever, which pivots the winder arm away from the handwheel, stopping the wind
- The pivot screw — adjusts the tension that holds the winder arm in contact with the handwheel
The operation: you drop a bobbin on the shaft, push the winder arm toward the handwheel until the rubber tire contacts the rim, and the handwheel’s rotation spins the tire, which spins the shaft, which winds thread onto the bobbin. When the bobbin is full, the trip lever releases the arm. Simple and reliable — when it’s working.
Diagnosing the Problem
The diagnostic step saves you from fixing the wrong thing. Run through this checklist before buying parts:
Bobbin doesn’t spin at all, or slips immediately: Almost always the rubber tire. Press the winder arm toward the handwheel manually and watch the contact point. If the tire looks glossy, flat, hard, or cracked — that’s your culprit. A healthy tire should be slightly soft when you press on it with a fingernail and have a slightly matte texture.
Winder wobbles noticeably when running: This is the shaft. A straight shaft produces a smooth rotation; a bent shaft wobbles visibly at the top. You’ll also sometimes feel it as a vibration in the whole arm. Confirm by removing the bobbin and watching the bare shaft rotate slowly.
Winder runs but never stops (or stops too early/too late): The trip mechanism. If it never stops, the trip lever isn’t catching the wound thread. If it stops too early, the lever engagement is too aggressive. This is the fix that requires the most tactile diagnosis.
Bobbin spins but thread winds unevenly or slips on the pin: The bobbin drive pin — the small retaining pin that engages the bobbin and drives its rotation. If this pin is worn, bent, or missing, the bobbin spins freely on the shaft rather than being driven by it.
Fix 1: Replace the Bobbin Winder Tire
This is the most common fix and the cheapest. A replacement rubber tire for a Singer 66 bobbin winder costs $3-5 from any vintage sewing machine parts supplier, or from eBay. But before you order one, try a quick rehabilitation first — sometimes the old tire just needs reconditioning rather than replacement.
Rehabilitating the old tire (try this first):
- Remove the tire from the shaft — it just slides off; on some 66s, you may need to remove a small retaining clip first
- Soak it in rubber rejuvenator (available from tire suppliers or automotive stores; Armor All Tire Foam works in a pinch) for 20-30 minutes
- Wipe dry and reinstall
- Test — if it grips and the bobbin winds, you’re done for another few years
If the tire crumbles when you try to remove it, is obviously missing chunks, or has hardened to the point where it won’t compress at all — it needs replacement. Don’t waste time on a tire that’s gone beyond recovery.
Fitting the replacement tire:
- The replacement tire should be a friction fit over the winder shaft hub
- If it’s too loose, a thin wrap of electrical tape under the tire will take up the slack
- If it’s too tight (common with replacement O-rings), soak the new tire in hot water for a few minutes to expand the rubber, then stretch it over the hub while warm
The O-ring substitute: A 5/8″ OD (outer diameter) rubber O-ring from any hardware store works as a perfect substitute for the original Singer 66 winder tire. These are typically sold in plumbing sections as faucet repair O-rings — size 014 or 015 in standard O-ring sizing. They’re made from nitrile rubber, which is actually more durable than the original natural rubber tire. Cost: under $1.
Fix 2: Straightening or Replacing the Winder Shaft
A bent winder shaft is less common than a worn tire but more structurally significant. The shaft bends when someone forces a jammed bobbin or drops something heavy on the extended winder arm.
Removing the shaft:
- Look for a circlip (also called a snap ring or E-clip) at the base of the shaft, or a small set screw depending on the year of manufacture
- Remove the circlip with circlip pliers (or carefully with two flathead screwdrivers) and the shaft pulls straight out upward
- On some early 66 models, the shaft is retained by a small pin through the arm — push this pin out with a punch
Straightening the shaft:
- Hold the shaft at both ends and roll it across a flat surface (the glass of your work surface, or a reference flat). Any bend will be immediately visible as the shaft rocks rather than rolling smoothly.
- For a slight bend: clamp the shaft in a vice at the bend point and apply gentle pressure with light hammer taps opposite the bend direction. Check frequently — you’re aiming for straight, not bent the other way.
- For a severe bend: replacement is usually easier and produces a better result. A replacement shaft can be sourced from a donor machine (Singer 66 shafts are plentiful as parts machines), from vintage sewing machine parts dealers online, or occasionally from Singer service centers that maintained parts stock.
After straightening, roll it across a flat surface again to confirm. Then reinstall and run the winder. A correctly straight shaft will run smooth with no visible wobble.
Fix 3: Repairing the Trip Mechanism
The trip mechanism is the small spring-loaded lever that disengages the winder when the bobbin is full. It’s a beautifully simple piece of engineering that works through contact with the wound thread — as the thread builds up on the bobbin, it pushes against the curved face of the trip lever, eventually pushing it far enough to trigger the release.
Problems with the trip mechanism:
Never trips (winder runs until thread tangles):
- The lever may have been bent away from the bobbin — the lever tip should sit close enough to the bobbin to make contact as the thread builds. If it’s been bumped or bent outward, it never contacts the thread. Bend it gently back toward the bobbin with needle-nose pliers.
- The lever spring may have weakened or broken — without spring tension, the lever doesn’t stay in engagement position. Check the small spring at the pivot point; replacement springs are available from Singer parts suppliers.
Trips too early (winder stops before bobbin is full):
- The lever is bent too close to the bobbin, making contact before the thread builds to the correct level
- Bend the lever tip slightly away from the bobbin — a small adjustment makes a significant difference. Test by winding a full bobbin; the winder should run until the thread reaches about 1mm below the edge of the bobbin flanges.
Trips intermittently:
- The lever pivot is dirty or corroded — clean with denatured alcohol and re-oil the pivot with a drop of sewing machine oil
- The lever is slightly loose at its pivot screw — tighten the screw one quarter turn at a time until the lever moves with appropriate resistance
If the trip lever is physically broken (snapped at the pivot or tip), replacement parts are available from Singer-specialized dealers. The part is inexpensive (usually $5-15) but requires sourcing from a supplier who stocks 66-specific parts, as the trip mechanism varies between Singer models.
Fix 4: Adjusting Winder Pressure
Even with a new tire, a winder that doesn’t make firm enough contact with the handwheel will slip or wind unevenly. The contact pressure is adjustable via the pivot screw — the main screw that holds the winder arm to the machine body.
Checking current pressure:
- Engage the winder (push the arm toward the handwheel so the tire contacts the rim)
- Try to pull the arm away from the handwheel with your finger while slowly turning the handwheel by hand
- The arm should stay engaged firmly — the spring tension should resist your pull. If the tire hops off the handwheel rim easily, pressure needs increasing.
Adjusting pressure:
- Locate the pivot screw under the winder arm — it’s the screw that passes through the arm into the machine bed, with a nut or locking mechanism underneath
- Loosen the pivot screw slightly (1/4 turn counter-clockwise)
- Bend the winder arm spring slightly — there’s usually a flat spring or coil spring at the arm pivot that provides the engagement tension. Bending this spring slightly toward the handwheel increases tension.
- Alternatively, if the arm has an adjustment slot, slide it to change the engagement angle
- Re-tighten the pivot screw and test
The correct feel: the winder should engage firmly and stay engaged during a full bobbin wind. When the trip mechanism releases, it should disengage cleanly without requiring force. If the arm is so tight it requires a hard push to release manually, you’ve gone too far — back off the tension slightly.
Reassembly and Testing
After any repair, run a complete functional test:
- Load a fresh bobbin — use a new or empty metal bobbin; test with an old bobbin first, not a project bobbin with irreplaceable thread on it
- Thread the bobbin winder correctly — thread from the upper thread path, through the bobbin winder tension disc, then wrap around the empty bobbin several times before engaging the winder. This gives the thread a starting grip.
- Engage and wind — the bobbin should spin smoothly from the moment the winder is engaged. Listen for any wobble noise or feel for vibration in the arm.
- Confirm trip function — the winder should stop automatically when the bobbin is filled to approximately 80-90% of flange height. If it doesn’t stop, the trip mechanism needs adjustment (see Fix 3 above).
- Check thread distribution — the thread should wind evenly across the bobbin width, building up in consistent layers. Uneven winding (piling up at one side) indicates the bobbin isn’t sitting straight on the shaft or the thread guide is misaligned.
A correctly operating Singer 66 bobbin winder will fill a bobbin in about 30-45 seconds and stop automatically every time. Once you’ve had it working well, you’ll recognize immediately if something changes — the sound and feel of a healthy winder is distinctive.
For more on maintaining your Singer 66 and other vintage machines, see the vintage equipment restoration guide. And if the bobbin winder repair revealed that the whole machine needs an oil and service, the guide on oiling a vintage sewing machine covers every lubrication point on the 66 and its relatives.
Frequently Asked Questions
What size O-ring fits a Singer 66 bobbin winder tire?
A standard size 014 or 015 nitrile O-ring (5/8″ outer diameter) fits most Singer 66 bobbin winder hubs. These are available at hardware stores in the plumbing section for under $1. If the fit is slightly loose, a thin wrap of electrical tape under the O-ring takes up the slack. This is a legitimate long-term fix used by many vintage sewing machine technicians, not just a temporary workaround.
My Singer 66 bobbin winder worked fine until I pressed the presser foot pedal. Why did it stop?
This is by design. On most Singer 66 machines, engaging the presser bar (putting the presser foot down) disengages the bobbin winder as a safety interlock — you shouldn’t be winding a bobbin while fabric is under the presser foot. If the winder seems to disengage when it shouldn’t, check that the presser bar is fully raised during winding.
Can I use any metal bobbin, or does it have to be a Singer 66 specific bobbin?
The Singer 66 uses a specific bobbin size — Class 66 bobbins. These have a specific diameter and flange height that the trip mechanism is calibrated for. Using a larger or smaller bobbin will cause the trip mechanism to trigger at the wrong fill level, or not at all. Class 66 bobbins are still manufactured and widely available; always use the correct class.
The winder works but the thread tension on the wound bobbin is uneven. How do I fix this?
Uneven bobbin tension is usually caused by the bobbin winder thread tension disc — the small spring-loaded disc the upper thread passes through before winding onto the bobbin. This disc should put light, consistent tension on the thread during winding. If it’s dirty, worn, or the spring is weak, the thread winds at inconsistent tension, creating a soft center with a hard outer layer (or vice versa). Clean the tension disc with a dry cloth, check the spring for weakness, and ensure the thread passes correctly through it during winding.
One thought on “Singer 66 Bobbin Winder Repair: 4 Easy Fixes Under $30”
Comments are closed.