


How to Fix Singer 99K Timing Issues: A Visual Step-by-Step Guide
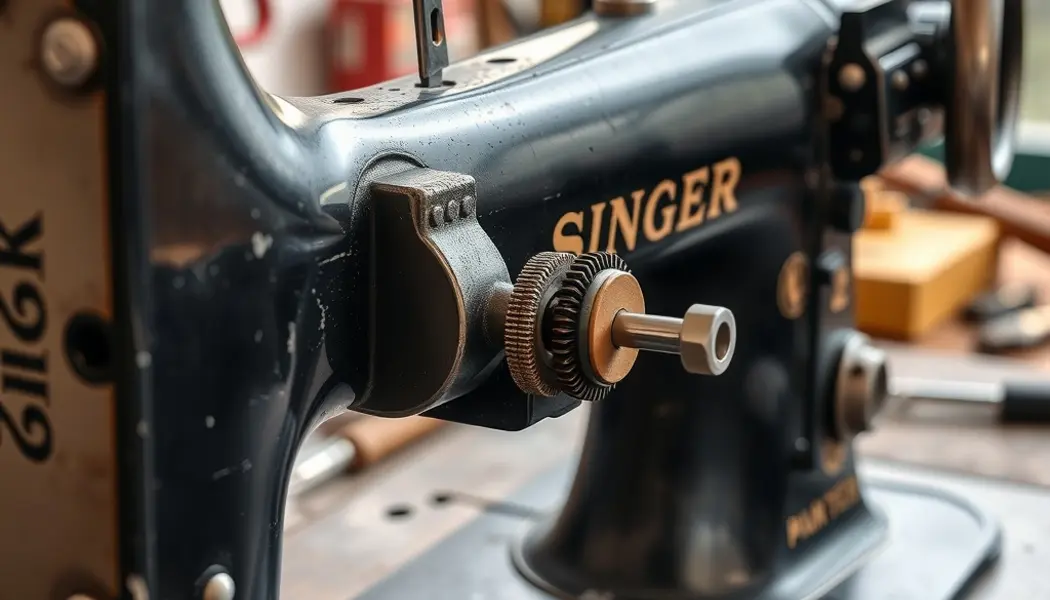
The Singer 99K has a reputation for being indestructible. It’s a 3/4-size version of the legendary Singer 66, built from the 1920s through the 1960s, and hundreds of thousands of them are still in circulation. They stitch beautifully — until they don’t. When a 99K starts skipping stitches, breaking upper thread, or producing that distinctive metallic thud on every cycle, you’re looking at a timing problem. And timing is one of those repairs that sounds intimidating until you understand what’s actually happening inside the machine.
Singer 99K timing issues mean the hook is no longer catching the thread loop at the precise moment required to form a stitch. The fix involves loosening the hook shaft gear setscrews, rotating the hook carrier to the correct position, and re-tightening — a procedure that takes about 30 minutes once you’ve done it once. This guide walks through the whole process, including how to diagnose whether timing really is the issue before you start turning anything.
How Sewing Machine Timing Works
Before touching anything, it’s worth understanding exactly what timing means in a sewing machine — because if you understand the mechanism, you’ll be able to diagnose problems and make adjustments with confidence rather than guesswork.
Here’s the sequence that produces a stitch:
- The needle descends, carrying the upper thread through the fabric
- At the lowest point, the needle starts back up
- As the needle rises approximately 2.4mm (about 3/32″) from its lowest point, a small loop of upper thread forms on the back side of the needle, just above the eye
- At that exact moment, the rotating hook point passes in front of the needle, entering that loop
- The hook carries the loop around and around the bobbin case, interlocking the upper and lower threads
- The take-up lever pulls the stitch tight
The critical number is 2.4mm of needle rise. The hook point must pass in front of the needle at precisely that moment — not 1mm earlier, not 1mm later. If the hook arrives too early, there’s no loop yet and it misses. Too late, and the loop has already collapsed back against the needle. Either way: no stitch, or a broken thread as the hook tries to catch a loop that’s already too small.
There’s a second critical measurement: the hook point should pass the centerline of the needle with a clearance of 0.04″ to 0.1mm (roughly 1.5-4 thousandths of an inch). Close enough to catch the loop reliably, but not so close that the hook contacts the needle and causes damage or noise.
Signs Your Singer 99K Timing Is Off
Timing problems are often confused with other issues, so let’s get the diagnosis right before starting any repair.
Skipped stitches are the most common symptom. The machine runs, the thread goes through, but every few stitches (or every stitch) the hook misses the loop and no interlocking happens. You end up with a straight line of thread that pulls out with no resistance — it’s not locked at all.
Upper thread breaking is the second most common timing symptom, and it’s the more alarming one. If the hook point arrives too late, the loop has already started to close and the hook catches it at the wrong angle. The thread gets grabbed and stressed rather than caught cleanly, and it snaps. This usually happens right at the needle eye or just above it.
A thudding noise on every stitch cycle — often described as a “clunk” or “knock” — indicates the hook is actually contacting the needle rather than just passing close to it. This is timing that’s off and clearance that’s too tight simultaneously. Run the machine for long in this state and you’ll nick the needle, damage the hook point, or both.
Needle hitting the shuttle or hook body is the most serious symptom. This usually means timing is significantly wrong, or the needle bar has dropped due to a loosened needle bar connection screw. The needle will be visibly bent or scored after even a few cycles.
One important check before assuming timing: confirm you’re using the correct needle. The Singer 99K takes a 206×13 or 15×1 needle (equivalent modern designation: 15x1ST). Using the wrong needle length shifts the loop formation point and can mimic timing symptoms without any actual timing issue.
Tools Needed
You don’t need specialized equipment for this repair:
- Flathead screwdrivers — medium and small; the setscrews on the hook shaft gear are slotted flathead
- A bright LED flashlight or phone torch — you’ll need good lighting inside the machine’s lower cavity
- A new needle — always do timing work with a fresh needle; bent or worn needles give false readings
- The handwheel — you’ll be turning this slowly by hand throughout the procedure; keep it accessible
- A ruler or feeler gauge — for confirming the 2.4mm needle rise measurement
- Sewing machine oil — after any disassembly, you’ll re-oil
How to Check 99K Timing
Before adjusting anything, confirm the timing is actually off. Here’s how to check:
- Remove the needle plate — two screws on the 99K; slide it out to expose the hook and bobbin area
- Remove the presser foot and raise the presser bar — gives you a clear view of the needle path
- Insert a fresh needle — make sure it’s fully seated and the flat side faces to the right on the 99K
- Slowly turn the handwheel toward you (counter-clockwise when facing the handwheel) — the needle will descend
- Watch the needle descend to its lowest point — mark this position mentally or note the handwheel position
- Continue turning very slowly — the needle starts to rise
- Stop when the hook point is exactly at the needle centerline — this is the catch moment
- Measure the needle rise — the needle eye should now be approximately 2.4mm above its lowest point
At the moment the hook point crosses the needle centerline, there should also be a visible thread loop forming on the back of the needle. If you can’t see the loop, or if the hook point is passing nowhere near the needle, timing is off.
Correct timing on the 99K also places the hook point about 2mm above the needle eye when the hook is at the catch position. If the hook is catching at the needle shank or well above the eye, the needle bar height may need adjustment independently of the hook timing.
How to Adjust Singer 99K Timing
The timing adjustment on the 99K is done by rotating the hook carrier on the hook shaft gear. Here’s the procedure:
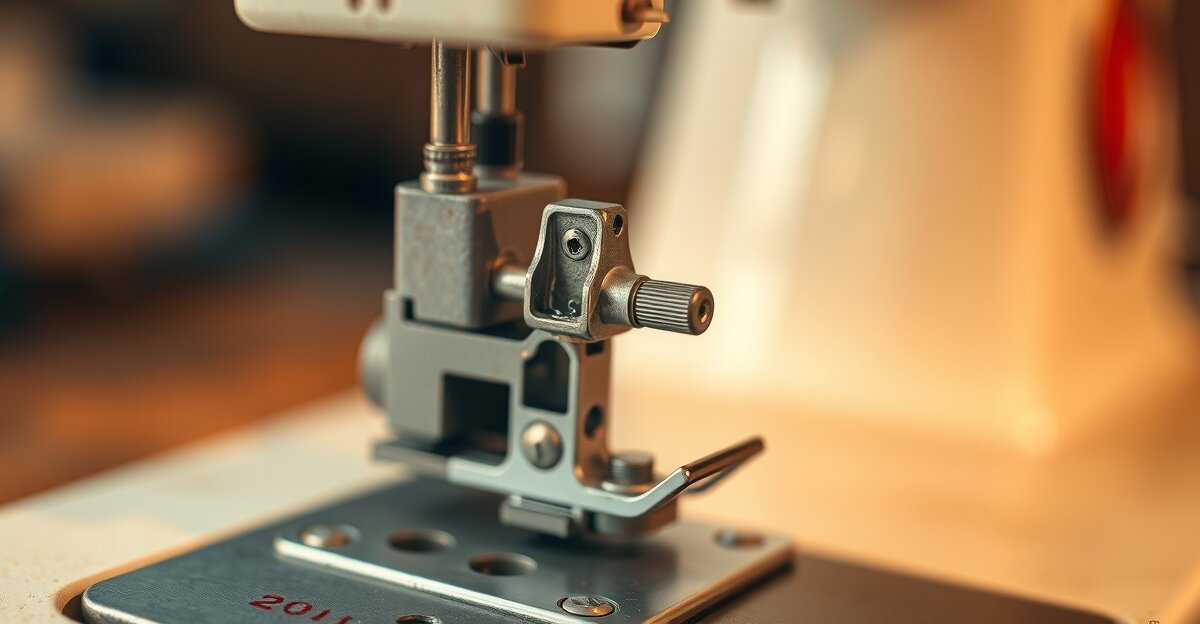
- Access the hook shaft gear — this is located under the machine bed. On the 99K, you reach it by tilting the machine back or working from below. The hook shaft gear is on the horizontal shaft that drives the hook, near the center of the bed.
- Locate the two setscrews — they’re on the hub of the gear, 180 degrees apart, and they clamp the gear to the shaft. They’re slot-head screws, typically 3mm wide. Loosen them both — you don’t need to remove them, just break them loose enough that the gear can rotate on the shaft.
- Do NOT move the handwheel while the setscrews are loose unless you need to make an adjustment. The hook and needle positions need to be set precisely.
- Position the needle at the catch point first — turn the handwheel until the needle has risen 2.4mm from its lowest point. Hold the handwheel firmly in this position.
- Rotate the hook carrier so the hook point is at the needle centerline, just above the needle eye, with the hook moving from right to left (the direction of travel on a 99K rotary hook)
- Check the clearance — the hook point should be 0.04 to 0.1mm from the needle, not touching it
- Hold everything firmly in position and tighten both setscrews — do one, check position hasn’t shifted, do the other
- Turn the handwheel through several full rotations by hand and watch the hook-needle relationship through the full cycle
The most common error here is letting the hook carrier rotate slightly when tightening the setscrews. The pressure of tightening can shift the position a fraction of a millimeter. To compensate: set the hook slightly past where you think it should be, accounting for the rotation that tightening will introduce. It takes a few attempts to calibrate your feel for this.
Setting the Hook-to-Needle Clearance
Timing and clearance are two separate adjustments, though they interact. Timing is about when the hook catches the loop. Clearance is about how close the hook passes to the needle.
The specification is 0.04″ to 0.1mm gap — close enough to reliably enter the thread loop, far enough to not nick the needle. On the 99K, the clearance is primarily controlled by needle bar height. If the clearance is correct at one needle position but wrong at another, the needle bar height needs adjustment.
To adjust needle bar height on the 99K:
- Loosen the needle bar connection screw — this is the screw that connects the needle bar to the needle bar fork; it’s accessible through the face plate after removing the face plate screws
- Slide the needle bar up or down as needed
- Re-tighten and recheck timing (adjusting needle bar height changes the timing point, so you may need to redo the timing adjustment)
The interaction between needle bar height and hook timing is why it’s important to do them in the right order: set needle bar height first, then set hook timing.
Reassembly and Testing
Once timing is set:
- Replace the needle plate and secure both screws
- Oil the hook race — this area gets disturbed during timing work; one drop into the hook race
- Thread the machine with a mid-weight thread (40-weight polyester or 50-weight cotton)
- Set a standard stitch length (2.5mm)
- Sew slowly through several layers of scrap fabric, watching for skipped stitches
- Increase speed gradually
- Test with different fabrics — thin cotton, medium denim
A correctly timed 99K should stitch flawlessly at any speed, through most fabric weights. If you still get occasional skipped stitches, check needle size (use the correct size for the fabric weight), check that the needle is fully inserted, and verify the bobbin case is seated correctly.
When to Take It to a Tech
Most timing issues on the 99K are straightforward. But some problems require more than a timing adjustment:
- Bent needle bar — if the needle bar is bent, timing will be correct at one point of rotation but wrong at others. The needle will swing slightly in its path rather than going straight down. A bent needle bar needs replacement, not adjustment.
- Damaged hook point — the hook point should be smooth and sharp. If it’s chipped, bent, or has a burr, it won’t catch thread loops reliably regardless of timing. Hooks for the 99K are available from Singer parts dealers and vintage sewing machine suppliers.
- Stripped setscrews or gear hub — if the setscrews won’t hold, or if the gear hub is worn to the point where the gear can rotate even when the screws are tight, the gear needs replacement.
- Worn hook race — if the hook wobbles in its race rather than running smoothly, the race is worn. This affects timing consistency and can’t be adjusted away.
For a broader view of maintaining vintage Singer machines, check out the vintage equipment restoration guide. And if your 99K is running but needs a full service, the guide on how to oil a vintage sewing machine covers proper lubrication technique for the 99 and its relatives.
Frequently Asked Questions
How do I know if it’s a timing issue or a needle issue?
Try a fresh needle first — always. A bent or dull needle can mimic timing symptoms because the loop doesn’t form correctly. If a new needle doesn’t solve skipped stitches, and you’ve confirmed correct needle type (206×13 or 15×1 for the 99K), then timing is the likely culprit. The definitive test: watch the hook catch point with the needle plate removed. If you can see the hook passing nowhere near the needle eye, it’s timing.
Can I time a sewing machine without a timing light?
Yes — a bright flashlight and your naked eye is sufficient for the 99K. A timing light is a convenience, not a requirement. The key measurements are the 2.4mm needle rise and the hook-to-needle gap, both of which can be checked visually with good lighting.
After adjusting timing, my machine runs but still skips on thick fabric. Why?
Thick fabrics push the needle sideways slightly as it enters, changing the angle of loop formation. Check that your needle is a heavy-enough size for the fabric (use a 16 or 18 needle for denim), that the presser foot pressure is adequate, and that the feed dogs are engaging properly.
My 99K was working fine and suddenly started skipping. What changed?
Sudden onset skipping without any other change usually means the hook shaft gear setscrews have worked loose — this is more common than you’d think, especially if the machine has been vibrated in transport or run hard. Check the setscrews first before assuming anything else is wrong. Also check that the needle hasn’t worked down slightly in the clamp.
4 thoughts on “How to Fix Singer 99K Timing Issues: A Visual Step-by-Step Guide”
Comments are closed.