


Remove Canon AE-1 Battery Corrosion: DIY Repair Guide
The Canon AE-1 is the best-selling 35mm SLR camera of all time. Canon sold over a million of them in the first two years after the 1976 launch, and production continued through 1984. Forty-plus years later, they’re everywhere — in thrift stores, estate sales, attic boxes, and on eBay listings marked “untested.” And the single most common reason an “untested” AE-1 doesn’t work is battery corrosion. Not age, not mechanical failure, not shutter damage. A leaked battery sitting in the chamber for decades, turning the contact strip into a crust of white-blue alkaline residue.
Removing Canon AE-1 battery corrosion requires cleaning the battery chamber contacts with white vinegar to neutralize the alkaline residue, followed by isopropyl alcohol and a pencil eraser to restore conductivity. Most cameras respond completely to a 30-minute cleaning with no parts replacement required. This guide covers the full procedure, including what to do if the contacts are pitted or broken beyond cleaning.
Identifying Battery Corrosion in the Canon AE-1
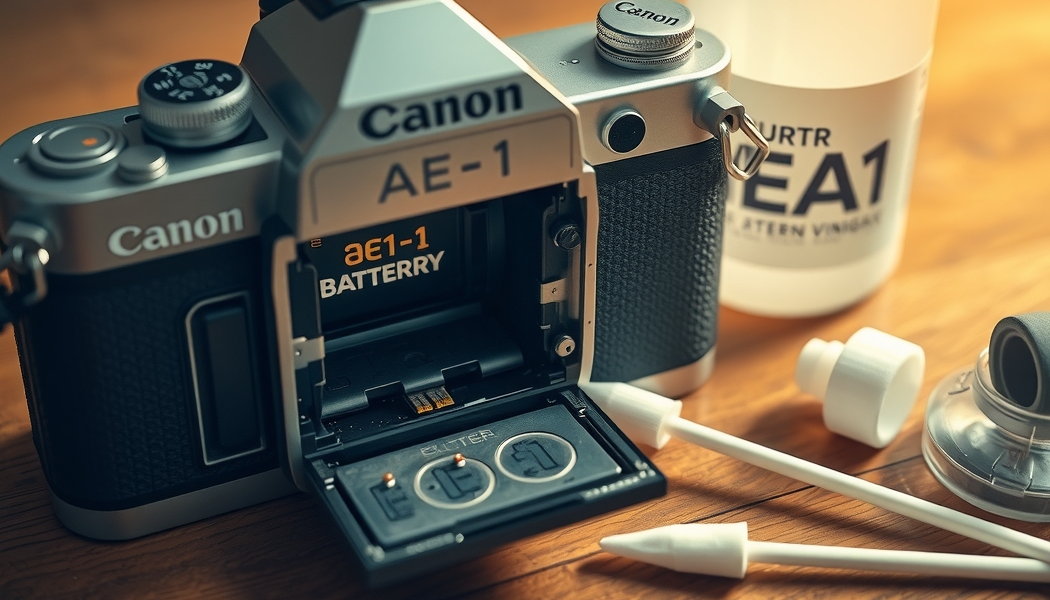
The battery chamber is on the bottom of the AE-1, accessed via the battery cover — a circular cap on the front-right side of the base plate (when holding the camera normally). Unscrew it and look inside.
Battery corrosion looks like:
- White or blue-white crusty deposits — the classic potassium hydroxide residue from leaked alkaline batteries. It looks like dried white paste or powder, sometimes with a light blue tint from copper corrosion on the contacts.
- Rust-colored residue — if the corrosion has been sitting for a very long time, iron from the contact spring may have rusted and mixed with the alkaline residue, producing an orange-brown crust
- Dark brown or black discoloration — heavy oxidation of the copper contact surfaces
Functional symptoms of battery corrosion:
- Camera won’t turn on at all — the most common presentation
- Shutter fires inconsistently (sometimes works, sometimes doesn’t) — partial conductivity through a contaminated contact
- Light meter is erratic or reads high/low — corroded contacts have variable resistance, which throws off the meter circuit
- Shutter fires but not at the selected speed — the AE-1’s electronic speed control depends on clean battery power; voltage drop from dirty contacts causes speed errors
Don’t assume corrosion is the only problem if the camera has other known issues, but if it looks corroded, always clean the contacts before drawing any other conclusion. You’d be surprised how many “broken” AE-1s need nothing more than clean contacts.
Tools and Materials
All of this is available at a pharmacy or hardware store for under $15 total:
- White vinegar — the mild acetic acid neutralizes the alkaline potassium hydroxide residue
- Isopropyl alcohol, 90% or higher — for cleaning and rinsing; lower concentrations contain too much water
- Cotton swabs (Q-tips) — for applying vinegar and IPA, and for scrubbing
- Pencil eraser — the white vinyl erasers (Staedtler Mars or similar) work best; used for polishing contact surfaces to bare metal
- Small flathead screwdriver — JIS #1 screwdriver if you have one; the base plate screws on a Canon AE-1 are JIS (Japanese Industrial Standard), not Phillips, and a standard Phillips can slip and damage the head
- Contact cleaner spray — DeoxIT D5 or equivalent; the final step to protect restored contacts
- Nitrile gloves — not optional; alkaline corrosion is caustic potassium hydroxide and will irritate skin
- A magnifying glass or loupe — for inspecting contact surfaces before and after
Safety First
The white powder in that battery chamber is potassium hydroxide (KOH) — the same compound used in drain cleaners and soap making. It’s caustic. In dried form, it’s less aggressive than in solution, but it’s still worth treating with respect.
- Wear nitrile gloves throughout this procedure — especially while handling the initial loose residue
- Don’t rub your eyes — if you get residue on your fingers, wash hands before touching your face
- Work in a ventilated space — when you apply vinegar to the alkaline residue, there’s a mild reaction that releases a small amount of CO2 and acetic acid vapor. It’s not dangerous in open air, but don’t do this in a closet.
- Keep the residue contained — do this over a sheet of paper you can fold up and discard, so loose powder doesn’t spread across your workspace
Accessing the Battery Chamber
The basic clean can be done with the battery chamber cover removed — no further disassembly needed in most cases. However, if the corrosion is severe enough that it has spread to the contact strip that runs from the battery chamber through the base plate to the main board, you’ll need to remove the base plate for a thorough clean.
To remove the AE-1 base plate:
- Make sure no film is loaded
- Open the film door and locate the two screws on the base of the camera body — there are three screws total on the base plate: one at the tripod socket (don’t remove this one; it’s the strap lug screw), and two standard base plate screws
- Use a JIS #1 screwdriver (critical — a Phillips will cam out and damage these screw heads). If you don’t have a JIS driver, apply firm downward pressure while turning and stop if the driver slips.
- Slide the base plate slightly toward the film door end, then lift off — it has a small tab that engages with the body
- The battery chamber and its contact strip are now fully exposed
Cleaning the Contacts Step-by-Step
Work methodically and don’t rush. This is where most of the repair success comes from.
- Remove loose residue first — use a dry cotton swab to brush away any loose white powder from the chamber walls and contact surfaces. Don’t apply any liquid yet — wet liquid on loose powder turns it into paste and can push it deeper into the mechanism.
- Apply white vinegar — dip a fresh swab in white vinegar and apply it to the corroded contact surfaces. You should see a very slight fizzing or bubbling where the vinegar contacts the alkaline residue — this is the neutralization reaction working. Let it sit for 2 minutes.
- Scrub gently — use the vinegar-dampened swab to scrub the contact surfaces with light circular motion. The softened residue should start coming off on the swab. Use multiple fresh swabs until they come out clean.
- Rinse with IPA — follow up with isopropyl alcohol (90%+) on a clean swab. This removes vinegar residue and dissolves any remaining contamination. The IPA also dries quickly and won’t leave water residue in tight spaces.
- Dry completely — let the chamber air dry for 10-15 minutes, or accelerate with a hair dryer on low heat from 6 inches away
- Polish with pencil eraser — this is the step most guides skip, and it makes a real difference. Use the flat face of a white vinyl eraser on each contact surface. Scrub vigorously — you’re removing the last layer of oxidation to get down to bare, conductive metal. Blow out any eraser debris with compressed air or a puff from your mouth.
- Apply contact cleaner — a quick spray of DeoxIT D5 or similar contact cleaner on each contact surface. This cleans any remaining contamination and leaves a thin protective film that slows re-oxidation. Let it dry for 5 minutes.
What if the Contacts Are Pitted or Broken?
Occasionally the corrosion is severe enough that the contact surfaces are eaten through — pitted, deeply corroded, or the spring contact is broken. Cleaning won’t restore conductivity in these cases; the contact needs replacement.
The Canon AE-1 battery contact strip (including the spring contact at the bottom of the battery chamber) is a known service part and is available on eBay and from camera parts suppliers for $5-10. The part varies slightly between the AE-1 and AE-1 Program, so confirm which model you have.
Replacement requires basic soldering skills — the contact strip is soldered to the main circuit board at one end. If you’re comfortable with a soldering iron:
- Heat the existing solder joint and lift the old strip free
- Clean the solder pad on the board
- Position the new strip in the same orientation
- Tack solder one end, confirm position, then solder the other point
- Use minimal solder — too much can bridge adjacent traces on these compact boards
Correct Battery for the Canon AE-1
This is worth addressing because getting the battery wrong is a common source of ongoing problems even after a successful corrosion repair.
The Canon AE-1 was designed for a 6V PX28 mercury battery — the same type used in many cameras of the era. Mercury batteries were banned in most countries in the 1990s and are no longer available.
The replacement options:
- 4LR44 alkaline 6V — the most common replacement; widely available, inexpensive. The voltage is nominally correct but alkaline cells discharge in a curve (starting higher than 6V and dropping), which can cause metering inaccuracies. For shooting with Auto exposure mode, you’ll notice the meter tends to overexpose slightly as the battery ages.
- Wein Cell MRB625 zinc-air — the most accurate replacement. Zinc-air cells maintain a very flat discharge curve close to the original 1.35V mercury voltage. They’re available from camera supply shops and give the most accurate metering on Auto. Drawback: zinc-air batteries start depleting when the tab is removed to activate them, whether you use the camera or not — typically 3-4 months of life regardless of use.
- 4SR44 silver oxide 6V — longer life than alkaline, flatter discharge curve than alkaline. A good middle ground between the 4LR44 and Wein Cell.
For casual film shooting, the 4LR44 is fine. For precise exposure work or shooting slide film (where exposure latitude is narrow), the Wein Cell or 4SR44 gives better metering accuracy.
Preventing Future Corrosion
The most effective prevention measure is the simplest: remove the battery when storing the camera. Any battery, including lithium types, can leak given enough time. A camera stored without a battery can sit for 20 years with a clean battery chamber. A camera stored with a battery in place is always at risk.
Additional steps:
- Use lithium batteries where possible — lithium chemistry is far less prone to leaking than alkaline. The AE-1 doesn’t have a lithium 6V equivalent that fits perfectly, but if you use any device that takes AA batteries, always prefer lithium for stored devices.
- Annual inspection — if you keep a battery in the camera, check the chamber every year. Early-stage corrosion that’s caught while still powdery and confined to the chamber is a 15-minute clean. Late-stage corrosion that’s had years to work into the contacts is a potentially terminal situation.
- Store in a dry environment — humidity accelerates battery corrosion. A sealed container with a silica gel desiccant pack is ideal for long-term storage.
After Repair: Testing the AE-1
Once the contacts are clean and a fresh battery is installed, run through a systematic test before loading film:
- Check that the camera turns on — press the shutter button halfway; the meter needle in the viewfinder should swing and stabilize. If it doesn’t move at all, there’s still a connection problem.
- Fire the shutter at all speeds — set the mode to manual, set ISO on the ASA dial, and fire at B (bulb), 1 second, 1/2, 1/4, 1/8, 1/15, 1/30, 1/60, 1/125, 1/250, 1/500, 1/1000. Each should sound distinctly different. The 1-second exposure should hold the shutter open for a full second.
- Check the self-timer — set it and fire; should run for approximately 10 seconds
- Check the meter reading — in a known lighting condition, compare the AE-1’s meter reading to a known-accurate source (your phone’s camera, another meter). The readings should be close.
- Run a test roll — shoot a roll of inexpensive color negative film (Kodak ColorPlus or Fujifilm 200) in a variety of lighting conditions. Color negative film has enough exposure latitude to show you if the meter is working correctly even if it’s slightly off.
For more on keeping vintage cameras functional, the vintage equipment restoration guide covers the broader picture. And if you’re dealing with another common AE-1 issue, the guide on removing fungus from a camera lens is a natural companion repair.
Frequently Asked Questions
Can I use distilled water instead of vinegar to clean battery corrosion?
Water alone doesn’t neutralize the alkaline potassium hydroxide — it just spreads it around. The mild acid in white vinegar (acetic acid) is what actually reacts with and neutralizes the KOH residue, converting it into a water-soluble salt that wipes off cleanly. Use white vinegar, not water. After the vinegar treatment, rinse with IPA (not water) to avoid introducing moisture into the camera body.
My AE-1 was working and I replaced the battery. Now it doesn’t work. What happened?
Almost certainly the battery polarity. The AE-1’s battery chamber has a specific orientation — positive terminal toward the lens. The 4LR44 batteries commonly sold as replacements have an obvious positive terminal button on one end. Make sure this faces the correct direction. Also confirm the battery type is correct (6V, not 1.5V or 3V).
How do I know if the corrosion has damaged the AE-1’s circuit board?
If the camera still doesn’t function after a thorough contact cleaning and a confirmed-good battery, board damage is possible. The most common failure is trace corrosion where the battery contact strip connects to the board. Inspect this junction with a magnifying glass — you’re looking for green or white corrosion on the PCB traces around the battery contact. Light corrosion on PCB traces can sometimes be cleaned with IPA and a soft toothbrush. Broken traces require bridging with conductive epoxy or soldering, which is advanced repair work.
Is the Canon AE-1 worth repairing?
Absolutely — a working AE-1 in good condition sells for $80-150 on the used market, and a non-working one for $30-50. If the only issue is battery corrosion, you’re looking at a 30-minute repair and $5 in supplies to potentially double the camera’s value. Even setting aside the monetary angle, the AE-1 is a genuinely excellent camera that produces beautiful results on film. A few minutes of cleaning work to bring it back to life is almost always worth it.
3 thoughts on “Remove Canon AE-1 Battery Corrosion: DIY Repair Guide”
Comments are closed.