


How to Clean Chainsaw Spark Plugs: Step-by-Step Guide
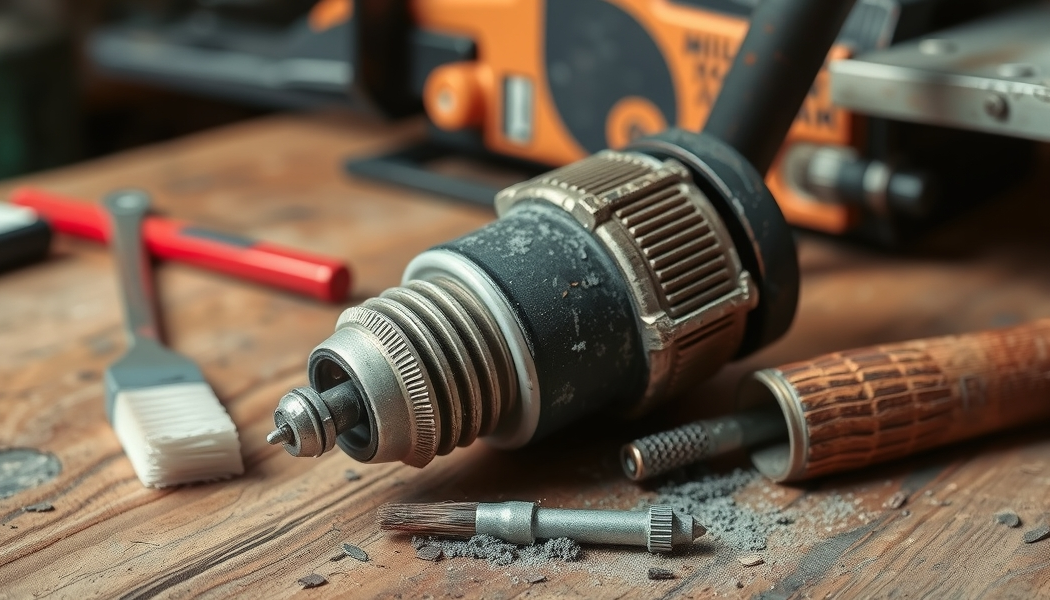
Tools You’ll Need
You don’t need a full workshop for this job. Gather these before you start:- Spark plug wrench — Most Stihl and Husqvarna chainsaws use a 5/8″ (16mm) plug socket. The Echo CS-400 and CS-590 use a 5/8″ as well. Check your manual if you’re unsure — using the wrong size risks rounding the plug hex.
- Wire brush — A small brass-bristle brush is ideal. Steel works, but be gentler; steel bristles can leave conductive debris on the ceramic that causes misfires.
- Compressed air — A can of compressed air or an air compressor. Critical for blowing carbon dust out of crevices after brushing.
- Feeler gauge / spark plug gap tool — The coin-style gap gauge (about $3 at any auto parts store) works fine. A set of feeler gauges gives you more precision.
- Penetrating oil — PB Blaster or Kroil, not WD-40. If the plug is seized from heat, penetrating oil prevents you from snapping the plug off in the head — an expensive mistake.
- Parts cleaner or brake cleaner spray — For oil-fouled plugs.
- Safety gloves — Engine components have sharp edges and may be hot if you just ran it.
- Clean rag or paper towels
How to Remove a Chainsaw Spark Plug
Step 1 — Let the engine cool completely. If you ran the saw recently, wait at least 30 minutes. Hot metal expands; removing a plug from a hot engine increases the risk of cross-threading and can cause the aluminum threads in the head to gall. Patience here saves a $200+ repair. Step 2 — Clean around the plug well. Use compressed air to blow sawdust, bar oil residue, and debris away from the plug boot and the area around the plug. Any grit that falls into the cylinder once the plug is out can score the piston. This step gets skipped constantly and it shouldn’t be. Step 3 — Remove the plug boot. Grasp the rubber boot (not the wire) and pull straight out. Wiggle gently if it’s stuck. Some vintage Husqvarna models from the 1980s — the 61, 181SE — have tight boots that need a slight twist while pulling. Don’t yank the ignition wire. Step 4 — Apply penetrating oil if needed. On any saw that’s been stored for a season or more, spray a small amount of PB Blaster around the base of the plug and wait 5 minutes before trying to loosen it. This is especially important on older Stihl 031 and 041 models where plugs can seize into the aluminum head. Step 5 — Loosen with the plug wrench. Turn counter-clockwise. Apply firm, steady pressure — don’t jerk. If it feels extremely tight, stop and add more penetrating oil rather than forcing it. A snapped plug body means drilling out the remnant, which is a whole different project. Step 6 — Remove by hand. Once loose, spin it out by hand. Catch it — don’t let it drop and crack the ceramic. Common plug sizes: 5/8″ (16mm) fits most Stihl (017, 018, 025, 026, 036, 044, 046, 064) and most Husqvarna (50, 51, 55, 61, 141, 240, 340, 350). The Echo CS-310 and CS-400 series also use 5/8″. A few older Homelite models use 3/4″ — always check if uncertain.Reading Your Spark Plug
Before you clean anything, look at what the plug is telling you. The color and texture of deposits are a direct window into engine health. Tan or light gray — Healthy. This is what you want. The electrode tip and ceramic insulator should be a light tan to gray color with minimal buildup. The saw is running on the right fuel-oil mix and the carb is properly tuned. Clean the plug, reset the gap, reinstall. Black and sooty (dry carbon) — Running rich. The fuel-to-air mixture has too much fuel. Common causes: choke partially engaged, air filter clogged, carb high-speed needle turned too rich. A black, fluffy carbon deposit is easier to clean than an oily one. The carb likely needs tuning after you sort the plug. Black and wet (oily) — Oil fouling. Two possibilities: the fuel-oil premix ratio is too rich in oil (some people think more oil = more protection; 50:1 is correct for most modern Stihl and Husqvarna saws, not 25:1), or you have worn piston rings allowing crankcase oil to enter the combustion chamber. If it’s ring wear, cleaning the plug is a band-aid — you’ll be pulling the plug again in a few hours. If the saw is older and high-hours, do a compression test before investing more time. White or light gray/chalky — Running lean or overheating. Not enough fuel, too much air, or the saw has been running without adequate cooling. Could be a partially blocked fuel line, air leak at the carb gasket, or a cracked fuel line introducing false air. White deposits on the ceramic are a warning — a lean-running two-stroke overheats fast and pistons can seize. Address the fuel system before relying on a clean plug. Eroded or melted electrode tip — Pre-ignition or detonation. If the center electrode looks rounded, pitted, or melted, the saw has been running extremely hot. Wrong octane fuel, air leaks, timing issues. Replace the plug and investigate root cause.How to Clean Chainsaw Spark Plugs Step-by-Step
The cleaning method depends on what type of fouling you found.Method 1: Dry Carbon Fouling (Black, Sooty Deposits)
This is the easier case. Step 1 — Hold the plug with the electrode end facing down and use the wire brush to scrub the electrode, ground strap, and insulator tip. Work in short strokes. You’ll see black powder fall away. Step 2 — Blow out the debris with compressed air. Get the air into the gap between the center electrode and the ground strap, and around the base of the ceramic insulator. Carbon dust trapped in the gap will cause misfires even after cleaning. Step 3 — Inspect with good light (a loupe helps). The ceramic insulator around the center electrode should be free of carbon tracks — black lines running along the ceramic indicate the plug is arcing incorrectly and needs replacement regardless of how clean you get it. Step 4 — Lightly sand the electrode tip with 400-grit sandpaper if there’s a baked-on carbon crust the brush won’t remove. Don’t overdo it — you’re not trying to make it shiny, just removing the insulating carbon layer. Step 5 — Blow clean again with compressed air. Check that no grit or wire bristles remain on the electrode.Method 2: Oil Fouling (Wet, Oily Deposits)
Oil-fouled plugs need solvent to cut through the residue. Step 1 — Spray the plug electrode end generously with brake cleaner or parts cleaner. Let it soak for 10 minutes. The solvent breaks down the oil film that’s bonding the carbon to the metal. Step 2 — Use the wire brush to scrub while the plug is still damp with cleaner. The combination of solvent and mechanical action cuts through even stubborn oil fouling. Step 3 — Rinse with another spray of cleaner and blow dry with compressed air. Make sure the plug is completely dry before reinstalling — any residual solvent can cause a misfire on the first start. Step 4 — Inspect the ceramic insulator. Oil fouling often leaves a glazed, shiny coat on the ceramic. A glazed insulator can still misfire even when it looks clean. If the ceramic looks glass-like rather than matte, replace the plug.Setting the Correct Gap
Getting the gap right is as important as getting the plug clean. Too tight and the spark is weak; too wide and it may not spark at all under compression. Correct gap for most chainsaws: 0.020″–0.025″ (0.5–0.6mm). Specific common models:- Stihl 025, 026, 036, 044: 0.020″ (0.5mm)
- Stihl MS 250, MS 361, MS 460: 0.020″ (0.5mm)
- Husqvarna 50, 55, 61, 240, 340, 350: 0.020″ (0.5mm)
- Echo CS-400, CS-590: 0.025″ (0.6mm)
- Homelite XL, Super XL: 0.025″ (0.6mm)
- Gap too large (worn or over-bent): Use the gap adjustment tool or gently press the ground strap (the bent metal arm) toward the center electrode on a hard surface. Small movements only — the ceramic can crack if you push the wrong part.
- Gap too small: Use the hook end of the gap tool to gently lift the ground strap away from the center electrode.
When to Replace Instead of Clean
Cleaning works, but not always. Know when a new plug is the right call: Cracked ceramic insulator. Any crack in the white ceramic insulator means replacement. A cracked insulator can’t maintain a reliable spark path and may arc internally, causing misfires or no-spark conditions. Run your fingernail around the insulator — even a hairline crack you can feel but not see is a problem. Worn or rounded electrode tip. The center electrode should have a relatively sharp, defined edge. When it’s rounded or domed from erosion, the ignition voltage required to fire increases, the ECM (on newer saws) or magneto works harder, and reliability drops. Replacement plugs for most vintage chainsaws cost $3–6. It’s not worth fighting a worn electrode. Gap too wide to adjust correctly. If the gap is so worn (>0.035″) that closing it would require bending the ground strap excessively, the electrode material has eroded away. No amount of closing the gap restores what’s gone. Corroded threads. If the plug threads show significant rust or corrosion, or came out with resistance suggesting corrosion in the head threads, replacement is safer. A corroded plug can strip threads when reinstalled. Carbon tracks on the ceramic. As mentioned — visible carbon tracking (black lines running down the ceramic toward the shell) indicates the plug is arcing along the surface. This doesn’t clean off. The 25-hour rule. On a saw you use regularly, just replace it annually. A new plug for a Stihl 036 costs about $4. The diagnostic time you’ll spend trying to figure out if the cleaned plug is still borderline isn’t worth $4. For a deep-dive on restoring vintage equipment beyond just spark plugs, our vintage equipment restoration guide covers the full process from cleaning to storage.Reinstalling and Testing
Step 1 — Thread in by hand. Start the plug in the hole by hand — finger-tight. This is non-negotiable. Cross-threading a spark plug into an aluminum head is the kind of mistake that turns a $4 repair into a $150+ helicoil job. If it doesn’t thread smoothly by hand, stop and check the plug angle. Step 2 — Anti-seize (optional but recommended for storage). A thin coat of copper anti-seize on the plug threads helps enormously with future removal, especially for a saw you winterize and store. Don’t use too much — a smear on the first two threads is enough. Excess anti-seize can foul the plug. Step 3 — Torque. Once finger-tight, turn with the wrench an additional 1/4 turn (90 degrees) for a used plug with a copper gasket. New plugs with a fresh crush washer get 1/2 turn. Don’t overtighten — you’re threading into aluminum. Step 4 — Reconnect the boot. Push the boot firmly onto the plug until it clicks or seats fully. A loose boot causes intermittent spark — you’ll think the problem isn’t fixed when it actually is. Step 5 — Test start. With the chain brake engaged and the saw on the ground, attempt a cold start using normal procedure (choke on, prime, pull). A freshly cleaned and gapped plug should fire within 3–5 pulls on a healthy engine. If it fires but runs rough, the carburetor likely needs attention — a clean plug doesn’t fix a dirty carb.How Often Should You Clean Chainsaw Spark Plugs?
General rule: inspect and clean every 25 hours of operation, or once per season for light users. For context, 25 hours is roughly equivalent to:- A homeowner cutting firewood for one full season (average: 15–30 cords)
- About 3–4 full days of active use with the saw
- Or anytime the saw has been in storage for more than 3 months
Frequently Asked Questions
Can I clean a chainsaw spark plug with sandpaper?
Yes, 400-grit sandpaper works for removing baked-on carbon from the electrode tip, but use it sparingly. You’re removing insulating carbon, not polishing metal. Sand just enough to clean the tip, then blow out all grit with compressed air. Avoid sanding the ceramic insulator — abrasive particles embedded in the ceramic can cause misfires.
What happens if the spark plug gap is too large on a chainsaw?
A gap that’s too large requires higher voltage to jump, which may exceed what the magneto can produce reliably — especially under compression. The result is intermittent spark, hard starting, and rough running at high RPM. Most chainsaw magnetos are designed for a 0.020″–0.025″ gap; exceeding 0.030″ will noticeably affect performance.
Can I use automotive spark plug cleaner on a chainsaw plug?
The abrasive blast-type plug cleaners (sandblast style) used in shops aren’t recommended for small engine plugs — the abrasive can embed in the ceramic and cause conductivity issues. Brake cleaner spray plus a wire brush is the correct method for chainsaw plugs. It’s gentler and just as effective for the fouling you’ll encounter.
My chainsaw starts but dies after 30 seconds — is it the spark plug?
Possibly, but a plug that fires well enough to start but then causes stalling is more likely a carburetor issue — typically a blocked high-speed jet or a deteriorating inlet needle. Pull the plug and check for oil fouling, which would point toward a rich-running carb. If the plug looks healthy, the carburetor is the more probable culprit and needs cleaning or a rebuild kit.
2 thoughts on “How to Clean Chainsaw Spark Plugs: Step-by-Step Guide”