


Vintage MTD Lawn Mower Won’t Start: The Complete Fuel System & Spark Fix Guide
Quick Diagnosis: The 5 Most Common Causes
Before pulling anything apart, narrow it down. Here are the five reasons vintage MTD mowers refuse to start, in order of frequency: 1. Stale fuel. Gasoline sitting in a tank for more than 30 days starts to oxidize. The lighter volatile compounds evaporate, leaving behind a thickened, varnish-like residue. In a carburetor with tiny fuel passages, even a small deposit blocks fuel flow completely. This is the #1 cause of no-start conditions on mowers that have been stored for winter. 2. Clogged carburetor. Related to the above — stale fuel deposits clog the main jet, idle circuit, or float needle seat. The mower might start with a shot of starting fluid (which bypasses the carb temporarily) but dies the moment the starting fluid burns off. That’s a dead giveaway. 3. Bad spark plug. A fouled, gapped-out, or simply worn plug won’t fire reliably. On a 20-year-old mower, there’s a reasonable chance the plug hasn’t been changed in years. A $3 fix that gets skipped constantly. 4. Blocked air filter. A filter packed with dust and grass clippings starves the engine of air, creating an over-rich mixture that won’t ignite properly. Easy to overlook because it doesn’t look like a fuel or ignition issue. 5. Cracked primer bulb. The small rubber primer bulb that you press before starting pumps fuel into the carb. A cracked or hardened bulb either can’t create suction or draws air instead of fuel. Press it — it should feel firm and springy. If it’s collapsed, hard, or cracked, you’re not priming anything. Work through these in order. Most MTD no-start issues end at step 2 or 3.Step 1 — Check the Spark Plug
The plug is the fastest check, so do it first. Locate and remove the plug. The plug is on the side of the engine block, accessible with a standard spark plug socket (most Briggs & Stratton small engines use a 5/8″ socket). Pull the rubber boot off first — grab the boot itself, not the wire — then unscrew counter-clockwise. What to look for:- Tan or gray: Plug is fine, probably not your problem. Clean it, reset gap, reinstall.
- Black and sooty: Rich mixture or too many failed start attempts (flooding). Clean with a wire brush and brake cleaner.
- Oily: Ring wear or over-oiled air filter. Clean the plug but investigate further.
- White or chalky: Running lean — possible air leak or blocked fuel delivery.
- Corroded, cracked ceramic, or rounded electrode: Replace it. Don’t try to clean a dead plug.
Step 2 — Inspect and Clean the Air Filter
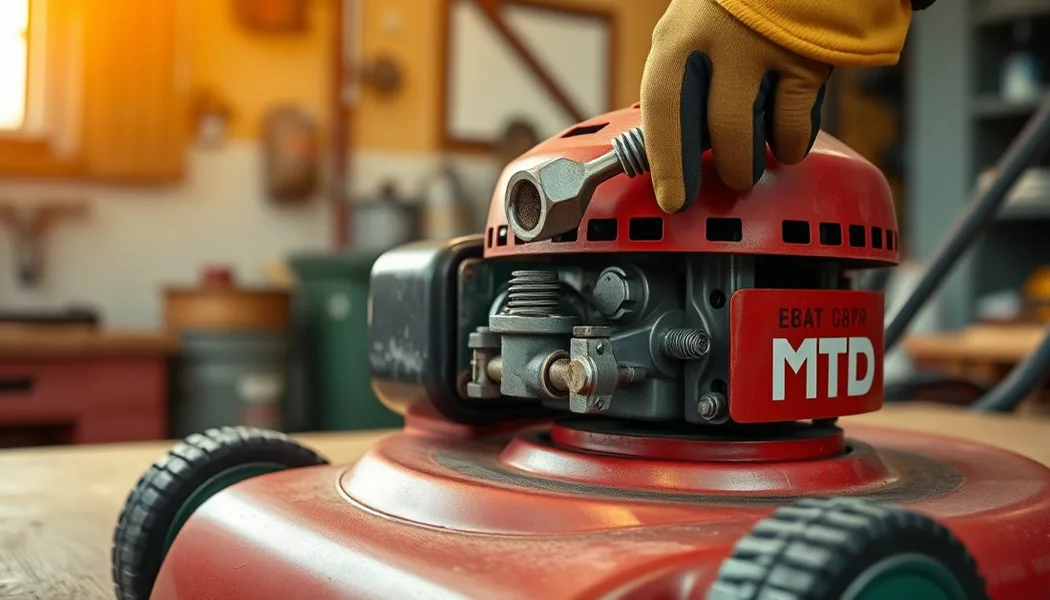
A clogged air filter is the second most overlooked cause of hard starting. It takes 3 minutes to check. Find the air filter housing. On most Briggs & Stratton-equipped MTD mowers, it’s a rectangular or round plastic housing secured by one or two screws or a snap tab, on the side of the carburetor. Foam filters (most common on this era): Remove and inspect. A foam filter should be slightly oil-dampened and light tan to orange in color. If it’s black with grime, compacted with grass, or dry and brittle, it needs servicing. To clean: Wash in warm water with a few drops of dish soap. Squeeze — don’t wring, which tears the foam. Rinse until the water runs clear. Let it dry completely (at least 30 minutes in open air — or overnight if you can). Once dry, apply 2–3 drops of clean motor oil and work it through the foam with your fingers. The oil film is what traps fine particles; a dry foam filter doesn’t filter effectively. Paper filters: Tap firmly against your palm to dislodge loose debris. Do not wash paper filters — water destroys the filter media. If it’s heavily clogged, gray with dust, or torn, replace it. Paper filters for this era of engine run about $4–7. Never run the engine without the air filter installed. Even a single session without a filter can score cylinder walls with fine grit. It’s not worth the risk.Step 3 — Drain Old Fuel and Refill
If the mower has been sitting with fuel in the tank for more than 60 days, drain it completely. This is non-negotiable. Why stale fuel is the enemy. Modern ethanol-blended gasoline (E10, which is 90% gasoline, 10% ethanol) starts to phase-separate in as little as 30 days. The ethanol absorbs atmospheric moisture and sinks to the bottom of the tank as a water-ethanol mixture. When this mixture reaches the carb, it won’t combust, it corrodes metal parts, and it swells the rubber components — diaphragms, gaskets, primer bulb. How to drain the tank: Option 1 — Run it dry. If the mower will run at all, run it until the engine dies from fuel starvation. This is the simplest method. Option 2 — Siphon or tip. For a completely non-starting mower, use a hand siphon pump to remove fuel from the tank. Some MTD models allow tipping the mower on its side (air filter side up) to drain from the fuel cap; check your specific model to avoid flooding the carb or spilling fuel near the ignition. What fuel to use: Fresh 87 octane regular unleaded, purchased within the last 2 weeks. For small engines, 87 octane is correct — higher octane doesn’t burn “cleaner” in a small engine and doesn’t prevent deposits. Avoid E15 and E85. Most small engines made before 2011 are not approved for E15 (15% ethanol). The rubber components in carburetors of this era weren’t designed for higher ethanol concentrations. Use E10 max, or find ethanol-free fuel (sometimes labeled “recreational fuel” or “non-oxygenated”) at marine/aviation fuel stations or some hardware stores. Ethanol-free fuel is worth the small premium for a vintage small engine. Fuel stabilizer for storage: If you’re working on this mower for spring start-up, add a dose of Sta-Bil or PRI-G to the fresh fuel once you’re done with repairs. It extends the usable life of fuel in the tank to 12+ months.Step 4 — Clean the Carburetor
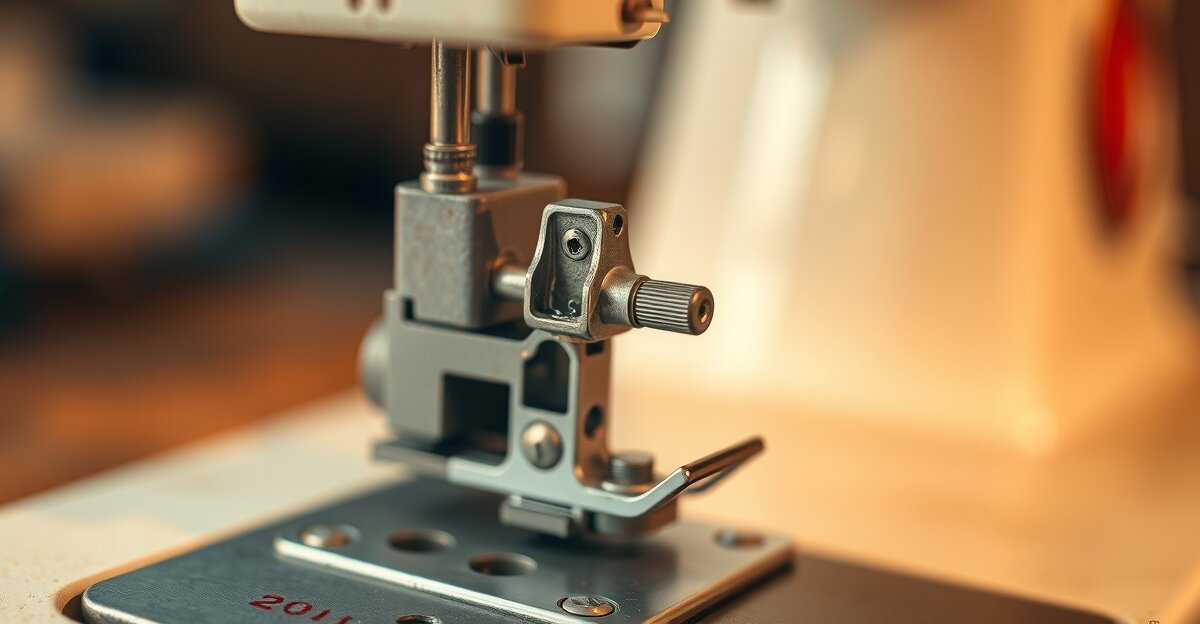
If steps 1–3 haven’t solved the problem, the carburetor needs attention. This sounds intimidating but on the Walbro and Tecumseh carbs fitted to vintage MTD mowers, it’s genuinely straightforward. Identify your carburetor type. Two carbs are common on this era of MTD:- Walbro LME/LMF series — Common on Briggs-powered MTD. Small, with a primer bulb and a fixed main jet. Recognizable by the flat primer bulb on the front.
- Tecumseh series — Used on MTD models with Tecumseh TVS90, H35, and H50 engines. Float-type carb with a removable bowl on the bottom.
Step 5 — Check the Primer Bulb and Fuel Lines
After the carb, work back toward the fuel tank. Testing the primer bulb: Press it three times slowly and firmly. It should:- Compress under finger pressure
- Spring back immediately when released
- Feel elastic, not stiff, cracked, or mushy
- Cracks or stiffness at the clamp points (where the line meets metal fittings — stress points where cracking starts first)
- Soft, swollen sections (ethanol damage)
- Kinks from being routed incorrectly
- Visible discoloration or film inside the line
Still Won’t Start? Advanced Checks
You’ve worked through all five common causes and the mower still won’t fire. Now you’re into less-common territory. Compression test. Rent a compression tester from your local auto parts store (usually free with deposit) or buy one for $20. Remove the spark plug, thread the tester into the plug hole, hold the throttle wide open, and pull the cord 4–5 times briskly. A healthy Briggs or Tecumseh small engine should show at least 90 PSI, with 120–140 PSI being typical for a low-hours engine. Under 60 PSI means worn rings, worn cylinder, or a sticking valve — problems that cleaning and gapping can’t fix. Valve clearance check. Briggs & Stratton L-head engines (the flat-head design used in most MTD mowers of this era) have intake and exhaust valves that require periodic adjustment. On high-hours engines, the exhaust valve can carbon up and not close fully — this bleeds compression. Checking valve clearance requires removing the valve cover (4 bolts) and using a feeler gauge. Intake should be 0.005″–0.007″; exhaust 0.009″–0.011″ for most L-head Briggs engines. Adjustment requires lapping the valve seat or shimming, which is a bigger job but still DIY-able. Flywheel key shear. The flywheel key is a small aluminum key that indexes the flywheel to the crankshaft at the correct timing position. If the mower has ever hit a hard obstruction (rock, stump) at full speed, the key shears to protect the crankshaft. A sheared key puts the timing off enough that the engine won’t start, or kicks back violently on the pull cord. To check: remove the flywheel (requires a flywheel puller, about $15) and inspect the small Woodruff key in the slot. A sheared or deformed key is the culprit. Replacement keys are $2–4. When to call it quits. If compression is below 60 PSI on a carb you’ve just rebuilt, the engine needs a professional rebuild or replacement. On a vintage MTD, a replacement Briggs & Stratton 3.5–5HP engine (short block or complete) can often be found for $50–100 on Craigslist or Facebook Marketplace from a mower with a dead deck. Sometimes the economics of a repair tip the other way and it makes more sense to source a better-condition donor engine. For a comprehensive approach to vintage equipment restoration beyond quick fixes, see our vintage equipment restoration guide — it covers the full teardown, parts sourcing, and reassembly process.MTD Model-Specific Notes
Vintage MTD push mowers came with a handful of engine combinations. Here’s what to know about the most common: Briggs & Stratton 3.5HP–5HP L-head (most common). The 3.5HP (model series 90000) and 5HP (model series 130000) Briggs engines are found in the largest number of vintage MTD mowers. Key features: side-draft carb with primer bulb, cast iron cylinder sleeve, aluminum block. The Champion RJ19LM plug is correct for these. One quirk: the choke plate on this era of Briggs carb must be fully closed for a cold start. A partially open choke is a common cause of hard starting. If the choke butterfly valve doesn’t close completely when you engage choke, the pivot shaft or spring has worn — clean the choke shaft with carb cleaner and work it back and forth to free any sticking. Tecumseh TVS90 and H35. MTD sourced engines from both Briggs and Tecumseh during this period. The Tecumseh TVS90 (3.5HP) and H35 are reliable engines but with some differences from Briggs: the carb is often a float type rather than suction-lift, meaning the fuel bowl approach described in Step 4 applies more directly. Parts availability for Tecumseh has decreased since the company closed in 2008, but carburetor kits, gasket sets, and filters are still available from small engine parts suppliers. The correct plug for most Tecumseh small engines is Champion RJ17LM (note: different from Briggs — check your engine tag). Choke position — critical. On cold starts, the choke must be fully closed. This is true for both Briggs and Tecumseh engines of this era. A fully closed choke creates a rich mixture that compensates for the vaporization issues of a cold engine. Once the engine fires and runs for 30 seconds, open the choke gradually. Running with the choke closed once the engine is warm causes fouling — the same black, sooty plug we discussed in the diagnosis section. The primer bulb count. Three pumps on the primer before pulling. Not one, not six — three. One pump doesn’t move enough fuel into the intake. Six pumps floods the engine with liquid fuel that won’t ignite as vapor. If the mower doesn’t start after three pumps and 3–4 pulls, do not keep pumping — you’re already flooding it. Let it sit for 5 minutes to let the excess fuel evaporate before trying again. If your chainsaw is also giving you trouble this season, the same systematic diagnostic approach applies — our chainsaw spark plug cleaning guide walks through diagnosing ignition problems step by step.Frequently Asked Questions
How do I know if my MTD lawn mower carburetor needs replacing vs. cleaning?
If the carburetor has intact physical structure (no cracks, the choke plate moves freely, the throttle shaft isn’t worn oval) and the issue is starting/running after storage, cleaning is almost always sufficient. A carburetor rebuild kit ($8–15) replaces every wear item — gaskets, needle, diaphragm, primer bulb — and is worth doing on any carb that didn’t respond fully to spray cleaning alone. True replacement is only necessary when the carb body itself is damaged or the throttle bore is worn out of spec.
What kind of oil does a vintage MTD Briggs & Stratton engine take?
SAE 30 non-detergent motor oil is the traditional specification for vintage L-head Briggs & Stratton engines, but modern SAE 30 or 10W-30 detergent oil works perfectly well and may actually provide better cold-weather starting. Check the oil level with the dipstick before every start. These engines don’t have an oil filter, so change the oil annually or every 25 hours — whichever comes first. An engine that’s run low on oil will fail quickly and with no warning on these older designs.
Can I use starting fluid to get my MTD mower running?
Starting fluid (ether spray) can confirm whether the issue is fuel delivery vs. ignition: spray a short burst into the air intake and immediately pull the cord. If the engine fires briefly, your ignition is working but fuel isn’t reaching the cylinder. But don’t rely on starting fluid as a regular fix — ether washes lubricating oil from cylinder walls and can accelerate wear if used repeatedly. Use it once for diagnosis, then fix the underlying fuel issue.
Why does my MTD mower start and then die after a few seconds?
This is classic carb starvation. The engine fires on the fuel already in the intake manifold, runs briefly, then dies when that fuel is consumed and fresh fuel can’t flow through the blocked carb. The most common specific cause: a stuck or corroded main jet, or a float needle that’s stuck closed (preventing fuel from entering the float bowl). Clean the carb per Step 4, paying close attention to the main jet and needle seat. If the float needle seat has corrosion, a rebuild kit is the right call.
One thought on “Vintage MTD Lawn Mower Won’t Start: The Complete Fuel System & Spark Fix Guide”