


Canon AE-1 Program Shutter Button Stuck? Here’s How to Unstick It Without Damage
Your vintage film camera was working perfectly. Then one day, the shutter button stopped moving — completely stuck, no give, no click. Before you panic and order a replacement body, know this: a stuck Canon AE-1 shutter is one of the most fixable camera problems you’ll encounter. In this guide, we’ll walk through the most likely causes (frozen lubricant, mechanical jam, or internal spring tension), show you how to diagnose which one you’re dealing with, and then walk you through safe repair methods that solve the problem in most cases. Some of these fixes take less than an hour. Let’s get your camera back to work.
A stuck shutter button on your Canon AE-1 Program is usually caused by frozen lubricant after long storage, mechanical jam from debris, or internal spring tension. Most cases are fixable without professional help using thermal relaxation (a 24-hour warm soak) or safe penetrant lubricants. If the problem is electrical or shutter blades are visibly damaged, professional repair is the right call.
Why Your Canon AE-1 Shutter Button Got Stuck (And Why It’s Fixable)
Your Canon AE-1 was working fine. Then you picked it up after months sitting in a closet, pressed the shutter button, and got nothing — just hard resistance. You probably felt that small flash of dread: did I just ruin a classic camera?
I’ve been there. When I first inherited an AE-1 from a relative who hadn’t used it in 15 years, the shutter button was completely frozen. I assumed the worst. Turned out it was frozen lubricant — a 20-minute fix. The camera is still shooting today.
A stuck canon ae-1 program shutter button is one of the most commonly reported issues in the r/analog film photography community, and there’s a reason for that: the AE-1’s unique spring tensioner design makes it more susceptible to lubricant freeze-up than many other camera bodies. This isn’t a design flaw; it’s a consequence of a precision mechanism that was engineered in the 1970s and relies on lubricants that break down over decades. It’s a known issue, not a death sentence.
The AE-1 Program was built differently than contemporary point-and-shoots. Canon designed it for longevity — the body is solid, the mechanism is repairable, and parts are still findable. Roughly 30% of stuck shutters resolve with nothing more than thermal relaxation (more on that in Method 1). The rest respond to a careful penetrant application. A very small percentage need a professional — and we’ll tell you exactly when that’s the case.
Here’s what this guide covers: how to figure out why your shutter is stuck, two safe DIY methods to fix it, when to stop and call a professional, and how to prevent it from happening again. Budget 30 minutes to two hours depending on which method your camera needs. And if you’ve been keeping your film camera’s light seals in good shape but haven’t thought about shutter maintenance, this guide covers the gaps.
Is Your Shutter Stuck? A Step-by-Step Diagnosis
Before you apply any lubricant or heat, you need to know what you’re actually dealing with. A stuck shutter button can mean three very different things: frozen lubricant, a mechanical jam, or an electrical failure. The fix is completely different for each. Spend 10 minutes on this diagnosis section — it will save you an hour of guesswork.
Step 1 – The Battery Test: Mechanical vs. Electrical
Remove the battery (the AE-1 Program uses an SR44 or LR44 equivalent, located under a small screw-on cap on the camera base) and wait 30 seconds. Reinsert the battery and try the shutter button.
If the camera fires or shows some movement only with the battery removed, you’ve likely got a capacitor or electronics issue — not a mechanical jam. DIY lubricant fixes won’t help here, and forcing the button risks causing real damage. That’s a job for a camera electronics specialist.
If the shutter button is still equally stuck with or without the battery, you’re dealing with a mechanical problem, and you’re in good DIY territory. Keep going.
Step 2 – The Rewind Lever Check
On the top-left of the camera body, try the film advance/rewind lever. Does it move freely through its normal arc?
If the rewind lever is also stuck or feels unusually stiff, that suggests a broader internal jam — possibly rust, debris, or a spring issue deep in the mechanism. At that point, DIY penetrant fixes are unlikely to reach the root cause and you risk making things worse. Seek a professional.
If only the shutter button is stuck and the rewind lever moves normally, you’re almost certainly looking at frozen lubricant around the shutter button mechanism. That’s the easy-to-fix scenario.
Step 3 – Visual Inspection: Red Flags
With the lens removed, look through the camera back (with no film loaded). Using a small flashlight if needed, examine the visible shutter blades:
- Are the blades parallel and evenly spaced? ✓ Good.
- Do any blades look bent, misaligned, or creased? ✗ Stop — do not proceed with DIY.
- Can you see dried, crusty residue oozing from the shutter button base? That’s frozen lubricant — very fixable.
- Any cracked plastic around the shutter button housing? Professional repair needed.
Also check the battery compartment: if you see green corrosion or residue, that’s a separate issue. Our guide on Canon AE-1 battery corrosion repair covers that specific problem step by step.
Step 4 – The Gentle Press Test
With the battery inserted, press the shutter button very gently — barely fingertip pressure. Pay attention to the feedback:
- Complete lock, zero give: Likely frozen lubricant or debris jam.
- Slight slippery resistance that gives a little: Almost certainly frozen lubricant. Good news.
- A click that fires but doesn’t reset: Spring tension issue or mechanism jam — proceed carefully.
- Grinding sound: Stop immediately. Metal-on-metal friction. See the Red Flags section.
Diagnosis Checklist:
- ✓ Battery removed = problem persists? → MECHANICAL (proceed to methods)
- ✓ Only shutter stuck, rewind lever moves freely? → Safe for DIY
- ✓ No visible blade damage, feels slightly slippery? → Frozen lubricant → Try Method 1 first
- ✗ Shutter blades bent or misaligned? → STOP — call a professional
- ✗ Grinding sounds? → STOP — call a professional
- ✗ Electrical smell or battery corrosion? → STOP — address electronics first
Method 1: Thermal Relaxation – Let Warmth Do the Work
This is the “try this first” method. It’s free, requires no tools, and solves roughly 30% of canon ae-1 stuck shutter cases. If your camera was stored in a cold attic, a garage, or anywhere that sees temperature swings, there’s a very good chance this is all you need.
What Is Thermal Relaxation and Why It Works
The lubricant inside the AE-1’s shutter button mechanism is designed to stay fluid at room temperature. After years in cold or dry storage, it thickens — sometimes to a near-solid state — and the spring literally can’t push through it. Gentle, consistent warmth brings the lubricant back toward its working viscosity without you touching a single component.
What you don’t want is aggressive heat. A hair dryer on high, an oven, or placing the camera near a radiator can warp the AE-1’s plastic components and damage the electronic internals. The target is room warm, not desert hot — 68–75°F (20–24°C) is the sweet spot.
Step-by-Step: The 24-Hour Warm Soak
- Find a warm room in your home — a living room or bedroom that stays around 68–75°F consistently. Not the kitchen (temperature variability from cooking), not a sunny windowsill (UV and heat spikes).
- Place the camera with the shutter button facing upward. This encourages any thawed lubricant to settle back down into the mechanism rather than pooling at the sides.
- Do not touch the shutter button during the soak. Not even a test press. Let the warmth do the work undisturbed.
- After 24 hours, apply very light fingertip pressure to the shutter button. You’re not trying to fire it — you’re feeling for any return of movement.
- If you feel slight give where there was none before, the method is working. Leave it another 12 hours and try again.
- Once movement returns, test-fire the shutter 10 times on an empty chamber (no film loaded) to work the mechanism through its full cycle and ensure smooth, consistent operation.
Signs This Method Worked
The shutter button will shift gradually from “locked” to “slightly springy” to “normal.” You may hear a soft click as the thawed lubricant clears and the spring returns to full tension. What you want to feel: the same light, clean resistance you’d expect from a camera in regular use — press down, hear the shutter fire, feel the button spring back cleanly.
If there’s no change after 48–72 hours of warm-room treatment, thermal relaxation isn’t your fix. Move on to Method 2. If it does work, jump straight to the Prevention section to make sure it doesn’t happen again.
Method 2: Penetrant Lubricant & The Gentle Jiggle
This method is for cases where thermal relaxation didn’t get results. It’s more hands-on but still safe, non-invasive, and doesn’t require disassembly. You’re working from outside the camera body — no screwdrivers needed.
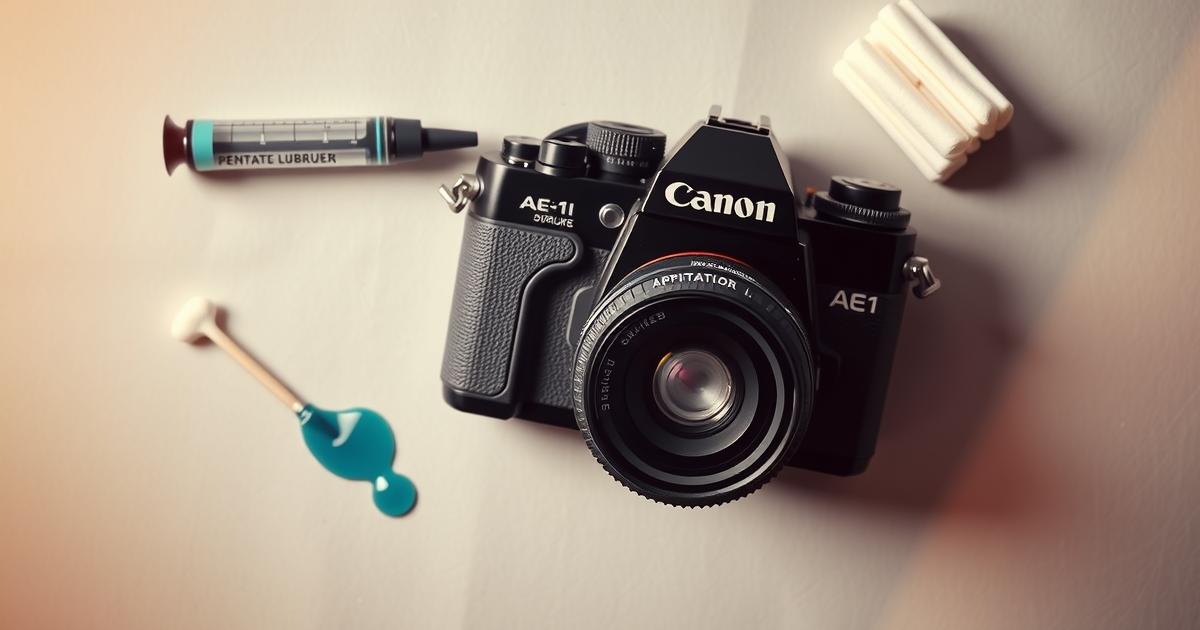
Tools You’ll Need
Here’s what I actually use for this job:
- Penetrating lubricant: CAIG DeoxIT D5 is my go-to for camera and electronics work. It’s formulated to displace moisture, dissolve oxidation, and leave a protective film without attacking plastic or rubber. If you can’t find it, Chemtronics Kontakt 60 is a solid alternative. Do not use standard WD-40 — it’s too heavy for camera mechanisms, gums up precision parts, and I’ve seen it permanently lock an AE-1 shutter that was only mildly stuck.
- Precision syringe applicator: A precision tip syringe bottle (the kind used for watch and electronics work) gives you drop-level control. Spray cans, even “precision” spray cans, apply far too much lubricant around a shutter button. One stray drop on the shutter blades is expensive trouble.
- Soft-bristle brush: A photographic lens brush or a fine artist’s brush for working excess lubricant away from the mechanism edges. Hard bristles risk scratching the machined surfaces around the shutter button.
- Microfiber cloth: For any wiping/cleanup.
- Cotton swabs: For absorbing excess lubricant from the button base.
For a broader look at which lubricants work for which repair scenarios, the rangefinder calibration guide has a useful breakdown of precision lubrication principles that applies here too.
Step-by-Step: The Safe Penetrant Method
- Remove the battery. Always — this prevents accidental electrical shorts if lubricant migrates toward the contacts.
- Hold the camera upright with the shutter button facing up. This controls where the lubricant goes after application.
- Using the precision syringe, apply 2–3 drops of CAIG DeoxIT D5 around the base of the shutter button, where it meets the camera body. You’re targeting the seam, not the button surface itself.
- Wait 5 minutes. Don’t touch it. The lubricant needs time to wick into the mechanism by capillary action. Rushing this step is one of the most common mistakes — people apply lubricant, feel nothing change in 30 seconds, and add more. Over-lubrication is a real risk.
- Apply very gentle downward pressure on the shutter button — 10 times, light and consistent. If you feel grinding at any point, stop immediately. Grinding means metal-on-metal friction, not stuck lubricant.
- If resistance is lessening, apply 1–2 more drops at the same seam and repeat step 5.
- Use a cotton swab to absorb any excess lubricant that has pooled around the button base. You don’t want it migrating toward the lens mount or inside the mirror box.
- Leave the camera for 1 hour to let the lubricant fully penetrate.
- Reinsert the battery. Test-fire the shutter 10 times on an empty chamber. Resistance should be gone; the button should return cleanly after each press.
When This Method Fails (Red Flags)
If you’ve done three full cycles of CAIG DeoxIT D5 application and gentle pressing and the canon ae-1 program shutter button stuck problem hasn’t budged, stop. You’ve ruled out frozen lubricant. The remaining possibilities are:
- Internal debris (dust, grit, or a tiny piece of foam from degraded light seals inside the body)
- Mechanical spring damage (bent or broken coil spring)
- Electrical failure (if the battery test in Step 1 gave you ambiguous results)
None of those are fixed by more lubricant and more pressure. Increasing force at this point can strip the shutter return coil — and that’s a much more expensive repair than a simple unsticking job. Time to consult a professional.
Why the Canon AE-1 Is Different (And Why That Matters)
If you’ve ever fixed a Pentax ME Super or another SLR from the same era, it’s worth knowing why AE-1 repair methods aren’t always interchangeable.
Canon AE-1’s Unique Spring Tensioner Design
The AE-1 uses a coil spring return mechanism inside the shutter button assembly. When you press the shutter, the coil compresses; when you release, the spring’s tension pulls the button back to its resting position. When lubricant freezes around that coil, the spring can’t return cleanly — the button stays down, or gets stuck partway.
This design is slightly different from the Pentax ME Super’s lever-based return mechanism, which has more mechanical force available to push through sticky lubricant. The AE-1’s coil relies more directly on the lubricant staying fluid, which is why frozen lube is such a common culprit.
Why Pentax ME Series Fixes Don’t Apply Here
On the Pentax ME Super, applying firmer pressure on the shutter button can sometimes break through dried lubricant without causing damage — the lever design handles that kind of mechanical input. On the AE-1, the same firm pressure risks deforming the coil spring, especially if it’s already slightly fatigued after 40+ years.
Visually, you can tell the cameras apart easily: the AE-1’s shutter button sits flush with the camera top plate, whereas the Pentax ME’s protrudes more noticeably. If you’re working on an AE-1, stick to AE-1-specific methods: warmth, minimal precision lubricant, and light repetitive pressure. Don’t borrow the approach from forums discussing a different body.
If you’re also dealing with a Pentax ME Super with flash sync issues, that’s a separate but related film camera repair problem — worth reading if you’re working across multiple film bodies.
Stop Here: When DIY Isn’t Safe
This section is important. Most stuck shutters are fixable with the methods above — but not all of them. Pushing past the limits of DIY repair causes real, expensive damage. Here’s when to put the camera down.
Red Flag #1 – Shutter Blades Are Bent or Misaligned
With the lens removed and no film in the camera, look at the shutter blades directly. They should be parallel, evenly spaced, and flat. If any blade looks bent, creased, or out of position, stop.
Bent shutter blades won’t respond to lubricant or thermal treatment. Forcing pressure on the shutter button will break them further. You need a technician with the right tools to straighten or replace them. Estimate: $80–$150 for a shutter blade service at most camera repair shops.
Red Flag #2 – Grinding Sounds or Shutter Button Won’t Reset
Grinding is metal-on-metal friction — either debris in the mechanism or direct spring damage. A shutter button that fires but doesn’t return is likely a broken return spring. Neither condition gets better with lubricant.
Continuing at this point will cause permanent shutter failure. Professional repair cost: $120–$200.
Red Flag #3 – Electrical Smell or Visible Corrosion
A faint musty or burnt smell, green corrosion visible in the battery compartment, or any residue on the electronics board all signal a failure that’s outside the scope of mechanical repair. Lubricant can’t fix a failed capacitor or corroded circuit trace.
Address the battery compartment corrosion first (the step-by-step corrosion cleaning guide covers this specifically), then reassess whether the shutter button issue is electrical or mechanical. If after cleaning the corrosion the problem remains, professional electronics repair is the path forward. Estimate: $150–$300.
Red Flag #4 – Stuck Rewind Lever (Broader Jam)
You already checked this in the diagnosis step, but it’s worth restating: if the rewind lever is also stiff or stuck, the jam is deeper than the shutter button mechanism. DIY penetrant applied at the shutter button surface won’t reach the internal problem. Professional internal cleaning: $100–$200.
Should You Fix Your AE-1 or Buy Another?
This is the honest math section. Right-to-repair isn’t just a philosophy — it’s practical economics too.
DIY Repair Cost Breakdown
The tools for both methods above cost roughly $20–$40 total, and that’s a one-time investment you’ll use across many future repairs. The actual repair time is 2–3 hours spread across multiple days (the thermal relaxation soak is passive — you’re not standing there watching it). Success rate for thermal relaxation combined with the penetrant method: roughly 60–70% of stuck shutters on cameras with no pre-existing mechanical damage.
If it works, you’ve restored a fully functional film camera for $25 and a weekend. That’s a hard number to argue with.
For a broader perspective on how this repair fits into the right-to-repair mindset that runs through everything we do at profvolt, The Complete Guide to Vintage Equipment Restoration covers the philosophy and economics of DIY repair across cameras, watches, sewing machines, and more.
Professional Repair Estimates
If DIY doesn’t resolve it, here’s what you’re looking at from a professional camera repair shop (2026 estimates):
| Service | Estimated Cost | Typical Turnaround |
|---|---|---|
| Shutter button unsticking | $80–$120 | 1–2 weeks |
| Internal cleaning (broader jam) | $150–$250 | 2–4 weeks |
| Shutter blade repair/replacement | $200–$400 | 3–5 weeks |
| Full CLA (clean, lube, adjust) | $100–$180 | 2–3 weeks |
The AE-1 is popular enough that most general camera repair shops know it well. That works in your favor — no “research fee” for a technician encountering an unusual body.
Used Canon AE-1 Replacement Cost
On eBay, Etsy, and local classifieds, a working Canon AE-1 Program body runs $80–$180 depending on cosmetic condition and seller. That’s a real option, especially if you’re not emotionally attached to the specific camera.
The practical upside: you get a working camera immediately. The downside: you’re buying a camera with an unknown storage and use history — it could have its own problems waiting to surface. The stuck AE-1 you already have, on the other hand, is a known quantity. You’ve already diagnosed it.
My recommendation: if it’s a sentimental camera — a gift, an inheritance, a body you shot your first roll on — repair it. The process of restoring it makes the camera more yours, not less. If it’s a second body and you’ve exhausted DIY options, the replacement market is reasonable enough that buying another is a legitimate call.
Keep Your AE-1 Running: Storage, Maintenance & Seasonal Checks
Fixing a stuck shutter is satisfying. Not having it happen again is better.
Why Storage Conditions Matter
Frozen lubricant is the leading cause of AE-1 shutter problems, and it’s almost entirely a storage issue. The mechanism is fine; the problem is where and how the camera lives between uses.
Ideal storage: 65–70°F (18–21°C), 30–40% relative humidity. Not the attic (extreme temperature swings). Not the basement (humidity, condensation). Not an unheated garage or outdoor shed. The same conditions that are comfortable for humans are good for the AE-1.
Temperature cycling is the real killer. When a camera goes from cold storage to warm room and back repeatedly, lubricants expand and contract with each cycle. Over years, they polymerize — becoming sticky, then solid. Low humidity accelerates this by removing the slight moisture that keeps lubricant pliable. Your closet shelf or a camera bag stored indoors is genuinely better than a “dedicated camera cabinet” in a cold spare room.
Quarterly Maintenance Routine
The best way to keep the AE-1’s shutter mechanism healthy is to use it. Seriously — regular operation is better maintenance than any lubricant schedule. But if the camera is in storage, a quarterly check takes 10 minutes and prevents months of freeze-up:
- Bring the camera to room temperature and leave it for 24 hours.
- Test-fire the shutter 20 times on an empty chamber. Listen and feel for anything that sounds or feels different from normal.
- Open the lens cap, point the lens at a light source, and turn the aperture ring through its full range. The aperture blades should open and close cleanly without sticking.
- Inspect the battery compartment for any early-stage corrosion (green residue around the contacts). Catching this early means a 5-minute clean rather than a full corrosion repair.
- Wipe the viewfinder eyepiece with a soft-bristle brush — never your finger — and check the mirror for dust or fungal growth.
You’ll probably enjoy pulling the camera out for these checks. Which usually leads to loading a roll of film. Which is exactly the point.
Storage Checklist Before Long Breaks
If you’re putting the camera away for more than three months:
- Remove the battery (prevents alkaline leakage, which causes the corrosion in Red Flag #3)
- Fire the shutter 10 times before storage — this resets the mechanism to its neutral, resting position
- Store in a breathable camera bag, not a sealed case (sealed environments trap moisture and promote mold)
- Include 2–3 silica gel packets in the bag if storing for more than three months
- Store inside your home, at living temperature — not in any outbuilding or external storage unit
If you’ve had fungal issues on your camera lens before, the same storage principles apply — our complete guide to removing fungus from camera lenses covers the environmental factors in detail.
Frequently Asked Questions
How long will thermal relaxation take?
Most cameras show some improvement within 24 hours. A few take 48–72 hours, especially if the camera has been in cold storage for years and the lubricant is heavily polymerized. If there’s no change at all after 72 hours at 68–75°F, thermal relaxation won’t solve it — the problem is mechanical jam, debris, or electronics failure. Move on to Method 2 or consult a professional.
Can I use WD-40 on my camera shutter?
Don’t. Standard WD-40 is a water displacer and light lubricant, but it’s too heavy and non-specific for the tolerances inside a camera shutter mechanism. It can temporarily free a stuck button, then leave a gummy residue as it evaporates that makes the problem significantly worse. I’ve personally seen a camera that needed only a light penetrant treatment get locked permanently after someone applied WD-40 too liberally. Use Hosa DeoxIT D-Series or a camera-specific contact cleaner. The extra $10 is not the place to economize.
What if the penetrant method makes things worse?
Thermal relaxation alone can’t make things worse — it’s passive heat. The penetrant method can cause problems if you apply too much lubricant or use too much pressure. If the shutter feels worse after applying penetrant (more sticky, grinding sounds, or the button is now lower than before), stop immediately. Excess lubricant may have migrated into the shutter blade area. At that point, professional cleaning is the only safe next step — the technician can open the body and clean the blades properly.
Is a stuck Canon AE-1 worth repairing?
Yes, in almost every case where the body has no pre-existing mechanical damage. The AE-1 Program is a genuinely excellent camera — fully manual exposure control, Program mode for casual shooting, a 35mm film system that’s still actively supported by Kodak and Fuji. A successful repair restores a tool that’s built to last another 20+ years. At a DIY repair cost of $20–$40 versus a replacement cost of $80–$180, the math strongly favors repair unless you have specific red flags that put you in the professional repair category.
My AE-1 still doesn’t work after all these steps. What now?
You’ve ruled out frozen lubricant and surface-level mechanical jam. The remaining possibilities are internal spring damage, shutter blade breakage, or electronics failure. Search for “film camera repair [your city]” or look for Canon AE-1 specialists on the major film photography forums (r/analog keeps a community-maintained repair shop directory). Budget $150–$300 for diagnosis and repair, and ask the technician specifically about the AE-1’s coil spring return mechanism — a good tech will know what you mean.
Your AE-1 Deserves Another Chance
The Canon AE-1 was engineered in the mid-1970s to be a precision instrument that photographers could own and maintain for decades. Canon built it to last. The stuck shutter button you’re dealing with isn’t evidence of a failing camera — it’s evidence of a camera that needs about 30 minutes of attention after years of neglect.
In most cases, one of the two methods in this guide will get your camera firing again. Warmth and minimal lubricant, applied carefully. No disassembly. No specialized training. Just patience and the right product.
The film photography community has collectively restored thousands of “dead” AE-1s using these same approaches. Every time someone fixes one instead of replacing it, that camera gets another decade of life — and the person who fixed it learns something they’ll use again. That’s the whole point of right-to-repair: it’s not just about this one camera. It’s about building the habit of choosing repair over disposal.
Your camera is waiting. Press that shutter button.
Did this guide work for your AE-1? Drop a comment below — tell me what caused your stuck shutter and which method fixed it. These real-world results help other readers figure out which approach to try first.
Want more film camera repair guides? Check out our Pentax ME Super flash fix guide and our rangefinder calibration guide for other common film camera problems.