


How to Sharpen Vintage Scissors and Garden Shears at Home
That pair of Gingher fabric scissors sitting forgotten in your sewing box — the ones with the satisfying weight and the German-precision blades — didn’t stop working. They got dull. And the 1980s garden shears your grandmother used to deadhead roses every spring? Still perfectly salvageable. Vintage scissors don’t wear out; they wait for someone patient enough to restore them.
To sharpen vintage scissors at home, use a whetstone or diamond plate held at a 30–40° angle for fabric shears (15–20° for garden shears), making 10–15 strokes per blade side. Start with rust removal using white vinegar if needed, then hone the blade edge, test on fabric or paper, and finish with a light oil coating for storage. The entire process takes 20–30 minutes.
Thousands of right-to-repair enthusiasts are rediscovering the satisfaction of restored tools, proving that dull blades aren’t a disposal sentence. In this guide, we’ll walk through the exact step-by-step restoration process using tools you can buy for under $40 — from rust removal and blade assessment, to sharpening technique, brand-specific tips for Wiss and Gingher, and a troubleshooting section for when things don’t go as planned.
Why Vintage Scissors Are Worth Restoring
Most modern scissors are made from stainless steel — corrosion-resistant, yes, but softer than the high-carbon steel used in vintage American and European blades. That matters. High-carbon steel holds a sharper edge longer, and it responds better to sharpening. You can put a genuinely fine edge on a 1960s Wiss W9 that a $12 grocery-store pair will never match.
There’s also the economics. Vintage scissors cost $20–80 on resale markets, but quality modern equivalents — a new pair of 8-inch Gingher shears runs $55–75 on Amazon — aren’t necessarily better-made. A sharpened vintage pair will outlast a new budget replacement by years, sometimes decades.
And then there’s the collection angle. Wiss scissors, made in Newark, NJ since 1890, are actively sought by sewers and collectors. Gingher has a cult following in quilting communities. A well-maintained pair retains — and in some cases increases — its value.
The stat worth keeping in mind: vintage scissors cost 2–3x the equivalent budget replacement but outlast them 10x over with basic maintenance. The math is obvious if you do any volume of fabric cutting, paper crafting, or gardening.
One more thing: if you keep a vintage sewing machine running (and if your machine needs lubrication advice, our guide on how to oil a vintage sewing machine covers that in detail), your scissors are part of the same ecosystem. Sharp blades mean cleaner cuts, less fabric fraying, and less tension on your feed mechanism when cutting close to the machine.
Assessing Your Vintage Scissors Before You Sharpen Anything
Don’t touch the whetstone yet. The first five minutes you spend on assessment will save you from wasted effort — or worse, damaging a pair that needed professional work.
Identifying Vintage Brands and Their Value
Wiss scissors (Newark, NJ, est. 1890) are the workhorses of the American vintage scissors world. The W9 fabric shears and W208 kitchen scissors are the most commonly found models. Wiss used forged high-carbon steel with chrome plating on many older models — the plating can pit over time, but the blade underneath is usually sound. If you can find a maker’s mark stamped on the blade near the pivot, you’ve got an authentic Wiss worth restoring.
Gingher scissors (est. 1907, originally German-influenced design, now American-made) are the fabric scissors that sewers argue about online in the most affectionate way possible. The 8-inch dressmaker’s shears are the most iconic model. Gingher uses precision-forged blades with an ergonomic handle design that hasn’t changed much in 50 years — that’s intentional. New Gingher 8-inch shears run $55–75 retail; a restored vintage pair is equivalent in function and often better-looking.
Henckels (Germany, est. 1700s — yes, really) and Mundial (Brazil, professional-grade) round out the brands worth mentioning. Henckels has a very acute blade angle suited for precision cutting; Mundial blades are thicker and often used in gardening and professional kitchen applications.
Signs you’ve got something worth restoring: hand-forged blades with visible grinding marks near the edge, a maker’s mark or country of origin stamp, handles with rivets rather than plastic screws, and a satisfying weight-to-size ratio that modern scissors rarely match.
Red Flags — When NOT to Sharpen
Some scissors are beyond DIY recovery. Put them down and step away if you see:
- **Deep pitting in the blade steel** — not surface discoloration, but actual holes or craters from rust that’s eaten into the metal. Sharpening won’t fix what’s missing.
- **Bent blades that won’t align** — if the blades visibly bow away from each other when closed, the frame is damaged, not merely dull.
- **Cracked handles** — wood handles with splits, or plastic handles that flex when you squeeze. Handle failure mid-cut is a real safety issue.
- **Missing or stripped pivot hardware** — vintage screw pivots are often not standardized; replacements can be nearly impossible to source.
If blades are merely stiff, misaligned slightly, or rusty on the surface, those are all fixable. Don’t confuse fixable with hopeless.
The Cost-Benefit Decision
DIY sharpening tool investment: $15–50 (one-time, lasts years). Time per pair: 20–30 minutes.
Professional sharpening: $8–15 per pair, plus shipping if you mail them in.
Replacement cost for quality equivalent: $25–150.
The ROI calculation for Gingher is stark: a single DIY sharpening session (after you’ve bought your whetstone) costs you nothing beyond 25 minutes. A professional sharpening runs $10–12. A new pair runs $60. Sharpen your own Ginghers three times and your $25 whetstone has paid for itself compared to professional service. Do it yourself for 10 years and you’ve essentially gotten a $600 pair of scissors for $25 in tools.
Pre-Sharpening: Rust Removal and Cleaning
This is the section most guides skip. Sharpening over rust is like painting over rot — you’re sealing in a problem. Get the blades clean first.
Tools You’ll Need
For cleaning and rust removal:
- White vinegar (distilled) or phosphoric acid rust remover — vinegar works well for moderate rust and costs almost nothing
- Fine steel wool (#0000 grade) or a brass-bristle brush — brass is gentler on plating
- Soft microfiber cloths or lint-free shop towels
- A shallow bowl or container large enough to submerge the blade
For disassembly (if needed):
- Precision screwdriver set — you’ll need both Phillips and flat-head in small sizes; a Wiha or iFixit kit covers the range
- Needle-nose pliers or tweezers
- Toothbrush (old one is fine) for scrubbing pivot crevices
For lubrication:
- Sewing machine oil or 3-in-1 oil — a drop goes a long way; the same bottle you use for your machine works perfectly
- Cotton swabs or a small oil applicator
Step-by-Step Rust Removal
Work through this before any sharpening happens.
1. Inspect the blades in strong light. Surface rust looks orange-brown and wipes off with light pressure. Pitted rust leaves indentations even after cleaning — if that’s what you’re seeing, reassess whether sharpening makes sense.
2. If rust is moderate to heavy: submerge the blade section (not the handles, especially if they’re wood) in white vinegar for 30–60 minutes. The acetic acid dissolves iron oxide without attacking the steel underneath. You’ll see fizzing — that’s the reaction working.
3. Remove from vinegar and scrub gently with #0000 steel wool or a brass brush. Use circular motions and light pressure. You’re not grinding metal here, breaking loose the rust layer. The blade should start showing its actual steel color.
4. Rinse immediately and thoroughly with warm water. Vinegar left on steel will cause flash rust within minutes, so don’t let the scissors air-dry after rinsing — dry them immediately with a cloth.
5. Use a toothbrush with a little vinegar solution to clean around the pivot area and between the handle grips. Debris trapped at the pivot causes stiffness and uneven blade action.
6. Dry every surface completely, including inside the pivot. A hair dryer on low heat works well for this. Any remaining moisture will cause the rust to return.
7. If you’re not sharpening the same day, apply a very light coating of 3-in-1 oil or sewing machine oil to the blade surfaces before storage. This thin barrier prevents oxidation from starting again.
When to Partially Disassemble
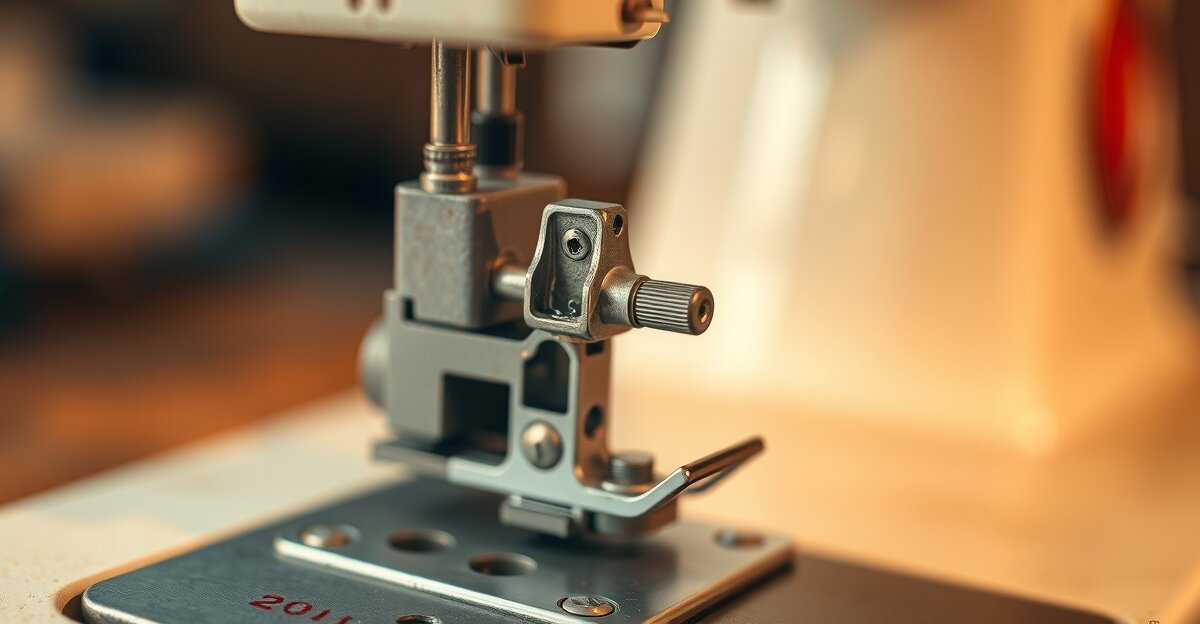
If the blades are misaligned, the pivot is stiff or sticky, or you can see debris trapped between the blades, light disassembly is worth it. Most vintage scissors have a single central screw — turn it counterclockwise to loosen.
Before you unscrew anything, take a photo. Document exactly how the blades are oriented, which one sits on top, and which direction the screw head faces. This takes 10 seconds and saves a frustrating reassembly puzzle later.
Once open, clean between the blades and around the pivot thoroughly. Reassemble loosely — the blades should move freely when you open and close them, but shouldn’t rattle. You’ll fine-tune the tightness after sharpening.
Whetstone vs. Diamond Plate: Which One Should You Use?
Both tools sharpen scissors effectively. They do it differently, and for different situations, one is clearly better than the other.
Whetstone Sharpening — The Traditional Approach
Best for: Fabric scissors, vintage shears, beginners who want maximum control.
A whetstone (specifically a combo stone with 1000 grit on one side and 6000 grit on the other) gives you the finest possible edge on fabric scissors. The slower, more deliberate process lets you feel what’s happening — you can adjust pressure and angle mid-stroke in a way you can’t with faster methods.
Japanese water stones in the 1000/6000 grit range (King whetstones are the standard recommendation; expect to pay $20–35) are purpose-built for this kind of precision work. Soak them in water for 10 minutes before use and they cut beautifully.
Advantages: Inexpensive entry point, superior final edge quality, versatile across scissors and kitchen knives, great beginner feel. The slower pace is actually an asset when you’re learning angle control.
Disadvantages: Technique takes a few sessions to feel natural. The 1000-grit side takes 10–15 minutes per pair for heavily dull scissors. Requires water or oil depending on stone type — a small setup step that some people find fussy.
Diamond Plate Sharpening — Faster, Less Fussy
Best for: Garden shears, heavily used pruning scissors, intermediate users who’ve already developed angle sense.
Diamond plates use electroplated diamond abrasive on a steel backing. They cut faster and harder than whetstones, making them better suited to the thick, heavy-duty blades of garden shears. DMT makes excellent combo plates (coarse + fine in one tool, $40–70) that hold up for years.
Advantages: 5–10 minutes per pair instead of 15. More forgiving on angle consistency — you can drift ±5° without dramatically changing your result. Works on harder steel alloys that whetstones struggle with.
Disadvantages: More expensive upfront. The aggressive cutting action can remove too much material if you’re not careful — harder to course-correct on fine fabric shears. The edge produced is slightly less refined than a good whetstone finish.
Other Methods: Pull-Through Sharpeners and the Aluminum Foil Trick
Pull-through sharpeners are fast and fool-proof — for kitchen knives. For vintage scissors, they’re problematic. The preset angle inside a pull-through sharpener rarely matches the blade geometry of vintage shears, and the carbide teeth remove metal aggressively without giving you any feedback. Save pull-through sharpeners for maintenance on cheap modern scissors; keep them away from vintage blades you care about.
The aluminum foil trick (fold a sheet of aluminum foil several times and cut through it repeatedly) works exactly as described online — but only for minor maintenance on an already-functional edge. The rough foil surface microscopically realigns the blade edge, like a very gentle strop. It won’t create a new edge on a truly dull blade. It’s not restoration; it’s touch-up.
Decision Matrix: Which Method for Your Situation?
| Your Situation | Best Method | Why |
|---|---|---|
| First time, fabric scissors, tight budget | Whetstone (1000/6000 combo) | Maximum control, best final edge, affordable |
| Garden shears, thick blades, intermediate skill | Diamond plate | Speed + strength for heavier metal |
| Minor dullness, already-functional scissors | Aluminum foil | Free, quick, effective for small realignment |
| Professional-quality finish on Gingher/Wiss | Whetstone + stropping | Combines sharpening + edge refinement |
How to Sharpen Vintage Scissors: Step-by-Step
This method uses a whetstone — the best choice for vintage fabric scissors and the method that translates best to other tools you’ll sharpen in the future.
Step 1: Set up your workspace
Work on a clean, flat surface — kitchen table or workbench, not a lap or a soft surface that flexes. Place a non-slip mat or damp cloth under your whetstone so it doesn’t slide during strokes. Good overhead lighting matters here; you need to see the blade edge clearly. A small LED task light aimed at the blade is worth the effort.
Step 2: Prepare the whetstone
If using a water stone: submerge it in clean water for 10 minutes before starting. This saturates the pores in the abrasive material and allows it to cut cleanly. If using an oil stone: apply a thin layer of honing oil across the surface. Don’t skip this — a dry stone glazes over and loses cutting ability.
Place the stone flat on your non-slip mat, grit-side up. Start with the 1000-grit side.
Step 3: Identify the correct blade angle
This is the most important step in the whole process. Getting the angle wrong is the primary reason DIY sharpening fails.
For fabric scissors (Gingher, Wiss fabric shears, sewing shears): aim for 30–40° between the blade flat and the whetstone surface. This more acute angle gives you the fine, thread-level cutting ability these scissors are designed for.
For garden shears and pruning scissors: aim for 15–20°. The more obtuse angle gives the blade strength to handle thick stems and branches without the edge folding.
Practical check: hold the scissors so the blade is edge-on and look at where the existing bevel starts. That’s the angle the manufacturer built into the scissors — match it. If you can’t see a clear bevel (common on very dull or heavily used scissors), start at 30° for fabric, 20° for garden, and adjust on subsequent sessions.
Step 4: Position and hold the blade correctly
Hold one blade (separated or still connected — either works) so the sharpened edge faces away from you. The blade flat rests lightly on the whetstone, with your wrist tilted to create the target angle. Use your thumb and two fingers to hold the blade firmly but not rigidly — white-knuckle gripping causes micro-tremors that produce an uneven edge.
Before making your first stroke, do a dry run: move the blade through the sharpening motion without pressing down, to feel the angle and motion path.
Step 5: Sharpen the first blade with pull strokes
Start at the heel of the blade — the part closest to the pivot. This is where most of the cutting force is concentrated on fabric scissors, and it’s often the most dull section.
With light, even pressure, draw the blade toward you in a smooth arc from heel to tip. One continuous motion, heel to tip, maintains an even bevel. Pressing harder doesn’t sharpen faster — let the grit do the work.
Make 10–15 strokes. Count them. After 5–6 strokes, look at the blade edge under your task light: a faint gray-white line should be appearing along the bevel. That’s the scratch pattern from the whetstone — confirmation that you’re removing metal and creating a new edge.
Step 6: Sharpen the second blade
Repeat Step 4 and Step 5 on the other blade. Count your strokes and match the number from the first blade exactly. Asymmetric sharpening (12 strokes on one blade, 8 on the other) produces scissors that cut unevenly and pull fabric rather than slicing cleanly. Symmetry here is everything.
After completing both blades, run your thumbnail very gently perpendicular to the blade edge (not along it — that’s how you cut yourself). You should feel tiny burrs — microscopic metal folds pushed to the edge by the sharpening action. Burrs mean the edge has been worked. Good sign.
Step 7: Switch to the fine-grit side and hone
Flip the whetstone to the 6000-grit side. Repeat 5–8 pull strokes on each blade at the same angle. The fine grit refines the scratch pattern, removes burrs, and produces a smooth, polished edge rather than the slightly rough edge the 1000-grit side leaves behind.
After honing, the burrs should be gone. Running your thumbnail across the edge now should feel smooth and sharp rather than rough and jagged.
Step 8: Strop the blade (optional, but worth it for Gingher)
If you have a leather strop — even a piece of old belt leather — drag the blade edge trailing (spine first, never leading with the edge) across it 3–4 times per side. This straightens any remaining micro-deformation in the edge and gives a polished finish.
No leather? A piece of denim works. Run the blade trailing-edge along the denim 4–5 times. It sounds trivial but it’s the step that separates a merely sharp edge from a truly refined one.
Step 9: Test the blade
Cut a piece of printer paper or scrap fabric. Paper is the more objective test: a sharp blade slices cleanly with minimal pressure and leaves a crisp cut edge. A still-dull blade drags and tears. Fabric is more forgiving as a test medium; use paper if you’re unsure.
If the scissors still drag or tear: you need more strokes on the 1000-grit side (try another 10 per blade), or your angle was inconsistent and you need to reset. If the scissors cut but leave a slightly rough paper edge: one more round on the 6000-grit side will fix it.
Step 10: Clean the blade
Wipe both blades thoroughly with a damp cloth to remove honing oil, water, and metal particulate from the sharpening process. Dry immediately. Don’t let the scissors sit wet — flash rust forms on freshly sharpened high-carbon steel in minutes.
Inspect the blades under your task light one more time. Any gray grit still visible on the edge? Clean again.
Step 11: Lubricate the pivot
Apply one small drop of sewing machine oil or 3-in-1 oil directly to the pivot point where the blades cross. Work the scissors open and closed 4–5 times to distribute the oil into the bearing surfaces. Then wipe away any excess — oil on the blades transfers to fabric and paper, so a thin coating is fine but pooling is not.
This same sewing machine oil is what you’d use for your machine’s oiling points — it’s worth keeping a bottle in your repair kit for both purposes. If you’re also maintaining a Singer 99K or similar vintage machine alongside your scissors, our guide to Singer 99K timing issues covers how blade and machine maintenance often go hand-in-hand in a well-kept sewing setup.
Step 12: Final adjustment of pivot tension
With the scissors now sharp and lubricated, close them slowly and watch the blades meet. They should contact each other smoothly along their full length and close with gentle resistance, not flop shut or bind up. If they’re too stiff, loosen the pivot screw by 1/8 turn. If they’re too loose (blades rattle or spread apart), tighten by 1/8 turn.
Get this right before you put them back in the drawer. A sharp blade with incorrect pivot tension still won’t cut fabric properly.
Brand-Specific Sharpening Guides
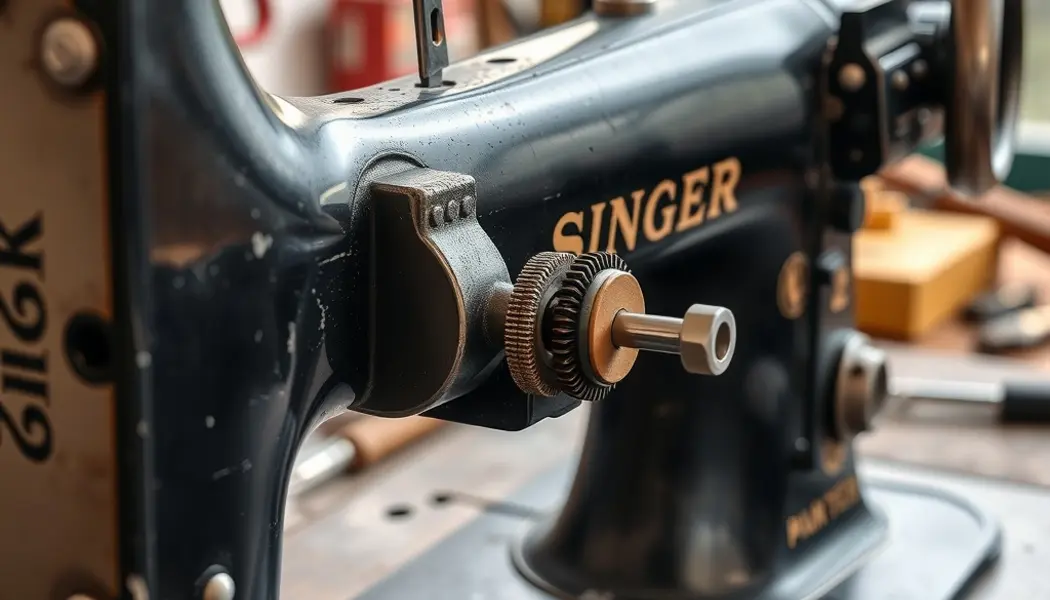
How to Sharpen Wiss Scissors
Wiss scissors from the Newark factory era (pre-1990 especially) have forged blades with a characteristic chrome or nickel plating on older models. The blade geometry is designed for fabric and general-purpose cutting at a 30–35° angle — slightly less acute than Gingher, giving the edge a bit more durability for varied cutting tasks.
The most common issue with Wiss scissors isn’t the blade, it’s the pivot. Over decades, the pivot screw tightens from repeated use and oxidation. If your Wiss blades are dragging — closing with visible resistance even after lubrication — try loosening the central screw by 1/4 turn before sharpening. The blades need to move freely past each other during cutting.
If the chrome plating is visibly pitted (small craters in the surface rather than the blade edge), a vinegar soak and brass brush won’t restore the plating — but it will clean the blade and make the steel underneath workable. Sharpened Wiss scissors with pitted plating still cut beautifully; the plating is cosmetic above the grind line.
Wiss W9 and W208 models are currently sought by sewers and vintage tool collectors alike. A properly sharpened W9 in good condition sells for $25–45 on resale markets — more than many “new” budget scissors cost retail.
How to Sharpen Gingher Scissors
Gingher scissors run at a 35–40° angle — the most acute of the common fabric scissors brands. This finer angle is what gives Gingher their reputation for thread-level precision, but it also means you need to be more consistent with your whetstone angle than you would be with heavier-duty blades.
The good news: Gingher steel forgives. Even a pair that’s been heavily used for 20 years and never sharpened tends to come back beautifully with a proper whetstone session. The forged blade construction means the steel beneath any surface wear is still sound.
Common issue with vintage Gingher: the handle screw can loosen over years of use, causing a very slight but annoying play in the blade action. Check the handle screw tightness (the one on the thumb ring, not the blade pivot) with a precision screwdriver — one size 0 Phillips usually does it. A snug handle screw is the difference between a scissors that feels precise and one that feels slightly sloppy.
A well-maintained Gingher pair can last 50+ years. If you’re keeping a vintage sewing setup in good condition — from your machine’s oil and timing adjustments down to the fabric tools — your Ginghers are worth every minute of maintenance.
How to Sharpen Henckels and Mundial Shears
Henckels (Germany, in production since the 1700s) uses a very acute blade angle — 25–30° — that produces exceptional precision for kitchen and fabric work. The flip side is that these blades are more sensitive to technique errors during sharpening. Use very light pressure on the whetstone and more strokes rather than heavier force. Over-aggressive sharpening on a Henckels blade can round the bevel and destroy the precision geometry you’re trying to restore.
Mundial blades are thicker than either Gingher or Henckels, built for professional kitchen and gardening use. Blade angle: 15–20°, similar to garden shears. A diamond plate or the coarse side of a 1000-grit whetstone is the right tool for Mundial shears — the thick blades need more material removed per session than fine fabric scissors.
Both brands justify the maintenance investment. Henckels scissors are actively collectible; a clean, sharp pair in good condition from the mid-20th century can sell for $50–100 to the right buyer.
Troubleshooting Common Sharpening Problems
Problem: Blades Are Misaligned and Won’t Close Evenly
Cause: Loose pivot screw, bent blade, or handle damage.
Start with the simplest fix: tighten the pivot screw 1/4 turn with a precision screwdriver and test. If the blades now align and close properly, that was the entire problem.
If the screw is tight but blades still don’t meet along their full length, lay the scissors flat on a table and press both blades down gently. If one blade visibly bows away from the surface, the blade is bent. Bent blades aren’t a DIY fix — a professional restorer with blade-straightening equipment is the right call. Sharpening bent blades won’t help; it gives you a sharp blade that still cuts wrong.
Problem: Blade Still Dull After Sharpening
Cause: Insufficient strokes, incorrect angle, or whetstone grit too fine for the level of dullness.
If you went straight to the 6000-grit side, start over on the 1000-grit side and put in 15–20 strokes per blade rather than 10. Severely dull scissors need real metal removal before honing makes any difference.
If you’re not sure about your angle, invest $10–15 in a blade angle guide from Amazon — a simple magnetic guide that clips to the blade and holds the correct angle while you stroke. Takes the guesswork out entirely.
Also double-check that you’re applying enough pressure. You should feel light resistance between blade and stone. If the blade is gliding frictionlessly, you’re barely touching the grit — increase downward pressure slightly.
Problem: Over-Sharpened Blades That Bend Instead of Cut
Cause: Too many strokes or angle too acute (too sharp a point on the bevel).
This is rare but correctable. Resharpen at a slightly more obtuse angle — if you were at 38°, try 32°. This builds back a little material on the secondary bevel and adds stability to the edge. On subsequent sessions, reduce stroke count by 30% once you’ve reached initial sharpness.
Problem: Can’t Get Symmetrical Sharpening
Cause: Unequal stroke counts or inconsistent starting position.
Count strokes on the first blade, write the number down if you need to, and match it exactly on the second. Place a small piece of painter’s tape on the pivot area of each blade as a tactile “start here” marker so you reliably begin every stroke at the heel rather than mid-blade.
An angle guide also helps here — when one variable (angle) is locked in mechanically, the other variable (consistency) becomes easier to maintain.
Problem: Rust Returns Within Days of Sharpening
Cause: Incomplete drying, improper storage, or insufficient oil barrier.
Freshly sharpened high-carbon steel is more reactive than polished, unworked steel — the scratch pattern from sharpening gives oxidation more surface area to start on. Dry blades thoroughly and immediately (hair dryer on low works well), apply a visible thin sheen of oil before storage, and store in a drawer or closed box rather than on an open workbench where humidity cycles accelerate corrosion.
Maintenance After Sharpening
The work doesn’t end when the scissors go back in the drawer.
Lubrication schedule: Oil the pivot monthly if you’re using the scissors weekly. For occasional-use scissors, oil before and after any significant cutting session. Sewing machine oil is ideal — thin viscosity, won’t gum up, and the same bottle covers your machine and your scissors.
Cleaning between uses: Fabric lint and small thread fragments accumulate at the pivot and between the blades. A quick pass with a toothbrush and dry cloth every few months keeps the pivot action clean. Sticky residue from tape or labels comes off with a little rubbing alcohol on a cotton swab.
When to re-sharpen: Heavy daily use (professional seamstress, frequent gardening) warrants sharpening 1–2 times per year. Moderate hobby use once a week falls in the once-yearly range. Occasional use every month or so means 2–3 years between sharpenings. The test is always the same: cut printer paper. Clean slice = still sharp. Drag or tear = time for the whetstone.
Minor edge maintenance between sharpenings: A few passes on the leather strop or denim every few months keeps the edge aligned between full sharpening sessions. This 2-minute maintenance step can push the interval between proper sharpenings from one year to two.
Monthly inspection routine: Hold the blades under a bright light and check for rust spots (treat immediately with vinegar + steel wool before they establish), check that the pivot screw hasn’t loosened, and confirm the blades align properly when closed. Catching problems early is the whole game with vintage tools.
Frequently Asked Questions
Can You Sharpen Vintage Scissors Without Taking Them Apart?
Yes — and for most vintage scissors in reasonable condition, you don’t need to disassemble anything. If the blades are properly aligned, pivot action is smooth, and both blade surfaces are accessible for sharpening strokes, you can work on them intact.
What Is the Difference Between Sharpening and Honing?
Sharpening removes metal from the blade edge to create a new, genuinely sharp bevel. It’s what a whetstone does on the 1000-grit side — actual abrasion, actual metal removal. For vintage scissors that haven’t been sharpened in years, this is the step that does the real work. It takes 10–15 minutes per pair and the results last 1–3 years depending on use.
How Often Should You Sharpen Vintage Scissors?
It depends almost entirely on use frequency. Heavy use — daily fabric cutting, frequent gardening — means sharpening 1–2 times per year. Moderate hobby use (2–3 sessions per week) falls in the once-yearly range. Occasional use, monthly or less, typically needs attention every 2–3 years.
Are Vintage Gingher and Wiss Scissors Worth Sharpening?
Without question. A new pair of Gingher 8-inch dressmaker’s shears runs $55–75 retail. DIY sharpening after you’ve bought your whetstone costs you nothing but 25 minutes. Professional sharpening runs $10–12 per pair. The math is unambiguous after the second or third sharpening session.
What Should I Do If My Vintage Scissors Are Too Rusty to Sharpen?
Start with a vinegar soak (30–60 minutes in white distilled vinegar) and a gentle scrub with #0000 steel wool. Surface rust — even fairly aggressive-looking discoloration — often responds well to this treatment and reveals perfectly sound blade steel underneath. This level of rust is not a problem; it’s an afternoon’s work.
Can You Use the Same Sharpening Method for Fabric Scissors and Garden Shears?
No — and using the wrong method on the wrong type is one of the most common DIY mistakes. The blade geometries are fundamentally different.