


Rangefinder Camera Calibration: Fix Out-of-Sync Rangefinders (DIY Guide)
Your Leica M3’s split-image patch is drifting off-center. Or your Canon P focuses fine at 10 feet but falls apart at infinity. You’re not imagining it — your rangefinder is out of sync, and you’re facing a choice: pay $250–$400 for a professional CLA, or pick up a few basic tools and calibrate it yourself for under $80. This guide walks you through both paths so you can decide what makes sense for your camera and your budget.
Rangefinder camera calibration means realigning the optical patch in your viewfinder so it matches the true focal plane of your lens. At its most basic, it involves locating and gently adjusting a single set screw that controls the rangefinder cam follower position. Most calibrations take 2–4 hours, cost $20–80 in tools, and can be done at home with a steady hand and a little patience.
What Does It Mean When a Rangefinder is Out of Sync?
The Patch and the Prism: How It’s Supposed to Work
A rangefinder camera uses two optical windows: the main viewfinder window and a smaller rangefinder window offset to one side. Light from both paths meets inside a half-silvered prism or mirror assembly, producing the “ghost image” or split-image patch you see when you focus.
As you rotate the focus ring, a mechanical cam pushes against a small follower arm that moves the prism laterally. When the patch image aligns with the main image — they snap together into one sharp image — the lens is at the correct focus distance. On the Leica M2 and M3, this mechanical linkage runs along the front of the camera body. The brass cam follower rides directly against the lens’s focus cam as you mount and rotate the lens.
When everything works correctly, turning the focus ring moves the patch smoothly and predictably from close focus to infinity. The system is elegant, but it relies on that follower arm staying in perfect contact with the cam.
Why Rangefinders Drift Out of Sync
The brass cam follower is the most common culprit. Decades of use wear down the tip of the follower by a fraction of a millimeter — enough to throw off focus accuracy at certain distances. On cameras from the 1950s and 60s, we’re talking about 60–70 years of use. Even light use adds up.
Impact damage is the other big one. Drop a Leica M4 once on a hard floor and the prism or its mounting bracket can shift. The damage may be invisible externally but immediately apparent in the viewfinder patch.
Old lubricants are often overlooked as a cause. Original grease from the 1950s turns to a sticky wax over time, making the follower arm sticky or binding it entirely. The result looks like a calibration problem — the patch barely moves — but is actually a lubrication failure.
Finally, improper prior reassembly accounts for a surprising number of “out of sync” cameras on the used market. Someone opened it up, moved something, and put it back wrong.
The Symptom Decoder: Is Your Rangefinder Really Out of Sync?
The Infinity Focus Test
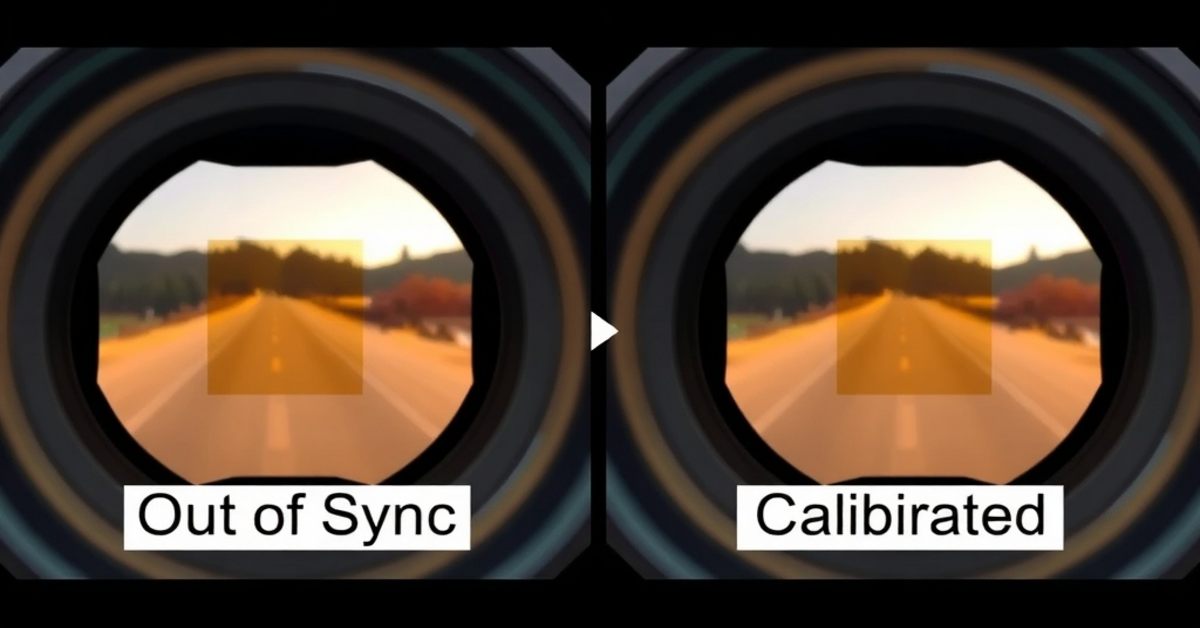
Find a distant subject — a building, a radio tower, anything at least 300 meters away. Set your lens to the infinity mark (∞). Look through the viewfinder. The rangefinder patch should perfectly align with the background: no ghost image, no offset split.
If the patch drifts left, right, up, or down at infinity, your rangefinder is out of horizontal or vertical alignment. If it aligns at infinity but drifts at closer distances, you have a cam follower wear problem rather than a simple adjustment issue.
Close-Range Alignment Check
Test at 1m, 3m, and 10m by focusing on a flat, high-contrast target — a sheet of newspaper taped to a wall works well. Measure the actual distance carefully. Align the patch to your target, then check with a loupe whether the film plane (marked on top of the camera body) is truly the right distance away.
A camera that’s accurate at 1m but off at infinity usually has a follower wear problem. A camera that’s consistently off at every distance by the same amount is a pure calibration adjustment, and the easiest type to fix.
False Positives to Rule Out
Before you open anything up, check these first:
| Symptom | Likely Cause | Action |
|---|---|---|
| Patch moves but blurry images | Dirty prism or patch mirror | Clean optics first |
| Patch doesn’t move at all | Dried lubricant, stuck follower | Lubricate before adjusting |
| Sharp at viewfinder, blurry on film | Out-of-sync RF or film flatness issue | Test roll first, then calibrate |
| Patch drifts only with one lens | Lens cam worn, not camera body | Test with second lens |
| Double image (not patch) | Eye position off-axis | Reposition your eye behind eyepiece |
| Images soft wide open only | Aperture / shutter issue, not RF | Test stopped down |
Eye position matters more than most people realize. A rangefinder viewfinder has a narrow eye box. Move your eye even 3–4mm off-center and the patch appears to drift. Before calling anything broken, verify alignment with your eye centered directly behind the eyepiece.
DIY vs. Professional Service: Cost & Complexity Breakdown
| Factor | DIY Calibration | Professional CLA |
|---|---|---|
| Cost | $20–80 (tools, reusable) | $250–400 + $30–60 shipping |
| Time | 2–4 hours | 4–12 weeks turnaround |
| Scope | Rangefinder alignment only | All mechanisms, seals, curtains |
| Risk | Stripped screws, wrong lube | Near zero if reputable shop |
| Skill required | Basic mechanical confidence | None (you ship it) |
| Best for | Soviet RFs, Canon P, repeat jobs | Leica M6, damaged cameras, high-value bodies |
When to DIY Calibrate
You’re a good candidate for DIY if you’ve done any basic mechanical work before — taken apart a bicycle derailleur, replaced a watch battery, adjusted a Singer timing. The movements are small but not mysterious. Soviet cameras like the Zorki 4 and FED 5V are genuinely beginner-friendly: fewer precision tolerances, heavier construction, and cheaper to replace if something goes wrong.
DIY also makes sense if you shoot multiple rangefinder cameras. Once you’ve bought a set of Wiha jeweler’s screwdrivers and a bottle of clock oil, those tools work across a dozen cameras. The economics flip quickly: one CLA costs $300; tools to do ten calibrations yourself cost $60.
When to Send to a Professional
Send it in if your camera is a Leica M6 or later. These are $1,000–2,500+ bodies. The M6 TTL in particular has a meter coupling that interacts with the rangefinder mechanism; a small misadjustment can affect both focus accuracy and metering. That’s not a beginner job.
Send it in if the camera already shows damage: grinding sounds when focusing, bent or missing parts, obvious dents near the rangefinder window. These indicate problems beyond calibration. Send it in if you’ve stripped a screw or found fungus inside the prism — for fungus specifically, check our guide on removing fungus from camera optics to understand the cleaning involved, but prism work is best left to professionals.
Tools You’ll Need (DIY Approach)
Precision Tools
The single most important tool is a quality jeweler’s screwdriver set. Wiha and Wera both make sets that won’t cam out and strip the tiny JIS screws found on Japanese cameras. A cheap import set from an electronics store will round the heads of a 40-year-old brass screw on first contact. Don’t risk it. The Wiha 26190 set covers Phillips #00, #000, and flat 0.8–3.0mm — enough for most rangefinder topplate screws.
You’ll also want a 10x or stronger loupe (watchmaker’s loupe or clip-on smartphone macro) to inspect the cam follower for wear and monitor the prism assembly. A magnified view reveals things that are invisible to the naked eye.
- Wiha 26190 jeweler’s screwdriver set [AFFILIATE LINK]
- 10x watchmaker’s loupe [AFFILIATE LINK]
- Rubber jar opener or lens wrench for filter rings
Lubricants & Solvents
Use clock oil (Moebius 9010 or D5) or proper sewing machine oil for the cam follower and focus gears. Both are light, non-gumming, and correct for fine metal-on-metal contact. A single drop is all you need — these aren’t bicycle chains.
Never use 3-in-1 household oil, WD-40, gun oil, or petroleum jelly. These either evaporate and leave residue, attract dust, or are too thick for precision mechanics. 3-in-1 in a rangefinder mechanism will gum up within a year and turn a simple calibration job into a full disassembly and solvent cleaning.
For cleaning: isopropyl alcohol (IPA, 90%+) for optics and metal parts. Naphtha (lighter fluid) for stubborn old grease. A few cotton swabs and lens cleaning tissue.
- Moebius 9010 clock oil [AFFILIATE LINK]
- IPA 90%+ [AFFILIATE LINK]
Optional But Helpful
A service manual specific to your camera is worth finding before you start. Butkus.org has free PDF manuals for hundreds of cameras. A small magnetic parts tray keeps screws organized. A calibration target — a printed chart with precise distances marked on tape on your floor — makes the post-calibration test much faster and more reliable.
Model-Specific Calibration Guides
Leica M-Series (M2, M3, M4, M6)
The Leica M system is the benchmark for rangefinder design, which also means it’s the most precise — and least forgiving of sloppy adjustments. The rangefinder mechanism sits beneath the topplate. To access it, you’ll remove three screws: one on each end of the top plate and one hidden under the accessory shoe (on most M bodies).
The cam follower on Leica M cameras is a small lever with a sapphire or hardened steel tip that rides against the lens cam as you focus. Wear on this tip produces errors that are worst at close focus distances. You can inspect it under the loupe after topplate removal — a worn follower has a flat or beveled tip instead of a rounded one. Replacement followers are available from specialty suppliers like Sherry Krauter or DAG Camera.
The horizontal adjustment screw on the M2 and M3 sits just behind the cam follower mount — a tiny flat-head set screw accessible once the topplate is off. Turn it in small increments: 1/8 turn changes alignment noticeably at infinity. The vertical adjustment is a separate eccentric screw. Adjust horizontal first, then vertical.
For the Leica M6: the meter coupling arm runs alongside the rangefinder cam follower. Moving the adjustment screw affects metering. We strongly recommend getting the M6 professionally serviced rather than attempting a DIY calibration. The cost of getting it wrong on a $1,500+ camera is not worth the $300 saved.
Canon P, 7, and L1
Canon’s LTM (L39 thread-mount) rangefinders share a similar cam-follower design to Leica but are built to slightly looser tolerances. They’re more forgiving, and parts are cheaper if something goes wrong. The Canon P and Canon 7 are excellent first rangefinder calibration projects.
Access is via topplate removal — four screws, the rewind knob (unscrew counterclockwise), and the advance knob (held with a friction spanner or careful screwdriver work). The rewind knob has a spring underneath it on the Canon P. Don’t let that spring fly across the room. Set it aside carefully and photograph it first.
The cam follower on the Canon 7 is known to wear more quickly than on Leica bodies because it uses a softer brass alloy. If close-focus accuracy is off, check for follower wear before adjusting the calibration screw. A worn follower won’t be fully fixed by calibration alone.
Soviet Rangefinders (Zorki 4, FED 5V)
The Zorki 4 and FED 5V are where many people learn rangefinder repair. The mechanics are simpler, the tolerances are looser (by design and by necessity), and replacement parts are available and cheap. A Zorki 4 in need of calibration is a learning opportunity. A Leica M3 in need of calibration is a test of nerves.
On Soviet cameras, lubrication failure causes more “calibration” problems than actual misadjustment. Before touching any adjustment screws on a Zorki or FED, lubricate the cam follower and focus helicoid first. Often the patch starts moving correctly and no further adjustment is needed. These cameras sat in warehouses for decades; the original grease dried out years ago.
If lubrication alone doesn’t fix the patch alignment, the topplate adjustment on the Zorki 4 is accessible via a similar set screw to the Leica system. The Zorki’s rangefinder base length is shorter than a Leica M, so accuracy at close focus distances is inherently less precise — set reasonable expectations.
Voigtländer Bessa R and R2
The Bessa R and R2 are modern cameras (made in the 1990s–2000s) with a sealed, compact rangefinder mechanism. They’re built to tighter manufacturing tolerances than Soviet cameras, and the rangefinder rarely drifts on its own unless the camera has been dropped.
If your Bessa R2 is out of sync, send it to a professional. The mechanism is accessible but tightly integrated with the frame counter and advance system. Getting access without disturbing other components requires specific knowledge of the Cosina-built internals. The cameras aren’t particularly expensive ($150–300), but the repair is fiddly enough that a professional service at $150–200 is genuinely worth it here.
Yashica Electro 35
The Yashica Electro 35 is a fixed-lens rangefinder with a hybrid mechanical and electronic exposure system. The rangefinder mechanism is accessed via topplate removal — three visible screws plus the advance and rewind knobs. The topplate also houses the battery check circuit and contacts; be careful not to bend or stress those leads.
The Electro 35’s rangefinder adjustment screw is accessible after topplate removal and works similarly to other designs. The complication is that the camera uses a capacitor-based electronic shutter, and that capacitor may hold a charge even with batteries removed. For general rangefinder access you’re not near the capacitor, but be aware of the electronics. If you’re already dealing with the Electro 35’s notorious “pad of death” shutter failure, check the electronics before investing in rangefinder calibration — a camera with a failed shutter isn’t worth calibrating.
Step-by-Step DIY Calibration Process
Pre-Work
- Document your baseline. Before touching anything, shoot a test roll (or test without film) and note exactly where the patch drifts: at infinity, at 3m, at 1m. Write it down. You need a reference point.
- Photograph everything. Take clear photos of the topplate, screw positions, and the area around the rangefinder window before you open the camera. You want a record of where everything lives.
- Gather tools and clear your workspace. White surface, good light, magnetic parts tray. Nothing worse than losing a 1mm screw in carpet.
Disassembly
- Remove batteries and lens. Always. No exceptions. On the Yashica Electro 35, wait 30 minutes after battery removal before proceeding.
- Remove topplate screws. Note the length and position of each screw — they’re often different lengths. Use your magnetic tray.
- Lift the topplate carefully. It won’t come free immediately. There may be a rewind knob, advance lever, or strap lug attachment beneath. Wiggle gently; never force.
- Inspect the prism and cam follower. Under your loupe, look for the cam follower tip condition (worn flat?), any visible grime or old grease on the prism surfaces, and the condition of the rangefinder mirror or half-silvered beam splitter.
Cleaning & Lubrication
- Clean the rangefinder patch and prism. Use lens tissue moistened with IPA. One pass, one direction. Don’t scrub. Haze on the patch prism is often mistaken for a calibration problem — cleaning it first can restore the patch clarity dramatically.
- Clean focus gears and cam follower contact area. A cotton swab with naphtha dissolves old dried grease. Let it dry completely (5 minutes) before applying fresh lubricant.
- Apply one drop of clock oil to the cam follower contact point and focus gear. One drop. Spread it with the tip of a toothpick if needed. You’re lubricating, not soaking.
- Work the focus ring 10–15 times. Full range of motion, slowly. This distributes the lubricant and lets you feel whether the movement has improved.
Patch Alignment
- Set focus to infinity. Point the camera at a distant object 300m+ away.
- Locate the horizontal adjustment screw. On most cameras, this is accessible with the topplate off and sits near the cam follower pivot. On the Leica M3, it’s a small flat-head set screw. On the Zorki 4, it’s a slightly larger screw covered by a lock nut.
- Micro-adjust in 1/8-turn increments. Turn, check. Turn, check. Never more than 1/8 turn at a time. The effect on the patch is immediate and easy to over-correct.
- Check movement across the focus range. After adjusting infinity, check 3m and 1m. If infinity is correct but close focus is off, you may have a worn cam follower rather than a pure calibration issue.
Reassembly & Testing
- Reassemble the topplate. Snug the screws down gently — brass threads strip at very low torque. Finger-tight plus 1/4 turn with the screwdriver is enough.
- Reinstall lens and battery. Recheck the focus ring movement before inserting film.
- Re-run the infinity test. With the topplate back on, confirm the patch still aligns at infinity. Reassembly can slightly change things.
- Multi-distance test. Focus at 1m, 3m, 10m, and infinity with a flat target at measured distances. Shoot a test roll before declaring success.
Common Mistakes to Avoid
Over-tightening the adjustment screw. The set screws in most rangefinder mechanisms are tiny brass screws in aluminum bodies. Strip them once and your repair becomes a full professional job. Snug is enough.
Using the wrong lubricant. 3-in-1 household oil, gun oil, or anything petroleum-heavy will gum up in a precision mechanism within 12–18 months. When you return to the camera and the patch is stuck again, you’ll have to strip the mechanism and clean out the residue. Use clock oil or sewing machine oil.
Forcing the focus ring during disassembly. Old dried grease makes the helicoid stiff. Forcing it can damage the focus cam or the follower arm. Lubricate first, work it loose gently.
Assuming all rangefinder mechanisms are the same. They’re not. The Leica M3 horizontal adjustment screw is in a different location than the Canon P’s. The Zorki 4 has a lock nut that must be loosened before adjusting. Read the service manual for your specific camera.
Skipping incremental testing. Don’t fully reassemble and then test. Check alignment after the cleaning step, after lubrication, and after each adjustment increment. If you wait until everything is back together, you can’t tell which step fixed it — or broke it.
When Calibration Isn’t Enough: Finding a Repair Professional
Red Flags: When to Stop and Send to a Pro
Some symptoms tell you to put the tools down. Grinding or scraping sounds when focusing means metal-on-metal contact that shouldn’t be there: a bent follower arm, debris in the gear train, or a damaged cam. Continuing to operate the camera accelerates the damage.
A stripped screw head is another stop point. If you cam out a topplate screw, don’t try to improvise. A professional can extract stripped screws without damaging the surrounding body. Trying to drill or pick it out yourself on a Leica body is how you turn a $400 repair into a $1,200 one.
Fungus on the prism or rangefinder mirror requires careful disassembly and chemical cleaning. It’s not impossible to DIY, but it involves more disassembly than a standard calibration. If you’re already dealing with fungus elsewhere in the optics, check our complete fungus removal guide first to understand the process.
Selecting a Repair Service
For Leica M bodies specifically, the recognized specialists in the US are DAG Camera (Don Goldberg), Sherry Krauter, and Youxin Ye. All three have multi-year waiting lists but deliver work that lasts another 30–40 years. For Canon LTM cameras, PBS Camera in Tokyo ships internationally and does excellent work.
KEH Camera in Atlanta accepts cameras for service referrals and has relationships with reputable technicians. For Soviet cameras, many users on the Rangefinderforum community do excellent work for reasonable rates.
What to look for: a written estimate before work begins, experience with your specific model (ask directly), and a 90-day warranty on the repair. Avoid shops that won’t discuss which technician will handle the work.
Frequently Asked Questions
How do I know if my rangefinder is out of sync?
Focus on a distant object with the lens set to the infinity mark. If the patch drifts off-center or fails to align cleanly with the background, your rangefinder is out of sync. Test at multiple distances (1m, 3m, infinity) to understand whether the problem is consistent or distance-specific.
Can I calibrate a rangefinder myself without experience?
Yes, if you’re comfortable with basic mechanical work. Soviet cameras like the Zorki 4 and FED 5V are the most forgiving: simpler mechanics, looser tolerances, inexpensive to replace. Leicas require more precision and patience. Expect 2–4 hours for your first calibration attempt.
What’s the difference between calibration and a full CLA?
Calibration fixes rangefinder patch alignment only — typically $20–80 in DIY tools. A full CLA (Clean, Lubricate, Adjust) covers all mechanical systems: shutter speeds, aperture blades, curtains, seals, and rangefinder. Professional CLAs run $250–400 and are comprehensive overhauls. If your camera shoots well but focuses off, calibration alone is usually all you need.
Why is my Leica M2 focusing sharp in the viewfinder but blurry on film?
Your rangefinder is likely out of sync — calibration will fix that. But also rule out shutter speed accuracy (a slow shutter on a moving subject blurs film regardless of focus), aperture issues (a sticky aperture blade changes effective depth of field), and film development problems. Shoot a controlled test: a flat brick wall, tripod, multiple apertures. If focus is consistently off by a fixed amount, it’s the rangefinder.
How much does rangefinder calibration cost?
DIY calibration costs $20–80 in tools — a screwdriver set, loupe, and lubricant. Those tools work across multiple cameras, so the per-camera cost drops after the first one. Professional CLA costs $250–400 plus $30–60 shipping. If you’re only dealing with one camera and it’s a valuable one, professional service is often the better value.
Can a damaged rangefinder prism be replaced?
Yes, but it’s a professional job. Replacement prisms are available for common models — typically $50–150 for the part — plus $150–250 in labor for proper installation and post-installation calibration. It’s worth pursuing if your prism has fungus damage or a chip that affects patch clarity. For cameras worth over $300, prism replacement is usually economically sensible.