


How to Remove Scratches from a Watch Crystal: Complete Acrylic, Mineral & Sapphire Guide
How to Remove Scratches from a Watch Crystal: Complete Acrylic, Mineral & Sapphire Guide
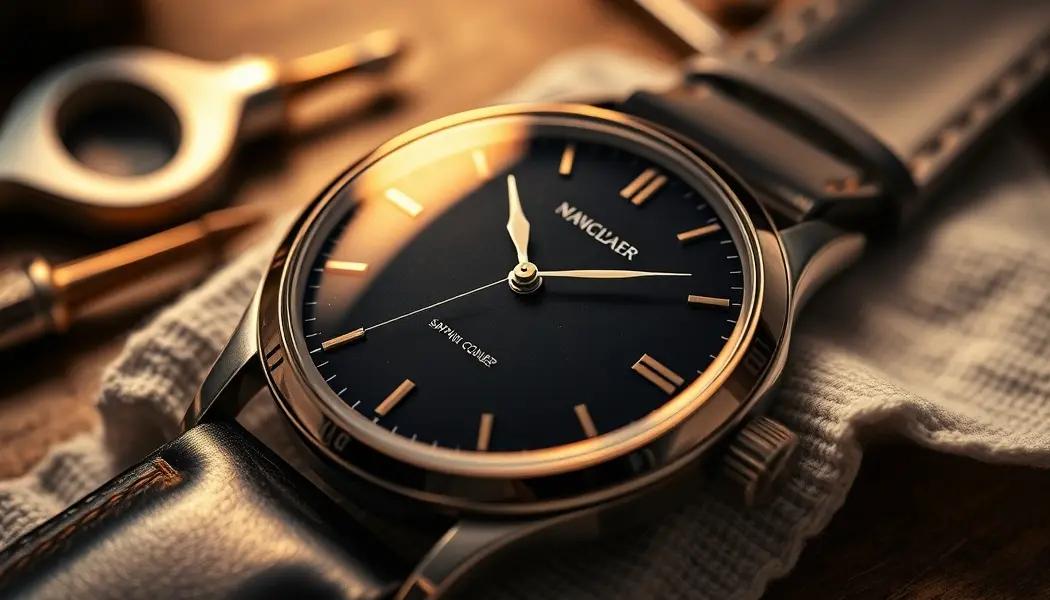
That familiar sinking feeling when you glance at your Seiko 5 under fluorescent light and see a web of fine scratches across the crystal — you know the one. The good news: most watch crystal scratches are fixable at home for around $30, and the whole job takes less than an hour.
You can remove scratches from a watch crystal using fine-grit polishing compounds like Novus plastic polish, applied in a grit progression starting with #3 (heavy cut) through #1 (final shine). The process takes 15–45 minutes for moderate scratches and works best on acrylic and mineral glass crystals. Sapphire crystals are too hard for DIY polishing and require professional replacement.
This guide covers all three crystal types — acrylic, mineral glass, and sapphire — so you’ll know exactly what you’re dealing with before you pick up a cloth.
Do You Actually Need to Fix It?
Before you reach for the polishing kit, take a minute to be honest with yourself about the damage. Not every scratched crystal is worth restoring, and knowing when to quit before you start will save you a lot of frustration.
Polishing makes sense when:
- Scratches are surface-level (light catches them at an angle, but you can’t feel them with a fingernail)
- The crystal is acrylic or mineral glass — materials that respond to polishing
- The watch has personal or monetary value that justifies 30–45 minutes of your time
- You want to develop a useful skill that applies to future restoration projects
Skip polishing and replace instead when:
- The crystal is cracked (polishing won’t fix structural damage)
- You can feel deep gouges with a fingernail and they’ve been there for years
- The crystal is sapphire (more on this below — it’s a hard no for DIY)
- The crystal has fogged from internal moisture damage — that’s a sealing issue, not a scratch issue
Is Your Crystal Damaged Beyond Repair?
The fingernail test is your best friend here. Run your fingernail lightly across the scratched area. If your nail skips over the scratches — catching slightly but not dropping into them — those scratches are surface-level and will respond beautifully to polishing. If your nail actually drops into a groove, that’s a genuine gouge. You can reduce how visible it looks, but it won’t disappear entirely.
Cracks are non-negotiable. A cracked crystal, no matter how minor the crack looks, needs replacement. Polishing won’t help, and continued wear risks pushing the crack further or letting moisture into the movement — the one scenario that turns a cosmetic problem into an expensive movement repair.
Cost-Benefit Math: Should You DIY or Replace?
Here’s the honest comparison. A Novus plastic polish kit runs about $15–$20 on Amazon. Add microfiber cloths ($8–$12) and a soft applicator pad ($5–$8) and you’re looking at $30–$40 total — with supplies left over for your next three projects.
Professional crystal replacement? Budget $50–$150 for affordable vintage pieces like a Timex Marlin or entry-level Seiko. For an Omega or vintage Rolex, replacement ranges from $200 to $500+, sometimes more for uncommon references. If your watch is worth less than what a jeweler charges to replace the crystal, the decision practically makes itself.
The one place I’d argue for professional work regardless of cost: if it’s a sapphire crystal on a watch you care about. Don’t touch it yourself. More on that in the next section.
Identifying Your Crystal Type (The Material Matters)
This is the step most guides skip — and it’s the one that matters most. Attack an acrylic crystal with the right technique and you’ll have a nearly new-looking result. Attack it with the wrong assumptions and you’ll cloud the surface in minutes. I’ve seen people ruin a perfectly good acrylic crystal by assuming mineral glass needed more aggressive treatment.
Each material has a completely different repair approach. Get this right and everything else falls into place.
Quick Crystal Type Identification Chart
| Property | Acrylic | Mineral Glass | Sapphire |
|---|---|---|---|
| Hardness | Soft — scratches easily | Medium — resists fingernail | Hard — resists almost everything |
| Scratch Appearance | Milky, dull, easy to see | Sharp-edged, angle-dependent | Rarely scratches at all |
| Typical Watches | Pre-1990s vintage (early Seiko 5, Timex Marlin, early Rolex Submariner) | 1990s–2000s affordable watches | 2000s+ luxury; some premium vintage |
| Polishing Effectiveness | 85–95% — excellent results | 60–70% — moderate improvement | 0% — not recommended |
| Cost to Replace | $20–$50 | $30–$100 | $150–$500+ |
| Tap Sound | Dull, muted thud | Clearer, more resonant | High, clear ring |
3 Simple Tests to Identify Your Crystal
You don’t need any special equipment for these — just good light and a quiet moment.
Test 1: The Hardness Test
Find a spot on the very edge of the crystal — not the visible face — and gently try to catch it with your fingernail. Acrylic yields immediately: you’ll feel it give, maybe leave a tiny mark. Mineral glass resists without budging. Sapphire won’t even acknowledge your fingernail exists. Be careful here — test the edge only, never the face of the crystal.
Test 2: The Light Test
Hold the watch at an angle under a bright lamp. Acrylic, especially aged acrylic from the 1970s or 1980s, often has a slight cloudiness or yellowing. On an old Seiko or Timex, this is almost diagnostic on its own — that warm, slightly hazy look is pure acrylic. Mineral glass stays clear. Sapphire has a distinctly glassy, sometimes slightly reflective quality with no haze at all.
Test 3: The Tap Test
Tap the crystal gently with a metal object — the back of your tweezers or the watch case itself works fine. Acrylic produces a dull, plastic-sounding thud. Mineral glass gives a noticeably cleaner tone. Sapphire rings out with a high, almost crystalline note that’s immediately recognizable once you’ve heard it.
If you have the original documentation or box for your watch, the crystal type is often listed in the specifications. Failing that, check the model number on the caseback against a watch database — Seiko, Rolex, and Omega all have extensive online references that specify crystal type by reference number.
Tools & Materials You’ll Need
You don’t need a watchmaker’s bench for this job. The essentials are available on Amazon for under $40, and you’ll use them repeatedly across future projects.
Essential Kit (Budget: $30–$40)
Novus Plastic Polish Kit (Grits #1, #2, #3)
This is the industry standard, full stop. Novus was originally developed for polishing acrylic aircraft windows — the stuff they put in airplane cockpits that needs to stay clear under harsh conditions. Watch enthusiasts discovered it works brilliantly on vintage crystals, and it’s been the go-to recommendation across r/Watches for years. The three-step system gives you proper grit progression: #3 for the heavy lifting, #2 for refinement, #1 for final clarity. A kit runs $15–$20 on Amazon and lasts for dozens of projects.
Microfiber Cloths (Pack of 10–15)
Lint-free cloths are non-negotiable. Standard cotton rags can leave fibers behind or introduce micro-scratches from dust particles trapped in the fabric. A 10-pack of quality microfiber cloths from Amazon costs $8–$12 and gives you clean cloths for each stage of the process.
Soft Foam Applicator Pads
These give you better pressure control than fingers and prevent direct cloth contact on the first passes. A basic set of foam buffing pads runs $5–$8 on Amazon and makes the whole process feel more controlled and intentional.
Total essential cost: ~$35–$40
Optional Tools (Worth Having for Repeat Projects)
A watch crystal removal tool or case opener set ($10–$25 on eBay or Etsy) is useful if you prefer working on the crystal off the watch. Most vintage acrylic crystals on snap-fit cases can be removed without specialized tools — gentle, even pressure from your thumbs often does it. But if you’re dealing with a pressed-fit crystal on a 1970s Seiko, a proper case opener tool makes removal much safer.
A desk lamp or LED headlamp (~$15–$30) is optional but useful for inspecting scratches before and after each grit stage. Natural sunlight works fine, but a directional lamp lets you tilt and examine the crystal without moving to a window every five minutes.
Products to Avoid
Toothpaste — The most persistent myth in this hobby. Yes, it’s mildly abrasive. No, it’s not a controlled abrasive — the particle size is inconsistent and you have zero grit progression. The Reddit consensus after thousands of “I tried toothpaste and now it looks worse” threads: just don’t.
Generic brass polish (Brasso and similar) — More aggressive than Novus, less precise, and easy to over-apply on acrylic. It can work in a pinch on mineral glass, but there’s no reason to reach for it when Novus exists.
Commercial jewelry polish — Designed for metals and gemstones, not watch crystals. Too aggressive for acrylic and won’t do anything useful for mineral glass.
Step-by-Step Polishing Guide
This is the section you came for. Follow the steps in order and don’t rush the grit progression — that’s where most mistakes happen.
Step 1: Preparation & Assessment (5–10 minutes)
Assess your scratches first.
In good angled light, look at the crystal closely and classify what you’re dealing with:
- Surface scratches: Catch light at angles, invisible from straight on, fingernail slides over them
- Medium scratches: Visible from most angles, slight depth you can feel lightly
- Deep gouges: Fingernail drops in, clearly physical damage
Take a reference photo at a 45-degree angle with your desk lamp aimed at the crystal. This sounds unnecessary right now, but after 20 minutes of polishing when everything looks the same to your tired eyes, you’ll be glad you have a before shot to compare.
Clean the crystal.
Wash with lukewarm water and a drop of mild soap, use a soft brush to clear any grit from the bezel edges, then pat dry with a lint-free cloth. Any debris sitting on the crystal surface during polishing will cause new scratches. This step matters more than people think.
Decide whether to remove the crystal.
For most vintage acrylic watches — your Timex Marlin, Seiko 5, older Citizen — you can polish with the crystal in the case without any issues. Just tape off the bezel edges with painter’s tape if you’re worried about compound getting into the gap.
If you need to remove the crystal, work slowly and use a case opener tool. Place the crystal on a clean, folded microfiber cloth while you work. If you’re not confident removing it, just polish in-case — you’ll get 90% of the same results.
Step 2: Polish Progression – Novus #3 Heavy Cut Cleaner (The Coarse Cut)
Grit progression is the foundation of this whole technique. You start with the most aggressive compound to remove the actual scratches, then progressively finer compounds to restore clarity. Skipping levels is the most common beginner mistake — it leaves you with haze you can’t understand the source of.
- Apply a pea-sized amount of Novus #3 to a clean foam applicator pad.
- Using light-to-moderate pressure — think polishing shoes, not scrubbing grout — work in circular motions across the scratched area.
- Keep the compound moving. Don’t let it dry on the surface.
- Work for 3–7 minutes depending on scratch depth. Start at the edges of the crystal before working toward the center.
- After 5 minutes, wipe clean with a damp microfiber cloth and check your progress under the lamp.
- Scratches visibly fading? Good — move to Step 3. Still prominent? Give it 2–3 more minutes.
Pressure guide: Light-to-moderate is key. If you’re pressing hard enough to see the crystal flex, you’re pressing too hard. Consistent, even pressure in slow circles is what produces results — not force.
Step 3: Polish Progression – Novus #2 Fine Scratch Remover
Novus #2 bridges the gap between removal and clarity. This is where the crystal starts looking genuinely better, not just different.
- Wipe the crystal completely clean with a damp cloth. Remove all Novus #3 residue before proceeding.
- Dry thoroughly with a lint-free cloth.
- Apply Novus #2 Fine Scratch Remover to a fresh applicator pad.
- Work in a slightly different motion pattern than Step 2 — if you used pure circles, try a cross-hatch pattern here.
- Light pressure, circular/cross-hatch motions for 4–8 minutes.
- The crystal should start looking noticeably clearer. Fine scratches will appear to recede.
- Wipe clean and inspect under bright light.
If most fine scratches are gone, move to Step 4. If medium scratches are still clearly visible, do another 3-minute pass. Don’t keep going beyond 15 minutes total at this grit level — if medium scratches aren’t improving after that, you’re dealing with a deep gouge that polishing won’t fully fix.
Step 4: Final Polish – Novus #1 Plastic Clean & Shine (Clarity & Shine)
This is the satisfying part. Novus #1 removes the haze left by the previous compounds and brings the crystal back to full clarity.
- Clean the crystal again completely, then dry it.
- Use a fresh, clean applicator pad — this is non-negotiable. Old pads carry residue from coarser compounds and will leave haze.
- Apply a thin layer of Novus #1.
- Very light pressure, slow circular motions for 3–5 minutes.
- The crystal should start showing a real shine — almost like glass, not plastic.
- Wipe with a clean lint-free cloth and check at an angle under light.
Hold the crystal up to a lamp at 45 degrees. Scratches should be nearly invisible. The surface should have subtle clarity and reflectivity. If it still looks slightly hazy, do one more 2-minute pass with fresh Novus #1.
Step 5: Final Clean & Reinstall (5 minutes)
- Clean the crystal one final time with a slightly damp microfiber cloth.
- Dry with a clean lint-free cloth, working from center outward to avoid streaks.
- Do a final inspection in natural sunlight if possible — artificial light can hide residual haze.
- If reinstalling the crystal: reverse the removal procedure, applying slow, even pressure. Patience here prevents cracking.
- Leave the watch for 30 minutes before wearing to let any moisture from cleaning evaporate.
Compare to your reference photo. If you’ve been thorough with the grit progression, the difference should be genuinely impressive — surface scratches nearly gone, medium scratches significantly reduced, crystal with real clarity again.
Total time investment: 30–45 minutes for moderate scratches. Light scratches: 20 minutes. A heavily scratched daily-wear crystal with years of accumulation: up to an hour.
Troubleshooting: Common Mistakes & How to Fix Them
Even with the right technique, things go sideways sometimes. Here’s what actually happens and how to recover.
“I Over-Polished and Now It’s Cloudy”
This happens when you spend too long with an aggressive compound — especially Novus #3 on acrylic. You’ve abraded the surface faster than the compound can refine it.
Recovery: Switch to Novus #2 or #1 immediately and work gently. You’re not removing more material now — you’re refining the surface you’ve already exposed. Five to ten minutes with Novus #2 followed by a proper Novus #1 finish usually restores full clarity. Going forward: take 5-minute progress checks and don’t exceed 10 minutes per compound stage.
“There Are Visible Swirl Marks After Polishing”
Swirl marks mean you applied compound with a dirty cloth or pad, or the crystal had dust on it when you started polishing. The particles embedded in the cloth dragged across the surface.
Recovery: Clean the crystal completely, get a fresh applicator pad, and do a final pass with Novus #1 under very light pressure. Three to five minutes should remove swirl marks entirely. Prevention is simpler: always start with clean equipment and wipe the crystal between every grit change.
“The Scratch Is Still There After 30 Minutes”
If you’ve spent a serious 20-minute pass at each grit level and a deep scratch is still visible, accept that it’s a physical gouge that polishing won’t fully eliminate. You can reduce how visible it is — polish brings it from “obvious” to “you have to look for it” — but it won’t disappear.
At this point you have two options: accept the remaining scratch as character (vintage watches are supposed to show use, and there’s nothing wrong with that) or pursue professional replacement. A reputable watchmaker or the brand’s service center can match the original crystal specification exactly.
“Is It Safe to Use a Rotary Tool?”
Yes, but only for people who’ve already done this by hand a few times. A rotary buffer removes material faster, which means mistakes happen faster too. One wrong angle, one momentary excess of pressure — you can create new problems faster than you can fix the original scratch.
If you do use a rotary tool, run it at the lowest speed setting, use very light pressure, and keep the tool moving constantly. Never let it sit in one spot. For your first few crystals, hand polishing is slower but gives you real feedback on what’s happening under the pad.
“Will the Scratches Come Back?”
Yes. You’re wearing the watch, and acrylic scratches. That’s not a failure of the polishing process — it’s physics. The payoff is that polished crystals look significantly cleaner for longer, and each polishing session essentially resets the appearance. Most daily-wear vintage watches benefit from a full crystal polish every 6–12 months. Some collectors build it into their regular maintenance schedule alongside movement cleaning.
Frequently Asked Questions
Can You Remove Scratches from a Sapphire Watch Crystal?
Not at home — and honestly, not worth attempting. Sapphire sits at 9 on the Mohs hardness scale, just below diamond. The polishing compounds that work on acrylic and mineral glass don’t have the abrasive strength to touch sapphire without specialized professional equipment. If your Rolex Submariner or modern Omega has a scratched sapphire crystal, the only real option is professional replacement. Cost: $150–$500+ depending on brand and reference. The good news is that sapphire scratches are genuinely rare from normal wear — that hardness works in your favor most of the time.
Does Novus Really Work for Watch Crystals?
Yes, very effectively — for the right materials. Novus was originally engineered for acrylic aircraft windows, and watch enthusiasts have used it on vintage crystals for decades. On acrylic crystals, expect 85–95% scratch removal on surface and medium scratches. On mineral glass, results are more moderate — 60–70% improvement on surface scratches, less on deeper ones. The three-step progression (Novus #3 → #2 → #1) is what makes it work; using only one compound leaves haze. You’ll find it consistently recommended across r/Watches because it’s gentle enough for vintage crystals while still being effective.
How Much Does Professional Watch Crystal Replacement Cost?
For accessible vintage watches like a Seiko 5 or Timex Marlin, expect $50–$150 at an independent watchmaker. Mid-tier brands like Tissot or Hamilton run $100–$200. Luxury tier — Rolex Submariner, Omega Seamaster, vintage Cartier — runs $200–$500 or more depending on reference. Crystal replacement for a vintage Rolex at an authorized service center can exceed $500 when labor is factored in. For most watches under $200 in value, DIY polishing is almost always the smarter financial choice.
Will Polishing Remove the Anti-Reflective Coating?
Possibly, and it’s worth understanding the trade-off before you start. Anti-reflective coatings are most common on sapphire crystals — you’ll recognize them by a subtle blue or purple tint on the crystal surface. On acrylic and mineral glass, AR coatings are rare. If your crystal has a coating and you polish it, you risk abrading that coating away, which will change how the crystal looks and performs in bright light. For vintage watches without coatings, this isn’t a concern. For modern watches with AR-coated crystals, weigh scratch removal against coating loss — sometimes the coating is more valuable than eliminating a minor scratch.
How Often Should I Polish My Watch Crystal?
If you wear the watch daily, a maintenance polish every 6–12 months keeps the crystal looking clean without waiting for obvious deterioration. Occasional-wear watches only need attention when scratches become noticeable enough to bother you. Polishing can be repeated indefinitely on acrylic without structural risk — you’re removing a fraction of a millimeter of material each time, and vintage crystals have plenty of depth. Mineral glass is slightly more limited, but still tolerates repeated polishing over many years.
What’s the Difference Between Acrylic and Sapphire Crystals?
Acrylic is soft, scratches readily from daily use, but those scratches polish out beautifully with Novus. It’s the classic material of vintage watch collecting — early Seiko, Timex, affordable Rolex references from the 1960s–1980s all used acrylic. Sapphire is at the other end of the spectrum: extremely hard, scratch-resistant in real-world conditions, but replacement-only when damaged. Acrylic has that warm, slightly curved look that vintage enthusiasts love; sapphire has that ultra-clear, modern flatness. For a daily-beater vintage piece, acrylic’s easy repairability is actually an advantage — your Seiko 5 will always look sharp with a 30-minute polish session. — Polishing your watch crystal is one of the most immediately satisfying restoration projects in this hobby. You’re not waiting months to see if a movement runs better — within 45 minutes, you can hold up a watch that looked rough an hour ago and see something that looks nearly new. Your vintage Seiko 5, Timex Marlin, or beat-up daily-wearer deserves better than a neglected-looking crystal. Grab the Novus kit, follow the grit progression, and you’ll wonder why you waited this long. And if this has you thinking about the movement inside — check out our Mechanical Watch Repair Basics: Cleaning & Lubrication guide for the next step in keeping your vintage watch at its best. Already done a crystal polish and want to tackle something bigger? Our Complete Guide to Vintage Equipment Restoration covers the full scope of what’s possible when you’re comfortable working on these things yourself. — Share your before-and-after in the comments below — there’s something genuinely satisfying about seeing a scratched crystal come back to life, and this community loves a good restoration result.
One thought on “How to Remove Scratches from a Watch Crystal: Complete Acrylic, Mineral & Sapphire Guide”