
Re-ink Vintage Typewriter Ribbons: Step-by-Step Guide
How to Re-ink a Vintage Typewriter Ribbon: Complete Guide for Hobbyists
You sit down to type a letter, and the impression on the page is so faint you can barely read it. The ribbon is bone dry. A quick search tells you a replacement costs anywhere from $12 to $25 once you factor in shipping — and that’s if you can even find the right size. Before you reach for your wallet, here’s what most people don’t know: you can re-ink that ribbon yourself in about 20 minutes for roughly $3 to $5, and it’ll keep typing cleanly for another 4 to 7 months.
Re-inking a vintage typewriter ribbon — the most cost-effective typewriter ribbon ink refill method — is possible on any cotton fabric ribbon — the most common type found in pre-1970s machines. Using stamp pad ink or dedicated typewriter ink, you apply a controlled amount of ink to the ribbon fabric, let it absorb for 10–15 minutes, and re-spool it. Cost per re-inking runs $3–$6, compared to $9–$30 for a new ribbon, saving 60–70% per cycle.
If you’re searching for how to re-ink a typewriter ribbon at home, this guide covers everything you need: which ribbon types can and can’t be re-inked, three different methods (from basic brush application to soaking), the right inks to use, model-specific tips for machines like the Olivetti Lettera 32, Hermes 3000, Royal Quiet De Luxe, Underwood 5, Remington Quiet-Riter, Olympia SM9, and Smith-Corona Silent — plus how to troubleshoot problems when the first attempt doesn’t go perfectly.
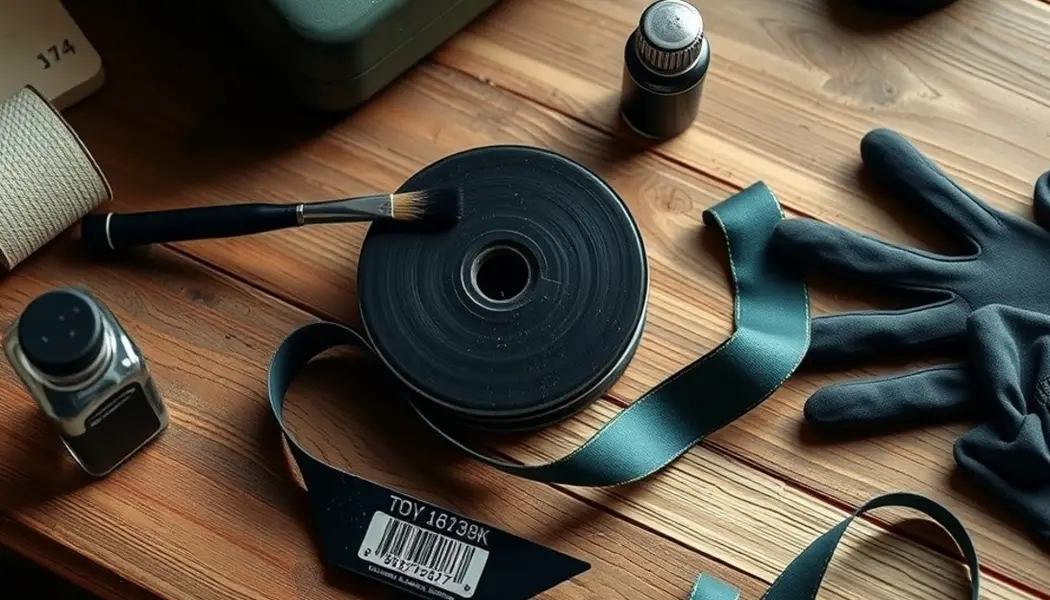
[IMAGE: Close-up of a small paintbrush applying black ink to an unspooled typewriter ribbon on a white cloth, with an Olivetti Lettera 32 visible in the background]
Can You Actually Re-ink a Typewriter Ribbon?
The short answer is yes — but only if your ribbon is made of cotton or a similar fabric material. Not all typewriter ribbons are created equal, and the wrong ribbon type won’t absorb ink no matter how carefully you apply it.
Cotton Ribbons: The Re-inkable Standard
Cotton fabric typewriter ribbons are what you’ll find in the vast majority of vintage typewriters made before the early 1970s. The fabric is woven to a thread count of around 300 per square inch — about 50% tighter than percale cotton sheets — specifically to hold ink in suspension and release a controlled amount with each type strike.
These ribbons are soft and slightly fuzzy to the touch. When held up to light, you can see the textile weave. They absorb ink readily and will take re-inking multiple times without issue. A well-maintained cotton ribbon can survive 5 to 10 re-inking cycles before the fabric itself starts to fray or thin.
Nylon typewriter ribbons are a different story. They’re stiffer, slightly plasticky, and the ink sits on the surface rather than absorbing into it. You can technically re-ink nylon, but it’s less effective — the ink tends to redistribute unevenly and smear more easily. If you’ve got nylon, it’s worth switching to a cotton ribbon when it runs dry.
Mylar and Carbon Film: Don’t Bother
Mylar and carbon film ribbons (sometimes called single-strike or one-time ribbons) cannot be re-inked. These emerged in the 1960s and 70s with machines designed for crisp office correspondence. The ink is embedded in a thin film layer, not held in absorbent fabric — once it’s transferred to paper, it’s gone. If your ribbon looks like it’s made of thin plastic film rather than cloth, that’s a mylar ribbon. Buy a replacement.
How to identify your ribbon type quickly: Pull a small section of the ribbon between your fingers. Cotton feels soft and cloth-like; nylon is firmer and slightly slippery; mylar crinkles like tape. If it crinkles, don’t try to re-ink it.
What You’ll Need: Tools and Ink Options
Good news: the shopping list is short and cheap. You probably already own half of this.
Ink Options
Stamp pad ink is the most accessible option and works well. It’s designed to soak into porous materials and dry quickly, which is exactly what you need. A bottle costs $2–$5 at any office supply store or on Amazon. Look for Trodat, Colop, or VersaColor brand inks — these are consistent in viscosity and don’t tend to get gummy over time. Black is the obvious choice, but red is easy to find too if your machine has a two-color ribbon.
One caveat: stamp pad ink formulations do vary slightly between brands and even batches. If you notice your first attempt feels stiffer or thicker than expected, try a different brand next time.
Dedicated typewriter ink is the gold standard. Brands like Oregon Toner Company and FJA Products make ink specifically formulated for fabric ribbon absorption — the viscosity is dialed in, it doesn’t over-saturate, and it won’t clog the ribbon mechanism. Expect to pay $3–$8 per bottle, but one bottle will re-ink dozens of ribbons. Order online; it’s not something you’ll find in a physical store.
Fabric ink (the kind used for stamping on textiles) is a solid third option. It’s designed to absorb into textile fibers and dry permanently, which is actually ideal behavior for a typewriter ribbon. Just be careful with application amounts — fabric ink can over-saturate more easily than typewriter-specific ink.
Avoid: regular fountain pen ink, ballpoint refill ink, or india ink. These are either too watery, too thick, or chemically wrong for this application. They won’t absorb correctly and can gunk up the ribbon transport mechanism.
Tools
– Small paintbrush (size 1–2 watercolor brush) or cotton swabs – Latex or nitrile gloves — ink stains are stubborn – Paper towels or a clean cotton cloth – Optional: a shallow dish or container (for the soaking method) – Optional: magnifying glass for inspecting ribbon fabric condition
Total cost if you’re buying everything new: under $10. If you’ve got gloves and paper towels around the house, you’re already most of the way there.
Step-by-Step: How to Re-ink Your Typewriter Ribbon
There are three methods, ranging from careful and controlled to fast and slightly riskier. Start with Method 1 if this is your first time.
Method 1: Brush Application (Recommended for Beginners)
This is the most controlled method and the one I’d suggest starting with. It takes about 20 minutes and gives you the best sense of how saturated the ribbon is getting.
Estimated time: 20–30 minutes Estimated cost: $3–$5
1. Remove the ribbon from the typewriter. Open the ribbon cover and carefully unspool the ribbon from both spools. Go slowly — don’t yank. If there are small metal tension clips on the spools, note their position so you can replace them correctly.
2. Set up your workspace. Lay paper towels on a flat surface. Put your gloves on. Have your ink, brush, and a piece of scrap paper ready. Do this near a sink if possible.
3. Lay the ribbon flat on a clean cloth or paper towel. Work in 6-inch sections. Starting at one end, use your brush to apply ink along the ribbon length. You want it damp and saturated, not dripping. If ink runs off the side or puddles, you’re using too much.
4. Work the full ribbon length. Methodically move down the ribbon, applying ink in sections. Flip the ribbon over and apply to the back side too — cotton ribbon holds ink through its full thickness, so one-sided application can leave the far face dry.
5. Let it absorb for 10–15 minutes. The ribbon should feel damp but not wet by the end of this time. If it still feels soaking wet, give it another 10 minutes. Rushing this step causes smearing.
6. Wind the ribbon back onto the spools. Use steady, even tension. Not too tight — you don’t want to squeeze ink back out — but not so loose that the ribbon bunches up. Wind smoothly and consistently.
7. Re-insert into the typewriter and test on scrap paper. Type a few lines. If impressions look good, you’re done. If there’s any smearing, let the ribbon sit in the machine without typing for 24 hours and test again.
Method 2: Direct Soaking
Faster than brush application, but higher risk of over-inking. Better suited to ribbons that are thoroughly dried out.
1. Unspool the ribbon and coil it loosely into a shallow dish. 2. Pour just enough ink to nearly submerge the ribbon (you don’t need to drown it). 3. Let it soak for 2–5 minutes. Not longer — 5 minutes is plenty. 4. Remove the ribbon and gently squeeze out excess ink with a folded paper towel. Wear gloves; this will stain. 5. Let sit for 30 minutes before re-spooling. 6. Test on scrap paper before using for anything you care about.
The risk with soaking is over-saturation. If the ribbon is dripping when you remove it, you’ve gone too far. Pat it down more aggressively and give it a full hour before re-spooling.
Method 3: DIY Re-inking Pad
This is worth building if you plan on re-inking regularly. It takes about 5 minutes to assemble and saves time on every future re-inking.
Cut a small piece of sponge or dense foam to fit inside a shallow container (a repurposed lip balm tin works perfectly). Saturate the sponge with ink. Thread one end of the ribbon over the sponge and pull the ribbon slowly across it, letting the sponge contact both sides as the ribbon passes over. Wind from one spool to the other while the ribbon drags across the ink-saturated pad.
Cost to build: $2–$3 for sponge material, or free if you’re repurposing household items. Commercial versions of this device exist (sometimes sold on Etsy or vintage typewriter supply shops) for $10–$15, but the DIY version works just as well.
Model-Specific Tips: Olivetti, Hermes, Royal, Underwood, Remington, Olympia, Smith-Corona
Re-inking works differently depending on your machine’s spool design and ribbon transport system. Here’s what to know for the seven most common vintage machines.
Olivetti (Lettera 32, Lettera 35L, Studio 45)
Olivetti machines use metal spools, and that’s important. Metal spools have locking nuts that create proper tension; plastic replacement spools are looser and less reliable. If you’ve got the original metal spools, keep them and re-spool rather than replacing with plastic. Re-inking on an Olivetti is smooth — these machines have excellent ribbon transport mechanics and rarely jam. Standard 1/2-inch ribbon width. New ribbons cost $5.95–$8.00; re-inking saves roughly $3–$5 per cycle.
Hermes (3000, 2000, 2000B)
The Hermes 3000 is one of the most mechanically refined portable typewriters ever made, and its ribbon system reflects that. Metal spools, smooth transport, and a well-calibrated tension mechanism mean re-inked ribbons perform beautifully. Historically, Hermes machines used silk ribbons — rare and expensive today — but modern cotton ribbons work excellently. If you find an old sealed tin of original silk ribbon, treasure it. Otherwise, re-ink your cotton ribbon and expect professional-quality results.
Royal (Quiet De Luxe, Parade)
Royal portables accept either plastic or metal spools. The ribbon mechanics are consistent and reliable. If you’re using plastic spools, make sure the tension nut is snug — plastic spools have slightly more slip than metal ones, and a loose nut will cause uneven ribbon advancement. Standard 1/2-inch ribbon. Re-inking success rate on a well-maintained Royal is high; just watch for over-inking since the ribbon transport on these machines is slightly faster than on some other portables.
Underwood (5, 6, Portable)
The Underwood 5 and its siblings use original metal spools that are integrated into the machine — they’re not easily replaced with universals. But they’re also well-built and durable, and the ribbon can be unspooled and re-inked directly without removing the spools from the machine entirely. These machines were built to last, and a good re-inked ribbon on an Underwood 5 will easily outlast several replacement ribbons on a cheaper modern machine.
Remington (Quiet-Riter, Streamliner)
Standard 1/2-inch ribbon, cotton fabric, straightforward re-inking. One thing to watch on Remington portables: the ribbon advance mechanism sometimes sticks even after re-inking, which isn’t an ink problem — it’s a separate mechanical issue with the advance pawl. If your ribbon isn’t advancing after re-inking, check that the advance click-wheel is engaging properly before assuming the re-inking failed.
Olympia (SM9, SM7, SM8)
Olympia’s SM series machines have some of the best ribbon transport systems of any vintage portable. Metal spools, precise tension, reliable advance. Re-inking on an SM9 or SM7 produces excellent results and the ribbon tends to advance very evenly, which means you get more consistent impression quality across the full ribbon length. Highly recommended for first-time re-inkers — if anything goes wrong, it’s easier to diagnose on an Olympia because the mechanics are so clean.
Smith-Corona (Silent, Silent Master, Clipper)
Smith-Corona portables use plastic universal spools, which are less durable than the metal spools on Olivetti or Olympia machines. They work fine for re-inking, but if a spool breaks, universal metal replacements are available cheaply online (usually $3–$5 a pair). Re-inking success rate is solid for beginners — just be conservative with ink application, since plastic spools don’t provide quite as much tension control as metal ones.
Avoiding Over-Inking: The Most Common Mistake
Over-inking is the number one problem with first-time ribbon re-inking. Here’s why it happens and how to avoid it.
When a typewriter key strikes the ribbon, it squeezes a tiny amount of ink onto the paper, then the ribbon fabric springs back and “recovers” — it draws ink back from the edges and redistributes it for the next strike. When a ribbon is over-inked, this recovery doesn’t happen properly because there’s simply too much ink in the fabric. The result: smeared, fuzzy impressions where ink bleeds beyond the character outline.
The fix is conservative application. Under-inked is always better than over-inked. A slightly faint impression is easy to fix (add a bit more ink). A smeared impression means you need to wait 24–48 hours for the ribbon to dry out partially before it’s usable again.
Signs you’ve over-inked: – Typed characters look blurry or have ink halos around them – The ribbon feels wet or tacky between your fingers after re-spooling – Ink is transferring from the ribbon to the paper guides or platen
If any of these occur, remove the ribbon and let it dry completely — ideally 48 hours in a warm, dry spot. If smearing persists after full drying, the ribbon may need to be replaced.
Always test on scrap paper first. Type 10–15 characters and check the impression before using the ribbon for anything you care about. This takes 30 seconds and saves a lot of frustration.
Cost Breakdown: Re-inking vs. Buying New
The math isn’t complicated. Here’s what you’re actually spending:
| Re-inking | Buying New Ribbon |
|---|---|
| Cost of ink | $2–$5 per bottle (covers dozens of ribbons) |
| Cost of ribbon | — |
| Shipping | $0 (already have ink) |
| Time | 20–30 minutes |
| Total per cycle | $3–$6 |
One re-inking extends ribbon life by roughly 180,000–250,000 words — about 180–360 double-spaced pages. If you’re typing 50 pages a month, that’s 4–7 months of continued use from one re-inking session. And one $4 bottle of stamp pad ink will re-ink 10–15 ribbons before it runs out.
The break-even point is obvious: re-inking wins on cost from the very first cycle. The only real argument for typewriter ribbon replacement is if the ribbon fabric is physically damaged or if you need a specific ribbon type you can’t source locally. For everything else, re-inking is the smarter call.
Troubleshooting Common Re-inking Problems
Faint or Weak Impressions After Re-inking
Cause: Not enough ink, or insufficient absorption time.
Pull the ribbon out and check the fabric — if it looks dry in spots, those areas need more ink. Re-apply with a brush to the sparse sections and wait 24 hours before re-spooling. For future attempts, apply ink more generously on the first pass and give it a full 15 minutes to absorb before winding.
Smudging or Bleeding
Cause: Too much ink applied, or the ribbon was re-spooled before the ink had absorbed.
Remove the ribbon from the machine immediately. Lay it flat and let it dry completely — this takes 24 to 48 hours, not 30 minutes. If the smearing is still there after full drying, the fabric itself may be damaged or the ink type isn’t right for your ribbon. Try a fresh cotton ribbon with a different ink brand next time.
Uneven or Patchy Inking
Cause: Inconsistent application, or sections of the ribbon fabric are more worn than others.
Type a test page and mark which sections produce faint impressions. Unspool the ribbon and target those specific sections with additional ink. Wait 24 hours and re-test. If the patchiness keeps recurring in the same spots after multiple re-inkings, the fabric in those sections is worn through — time for a new ribbon.
Ribbon Won’t Advance Smoothly
This isn’t an ink problem. If the ribbon transport is sticking or not advancing, check the ribbon advance mechanism: the ratchet pawl, the advance wheel, and the guide eyelets. These can get gummed up with dried ink over time, especially on machines that haven’t been serviced recently. For a full fix, see our guide on Royal Quiet De Luxe Typewriter Repair — the ribbon mechanism section applies to most vintage portables.
Frequently Asked Questions
How often should I re-ink my typewriter ribbon?
For regular use — say, 30–50 pages a month — you’ll likely need to re-ink every 4 to 7 months. Light users (10–15 pages a month) might only re-ink once a year. The signal is simple: when your typing starts looking faint or impressions are uneven, it’s time. Don’t wait until the ribbon is completely dry — re-inking a slightly faded ribbon is easier and produces better results than trying to revive a bone-dry one.
Can I use regular pen ink or fountain pen ink on a typewriter ribbon?
No. Fountain pen ink is too thin and watery — it’ll saturate the ribbon unevenly and drip everywhere. Ballpoint refill ink is too thick and paste-like; it won’t absorb into the fabric properly and can gum up the ribbon guides. Stick to stamp pad ink, dedicated typewriter ink (Oregon Toner Company or FJA Products), or fabric textile ink. These are formulated to absorb into fibrous materials at the right viscosity.
What if my typewriter uses a mylar or carbon film ribbon?
You can’t re-ink it. Mylar and carbon film are single-strike materials — the ink is embedded in a film layer, not held in absorbent fabric, and once it’s transferred to paper, there’s nothing left to refresh. If your machine uses mylar (look for a thin, crinkly, slightly shiny ribbon that doesn’t feel cloth-like), you’ll need to buy a replacement. The good news: most vintage machines made before the mid-1960s use cotton ribbons, so this is less common than you might expect.
How long does it take for a re-inked ribbon to be ready to use?
Using the brush method, the ribbon is ready to test after about 15–20 minutes of absorption time. For best results, give it 30 minutes before re-spooling, then test on scrap paper. If you want to be certain the ink is fully set and there’s zero smearing risk, wait 24 hours before using it on anything important. The soaking method requires a minimum of 30 minutes drying time before re-spooling.
Can I re-ink the same ribbon multiple times, or will the fabric wear out?
Yes, you can re-ink the same ribbon repeatedly. Cotton ribbon fabric is durable enough to handle 5 to 10 or more re-inking cycles before showing real wear. What eventually gives out isn’t the ink capacity — it’s the physical fabric itself, which will start to thin and fray after years of type strikes and handling. A cotton ribbon that’s been well-maintained and consistently re-inked can genuinely last years of regular use before needing replacement.
[IMAGE: Side-by-side typing samples on white paper — left shows faded output from a dry ribbon, right shows sharp, dark impressions from the same ribbon after re-inking]
Wrapping Up
Re-inking a vintage typewriter ribbon is one of those repairs that feels more intimidating than it actually is. Once you’ve done it once — laid the ribbon flat, worked ink into the fabric with a small brush, wound it back onto the spools — it becomes a routine part of owning a vintage machine rather than a reason to panic.
The short version: if your ribbon is cotton fabric (soft, cloth-like, absorbent), re-ink it. If it’s mylar (thin, crinkly, plasticky), replace it. Cotton ribbons can be refreshed 5–10 times before the fabric wears out, and each re-inking costs $3–$6 vs. $9–$30 for a new ribbon. Over a year of regular use, that adds up.
For machines like the Olivetti Lettera 32, Hermes 3000, and Olympia SM9 — which have excellent ribbon transport systems — re-inking is almost always the right choice. For Smith-Corona and Royal portables with plastic spools, it works fine too, just be a little more conservative with ink amounts.
For more on vintage typewriter maintenance — including platen care and lubrication — check out our restoration guides below.
If you want to go deeper on keeping your machine running well, check out our guide on Typewriter Platen Restoration — the platen and the ribbon work together, and addressing both makes a big difference in print quality. And if your Remington is giving you mechanical grief beyond the ribbon, our Remington Segment Shifter fix guide covers the most common mechanical issues.
Now go re-ink that ribbon. It’ll take 20 minutes and save you $15.