

How to Rebuild a Carburetor on a Vintage Lawn Mower
How to Rebuild a Carburetor on a Vintage Lawn Mower: Complete Guide for Briggs & Stratton, Tecumseh & Clinton
You drag your dad’s old Briggs & Stratton out of the shed after six months of winter storage. You prime it, pull the cord, and… nothing. Or maybe it coughs once, spits a little smoke, and dies. The engine itself is fine. The spark plug looks okay. But the carburetor? That’s where your problem lives.
A lawn mower carburetor rebuild takes 1–3 hours for someone who’s done it before, and 3–4 hours for a first-timer. The cost is $15–35 for parts and cleaner — compared to $80–200 at a repair shop. In this guide, we walk you through every step from fuel system prep to final tuning, including model-specific tips for Briggs & Stratton, Tecumseh, and Clinton engines, so you can get your vintage mower running again without paying someone else to do it.
The culprit in most cases isn’t age or wear — it’s the fuel. Modern gasoline contains 10% ethanol (E10), and vintage carburetors weren’t built for it. That ethanol oxidizes over months of storage, leaving behind a thick, lacquer-like varnish that clogs the tiny jets inside your carburetor. Understanding that process is the key to fixing it — and preventing it from happening again.
This guide is part of our broader resource on vintage equipment restoration.
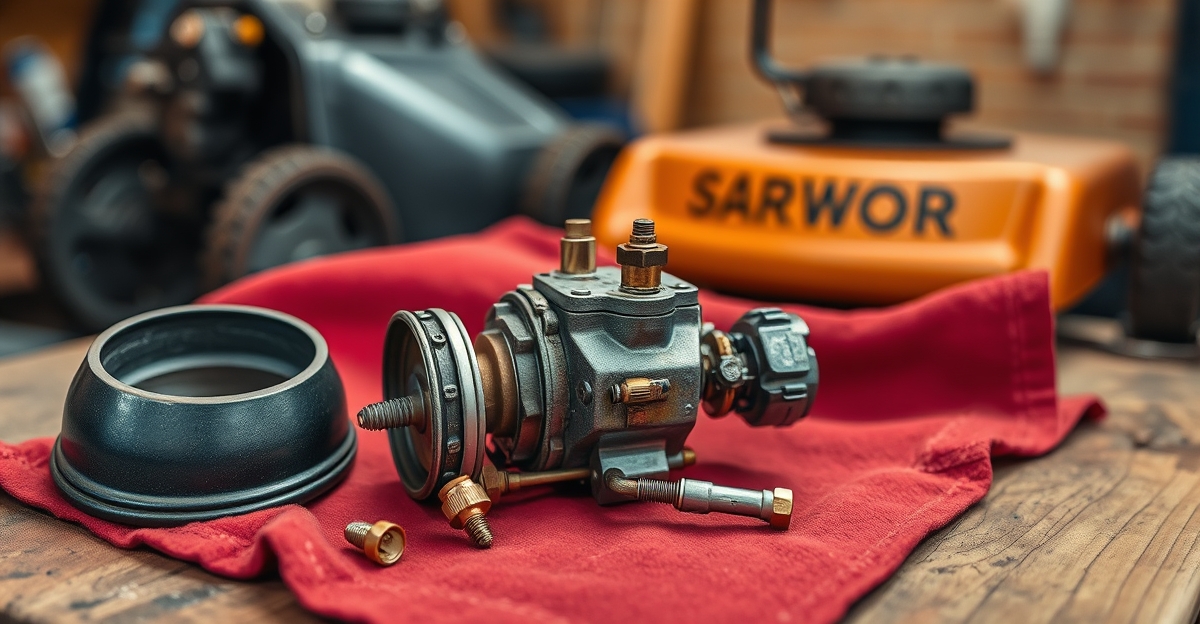
[IMAGE: Vintage lawn mower carburetor removed and sitting on a workbench, fuel lines disconnected, showing external components]
When to Rebuild vs. Replace Your Carburetor
Before you spend an afternoon on a rebuild, take two minutes to decide whether it’s the right call.
Decision Tree: Is Your Carburetor Worth Rebuilding?
Work through these questions in order:
- Is the carburetor body cracked or severely corroded? If the aluminum housing has actual cracks or deep pitting that goes through the metal, no gasket kit will save it. Replace the carb outright.
- Is a rebuild kit available for your engine model? Check Amazon or eBay with your engine model number. If kits exist for $10–20, rebuild. If the carb is so obscure that kits don’t exist, you’re looking at a replacement.
- Is the mower worth the time investment? A running vintage Briggs & Stratton mower is worth $200–800 at minimum. A $15 rebuild kit is a no-brainer. If the frame is rusted through and three other things are broken, weigh your time honestly.
- Is this mower under 5 years old? If so, carb rebuild is less likely to be the issue — newer machines often have sealed fuel systems or different failure modes. But if it’s a 1968 Snapper or a 1979 Toro with a Tecumseh engine, rebuild first.
The default rule: If a rebuild kit exists for your model, the carb body is intact, and the mower runs otherwise okay, always try rebuilding before replacing. It works 85–90% of the time.
Cost Comparison: Rebuild vs. Repair Shop vs. Replacement
| Option | Cost | Time | Notes |
|---|---|---|---|
| DIY Rebuild | $15–35 | 2–4 hours | Most cost-effective; requires patience |
| Repair Shop | $80–200 | 1–5 days wait | Convenient, but labor-heavy billing |
| Replacement Carburetor | $50–150+ | 1–2 hours to swap | Only if body is damaged; may need adaptation |
| New Mower | $400–1,500+ | Immediate | Only if everything else has failed |
A $15 rebuild kit on a mower worth $300+ is an 80:1 return on investment if it works. And it usually does.
Understanding Carburetor Problems: The Ethanol Issue
Most vintage mower carb problems trace back to one thing: what’s in the fuel. This section explains the root cause, because understanding it changes how you approach the repair — and how you prevent the next one.
What is Carburetor Gumming? (And Why Modern Fuel Causes It)
Your carburetor mixes fuel and air in a precise ratio before sending the mixture into the engine. The fuel passes through jets — small brass orifices as tiny as 0.5–1.5mm in diameter. If those jets get partially blocked, the engine runs lean (not enough fuel), resulting in rough idling, surging under load, hard starting, or a complete no-start.
The blockage is varnish. When gasoline sits in a carburetor for months, it oxidizes and evaporates unevenly, leaving behind a sticky brown residue that hardens over time into something resembling dried shellac. Tilt a vintage mower’s float bowl after a winter and you’ll often find it coated in brown gunk — that’s the varnish.
[AFFILIATE: carburetor cleaner spray] is the primary weapon against this. Solvents like Gumout or Seafoam Carb Cleaner dissolve the varnish without damaging aluminum. But if the buildup is old and heavy, cleaning alone won’t fix a worn needle valve or cracked float seal — that’s when you need the full rebuild.
How Ethanol Damages Vintage Equipment
Before about 1990, gasoline was pure petroleum. Vintage engines were designed around that. Then the U.S. EPA mandated ethanol blending — by 2006, E10 (10% ethanol) became standard at most pumps.
Ethanol causes problems for vintage carburetors in three ways:
- It’s hygroscopic. Ethanol absorbs water from the air. That moisture corrodes metal components and dilutes the fuel-oil mixture in engines that use mixed fuel.
- It oxidizes faster than pure gasoline. E10 fuel left sitting for 6+ months turns into varnish much more aggressively than pre-ethanol fuel ever did.
- It degrades rubber. The rubber seals, O-rings, and gaskets in a 1970s carburetor were formulated for pure gasoline. Ethanol swells and hardens them, causing air leaks and fuel seepage.
This isn’t a design flaw in your old mower. It’s a fuel chemistry mismatch between what your carburetor was built for and what comes out of the pump today.
Signs Your Carburetor is Gummed Up
Watch for these symptoms before assuming the worst:
- Won’t start after 6+ months of storage — classic post-winter varnish blockage
- Rough idle — engine sounds choppy or uneven at low speed
- Surging under load — RPMs fluctuate when cutting
- Fuel leaking from the carburetor bowl — float needle stuck open from debris
- Engine stalls when you give it throttle — lean condition from partially clogged main jet
- Black smoke from exhaust — flooding condition; float is set too high or needle valve is stuck
If you’re seeing two or more of these symptoms together, a carburetor rebuild is almost certainly the fix.
Tools and Materials You’ll Need
Good news: you don’t need a shop full of specialized tools. Most of this is stuff you either already own or can pick up for under $20 total.
Essential Tools
- [AFFILIATE: carburetor cleaner spray] — Gumout Carb Cleaner or Seafoam Deep Creep, $8–12 per can. Buy two if the carb looks really gunked up.
- Soft brass wire brush — $3–5. Brass is critical; steel bristles will scratch aluminum passages. Don’t substitute.
- Needle-nose pliers — for removing float pins and small components without fumbling
- Screwdrivers — flat-head for jet screws (most carbs use flat-head jets), Phillips for bowl bolts
- Shallow container or tray — a $2 aluminum baking pan works perfectly. Jets are tiny; you will lose one if you don’t corral them.
- Clean rags — for wiping down parts and the work surface
- [AFFILIATE: carburetor rebuild kit] — model-specific kit, $8–20. Match it to your engine model number.
- Phone with camera — for taking reference photos before disassembly
Optional But Genuinely Helpful
- Compressed air — for blasting out passages after cleaning. Even a $25 electric pump with a nozzle attachment works.
- Magnetic pickup tool — for fishing out dropped jets from inconvenient places (it will happen)
- Service manual PDF — free from Briggs & Stratton’s website or Tecumseh archives. Worth 10 minutes to download before you start.
Safety Precautions
Carburetor cleaner is not gentle. Work outdoors or in a well-ventilated garage with the door open. Keep it away from open flames — the fumes are flammable. Nitrile gloves protect your skin, and safety glasses are smart when using compressed air. Drain the fuel tank completely before removal; don’t work with a fuel-filled carburetor near any ignition source.
Step-by-Step Carburetor Rebuild Guide
[IMAGE: Step-by-step visual guide overview — six labeled carburetor components on a clean workbench]
Work methodically. This isn’t a race. Lay out a clean surface, organize your parts as you go, and take photos at every disassembly step.
Step 1: Fuel System Preparation & Documentation
Drain the fuel tank completely before touching anything. If there’s residual fuel in the lines, have a small container ready to catch drips.
Take your phone and photograph everything before you disconnect a single hose or linkage. Snap the choke linkage, the throttle cable routing, the fuel inlet position, and the air filter housing orientation. If you have multiple hoses, label them with a marker on masking tape. The two minutes you spend here will save you 20 minutes of guessing during reassembly.
Common mistake: Skipping the photos because “you’ll remember.” You won’t. Especially once the carburetor is off the engine and pieces are spread across your workbench.
Remove fuel lines from the carburetor by gently twisting and pulling (old rubber sometimes needs a bit of wiggle). Cap the fuel tank line with a golf tee or a small bolt wrapped in rag to prevent drips.
Time: 10 minutes
Step 2: Remove the Carburetor from the Engine
The carburetor bolts to the engine’s intake manifold, typically with two to four bolts. On most vintage Briggs & Stratton and Tecumseh engines, it’s two bolts on a flange.
Before unbolting, check for a mounting gasket between the carburetor and the manifold. You want to keep this in one piece for reference — you’ll use a new one from the rebuild kit on reassembly. If it tears, that’s fine; just note its thickness and shape.
If the carburetor feels stuck: Don’t force it. Spray PB Blaster or similar penetrating oil around the flange and wait 10–15 minutes. Vintage carbs often bond to manifolds through years of heat cycling and oxidation.
Keep the carburetor upright as you remove it to avoid spilling residual fuel from the float bowl.
Time: 5–10 minutes
Step 3: Disassemble the Float Bowl & Identify Parts
The float bowl is the metal cup hanging from the bottom of most horizontal-shaft carburetors — it’s the fuel reservoir inside the carburetor. Place your parts tray underneath before removing it; fuel will drip.
Remove the float bowl bolts (usually 2–3 bolts or a single center bolt depending on model). Set the bowl aside and you’ll see the float assembly: a hollow metal or plastic arm that rises and falls with the fuel level, held in place by a small pin.
Carefully photograph the float orientation before removing the pin. Use needle-nose pliers to push the float pin sideways — it slides out cleanly when you get the angle right. The float lifts out, and underneath you’ll find the needle valve: a small tapered brass or rubber-tipped pin that seats against a matching cone in the carburetor body to control fuel flow.
Handle the needle valve like it cost $50. It didn’t, but losing it or bending it will send you hunting through the rebuild kit, and it’s easy to damage.
Also locate and remove the main jet (a brass screw in the center of the venturi passage) and the pilot jet (a smaller screw, sometimes on the side or bottom). Write the jet sizes down if they’re visible — you’ll want to confirm the replacement jets in your kit match.
[IMAGE: Exploded diagram of vintage carburetor float bowl components — float, needle valve, main jet, pilot jet, gaskets labeled]
Time: 15–20 minutes
Step 4: Clean All Metal Components Thoroughly
Soak all metal parts — the float bowl, jets, carburetor body, float arm (if metal) — in [AFFILIATE: carburetor cleaner spray] for 15–30 minutes. Use a dedicated plastic container or the shallow parts tray with a lid. Don’t soak rubber gaskets or plastic floats in strong carb cleaner; it will degrade them.
After soaking, use your brass wire brush to gently scrub the jets and any visibly varnished surfaces. Short strokes, light pressure. The brass bristles break up softened varnish without gouging the soft aluminum.
Critical rule: Never use a metal wire, toothpick, or drill bit to clear jet passages. Carb jet orifices are sized to exact tolerances — even a 0.1mm enlargement changes the fuel mixture enough to cause problems. If a passage won’t clear with cleaner and compressed air, soak longer.
Finish by blasting compressed air through every passage you can find — hold the carb up to a light and confirm you can see through each jet hole. Rinse with fresh carb cleaner, then air-dry completely.
Time: 30–45 minutes (not counting extended soak time)
Step 5: Inspect Float, Needle Valve & Gaskets
Now you’re doing diagnostics, not just cleaning. This step tells you which parts from the rebuild kit you’ll actually use.
Float check: Fill a small bowl with water and drop the float in. A healthy float floats — it’s hollow and sealed, so it rides at the water’s surface. A damaged float (cracked or fuel-logged) will sink or sit partially submerged. Replace any float that sinks during the water test. If you hear fuel sloshing inside when you shake it, the float is compromised. Use the replacement from the kit.
Needle valve check: Examine the tip under bright light or a magnifying glass. A worn needle has a visible groove or flat spot worn into the tapered contact surface. If you see that, replace it — a worn needle valve will let fuel trickle past its seat and flood the engine.
Gaskets and seals: Pick up each old rubber gasket and try to bend it. A healthy gasket is still supple. If it cracks, crumbles, or has gone hard and brittle, toss it. At 40–50 years old, most gaskets from vintage carbs will fail this test. That’s what the kit is for.
Time: 10 minutes
Step 6: Reassemble with New Kit Gaskets & Seals
Open the rebuild kit and lay out the parts. A quality kit for Briggs & Stratton or Tecumseh will include: a new float bowl gasket, new needle valve, various O-rings and seals, and sometimes a replacement float.
Work in reverse order from disassembly:
- Install any new O-rings on jets before reinstalling jets
- Thread the main jet and pilot jet back in — finger-tight, then a quarter-turn with a flat-head screwdriver. No more. Jet screws strip easily.
- Drop the float assembly in, needle valve seated properly in its cone, and slide the float pin back through the bracket
- Place the new float bowl gasket on the mating surface (dry fit — no sealant needed)
- Set the float bowl in place and thread bolts finger-tight in a crisscross pattern, then snug evenly
The overtightening trap: Float bowl bolts should be “snug” — maybe 15–20 in-lbs on a torque wrench if you have one. They’re going through a gasket into an aluminum body. Too tight and you’ll crack the gasket or strip the threads. If you feel resistance and the bowl is seated flush, stop turning.
Time: 25–35 minutes
Step 7: Reinstall, Reconnect & Tune
Use the new intake manifold gasket from the kit (or a replacement if the kit didn’t include one). Mount the carburetor back on the engine, hand-thread the bolts, then torque to spec — usually 90 in-lbs (about 7.5 ft-lbs) for most vintage Briggs & Stratton and Tecumseh manifold bolts. Consult your service manual if you have it.
Reconnect fuel lines, choke linkage, and throttle cable using your reference photos. Before refilling with fuel, manually operate the choke and throttle linkages to confirm they move freely without binding.
Fill the tank with fresh fuel — ethanol-free if you can get it, which we’ll cover in the maintenance section. For the first start after a rebuild, set the choke to full ON (closed). Pull the cord. The engine may need 3–5 pulls as fuel fills the new bowl and passages.
Once running, let it idle for 2–3 minutes to warm up, then gradually open the choke. Run it briefly under light load (slow walk with the mower, no heavy grass) to check for stumbling, surging, or smoke. Also check the float bowl area visually for any signs of fuel seeping from the gasket.
For the blade sharpening guide to complete the seasonal tune-up, see our vintage lawn mower blade sharpening guide.
Time: 20–30 minutes
Model-Specific Carburetor Rebuild Tips by Engine Brand
Generic steps get you most of the way there, but each major engine brand has quirks worth knowing before you start. Here are the details that trip people up.
[IMAGE: Side-by-side comparison of Briggs & Stratton Walbro, Tecumseh, and Clinton carburetor designs with key components labeled]
Briggs & Stratton Walbro Carburetor Rebuild
The Briggs & Stratton carburetor rebuild is the most common job you’ll encounter — the Walbro is fitted on virtually every Briggs engine from the 1960s through the 1990s. It’s a float-type design, gravity-fed, and generally very DIY-friendly. Rebuild kits are everywhere — Amazon, eBay, and the Briggs & Stratton parts website. Expect to pay $12–18 for a genuine kit.
The float bowl on most Walbro carbs uses a 3-bolt triangle pattern (vs. Tecumseh’s common 2-bolt pattern). The bolts are small — usually 1/4-20 — and easy to over-torque, so go easy on them. The main jet is typically 0.094″ on most standard horizontal-shaft models, but your engine’s model number will confirm the exact spec.
One Walbro-specific detail: some versions of this carb have a fuel inlet check valve on the side of the body. It looks like a small brass plug, and it’s easy to confuse it with a jet. Don’t try to remove it unless the kit specifically calls for it.
[AFFILIATE: carburetor rebuild kit] for Briggs & Stratton Walbro carbs: Always verify using the three-number engine model code stamped on the engine block (e.g., 130202 or 92902). Kits bought by engine model number fit correctly — generic kits sometimes include wrong jet sizes.
Tecumseh Carburetor Rebuild (Float-Type & Diaphragm)
Tecumseh dominated the 1970s and 1980s mower market, and their carburetors come in two main flavors:
Float-type — the majority. Works the same as Briggs, with one key difference: Tecumseh’s float bowl gasket is typically smaller in diameter than Briggs gaskets. Don’t mix kits between brands; the gasket won’t seat properly. Tecumseh main jets often run 0.065″ (smaller than Briggs), which means a Briggs jet accidentally installed in a Tecumseh carb will flood the engine.
Diaphragm-type — found on some tilting or vertical-position applications where a float would be unreliable. Instead of a float and needle valve, a rubber diaphragm flexes with fuel demand. Rebuild kits include a replacement diaphragm. Check that yours isn’t cracked or stiff before assuming the carb is the only problem — a torn diaphragm often mimics carburetor gumming symptoms.
Some Tecumseh engines also have an external fuel pump (a separate small unit on the engine block). If your mower isn’t drawing fuel even after a complete Tecumseh carburetor rebuild, confirm the fuel pump is functioning — that’s a separate rebuild job.
[AFFILIATE: carburetor rebuild kit] for Tecumseh: Use the engine model number stamped on a metal tag riveted to the engine block. Kits run $10–16.
Clinton Small Engine Carburetor Rebuild
Clinton engines powered a lot of mid-century American equipment — 1950s through early 1970s — and they have a dedicated following among restoration enthusiasts. The carburetors used on Clinton engines are typically Flo-Jet style float-type designs, which share some conceptual similarity with Briggs Walbro carbs but use proprietary jet sizes.
Here’s the critical warning: do not substitute Briggs & Stratton or Tecumseh jets in a Clinton carburetor. Clinton jet orifices are sized differently, and a mis-sized jet will create a rich or lean condition that no amount of tuning will fix.
Rebuild kits for Clinton carbs are harder to track down than Briggs or Tecumseh. Amazon has sporadic availability. Better sources: specialty vintage equipment suppliers, eBay vintage engine listings, or the active Clinton engine community on Reddit’s r/lawnmowers. Enthusiasts there often have bulk parts or can point you to a supplier.
Clinton carb bodies are often brass rather than aluminum, which means they’re more corrosion-prone but also more resilient to aggressive cleaning. An extended soak in carburetor cleaner is usually necessary — 1–2 hours minimum for a Clinton carb that’s been sitting for decades.
Success rate with correct kits: around 82% — slightly lower than Briggs or Tecumseh simply because getting the right kit is harder, and wrong-kit rebuilds don’t work.
Common Mistakes & Troubleshooting
My Carburetor Still Leaks After Rebuild — What’s Wrong?
The most common cause is a gasket that didn’t seat flush. This happens when:
- The mating surfaces weren’t cleaned completely (old gasket material left behind creates a bump that the new gasket bridges unevenly)
- The float bowl bolts were tightened unevenly — tighten in a star/crisscross pattern to seat the gasket uniformly
- The gasket was installed upside down (some gaskets have a top and bottom — check kit instructions)
Remove the float bowl, clean the mating surfaces with a plastic scraper and fresh carb cleaner, re-inspect the gasket orientation, and reassemble. Don’t add gasket sealer unless the kit specifically says to — most float bowl gaskets seal dry.
Engine Floods or Won’t Start After Rebuild
Flooding (too much fuel) after a rebuild usually means the float needle valve isn’t seating correctly. Remove the float bowl and check:
- Is the needle valve fully seated in its cone? It should drop in under gravity and seal without forcing.
- Is the float arm bent? The float arm should be parallel to the float bowl gasket surface at rest. A bent arm holds the needle open and floods the engine. Straighten gently with pliers or replace.
- Did you accidentally install the needle valve upside down? (More common than you’d think — it goes in tapered end down.)
If the engine simply won’t start (rather than flooding), check that fuel is actually reaching the carburetor. Disconnect the fuel inlet hose and verify fuel flows freely from the tank. Old fuel line varnish can restrict flow even after a perfect carb rebuild.
Stuck or Broken Float Needle Valve
If the needle valve won’t come free during disassembly, soak the entire carb — assembled — in carburetor cleaner for 30 minutes, then try again with needle-nose pliers. Never grab a needle valve with pliers and yank; the tapered tip will bend and the new one from the kit will be needed anyway.
If you break the needle during removal, that’s actually fine — you have a replacement in the rebuild kit.
Rust or Debris Still Visible in Float Bowl
This typically means the fuel tank has corrosion. Cleaning the carburetor solves the downstream symptom, but if you refill from a rusty tank, you’ll have debris in the new carb within an hour of running. Inspect the tank with a flashlight. Light surface rust can sometimes be treated with a tank sealer product; heavy rust means the tank needs replacement or lining.
For a broader look at fuel system maintenance across different types of small engines, our guide on cleaning chainsaw spark plugs covers related ignition and fuel system diagnostics.
Carburetor Maintenance: Prevent Future Problems
A successful carburetor rebuild gets you running again — but good maintenance is how you avoid doing it again in two years.
Best Fuel for Vintage Lawn Mowers (Ethanol-Free vs. E10)
If you can source ethanol-free gasoline, use it in your vintage mower. It’s available at:
- Marina fuel docks — practically universal; boats and vintage outboards pushed this demand
- Small-engine dealers — many stock ethanol-free in 1-gallon jugs
- Some Shell, Chevron, or Sunoco stations — call ahead; availability varies by region
- Use GasBuddy or Pure-Gas.org to find ethanol-free stations near you
The premium is real: expect $5–7/gallon vs. $3–4 for E10. But the math works out. If you run 2 gallons per mowing season across 20 sessions, that’s 40 gallons — roughly $60–80 extra per season in fuel cost. But you skip the $20 rebuild kit, $10 in cleaner, and 3 hours of your weekend every 2–3 years. Break-even is roughly 2–3 seasons.
If ethanol-free isn’t practical, add a fuel stabilizer (Sta-Bil 360 Marine, PRI-G) at every fill if the mower will sit for more than 30 days.
Seasonal Storage Tips to Avoid Gumming
The single best thing you can do to prevent carburetor gumming is spending 10 minutes at the end of the mowing season:
- Add fuel stabilizer to the tank
- Run the engine for 3–5 minutes to circulate stabilizer through the carburetor
- Turn off the fuel shutoff valve (if equipped) and let the engine run until it stalls from fuel starvation
- Disconnect the fuel line at the carburetor if you want to be thorough
That 10 minutes saves you the spring rebuild. It’s a genuinely good trade.
How Often Should You Rebuild Your Carburetor?
| Fuel Type | Storage Practice | Expected Rebuild Interval |
|---|---|---|
| E10 (standard pump gas) | No stabilizer, fuel left in carb | Every 2–3 years |
| E10 with fuel stabilizer | Fuel drained or stabilized for winter | Every 4–5 years |
| Ethanol-free fuel | Proper storage | Every 6–8 years |
| Ethanol-free + drained for winter | Best practice | 8–10+ years |
Symptom-based is the honest answer: rebuild when the mower shows signs. But proper fuel handling can realistically double or triple the time between rebuilds.
Frequently Asked Questions
How much does it cost to rebuild a carburetor on a lawn mower?
A DIY carburetor rebuild costs $15–35 total: $8–20 for a model-specific rebuild kit, $8–12 for carburetor cleaner spray, and odds and ends you likely already own. Compare that to $80–200 at a small-engine repair shop, which includes diagnosis, parts markup, and labor. For most vintage mowers, the DIY route is the obvious choice.
Can you rebuild a carburetor without taking it apart?
Not a true rebuild, no. You can spray carburetor cleaner through external passages with the carb still on the engine for mild, fresh gumming — sometimes called a “spray clean” — and it occasionally works for early-stage varnish. But if the float needle is worn, gaskets are hardened, or jets are fully blocked, you need to disassemble and replace components. There’s no shortcut for a full carburetor rebuild lawn mower job.
How long does a carburetor rebuild take?
First-timers should budget 3–4 hours, including photo documentation, cleaning soak time, and the inevitable moment of “wait, which jet goes where.” Someone who’s done it once or twice will get it done in 1–2 hours. Add 30–45 minutes if you’re soaking heavily varnished parts rather than quick-cleaning. Plan a full weekend morning and you won’t feel rushed.
Is it worth rebuilding an old lawn mower?
Yes, in almost every case where the mower is otherwise functional. A vintage Briggs & Stratton or Tecumseh mower in reasonable shape is worth $200–800; a $15 rebuild kit to restore it is essentially always worth it. The exception: if the engine has a seized piston, the deck is rusted through, or there are multiple major failures beyond the carburetor — at that point you’re looking at a parts donor, not a restoration.
What are the symptoms of a bad carburetor on a lawn mower?
The main ones: won’t start after sitting for months, rough or choppy idle at low speed, engine surges while cutting, fuel leaking from the bowl area, stalls when you apply throttle load, or black smoke indicating a flooding condition. Two or more of these together almost always point to carburetor gumming or a failed float needle valve.
Can I use WD-40 to clean a carburetor?
No. WD-40 is a water displacer and light lubricant, not a solvent. It doesn’t dissolve varnish, and it leaves an oily residue that can clog the same passages you’re trying to clear. Use a dedicated [AFFILIATE: carburetor cleaner spray] — Gumout Jet Spray or Seafoam Carb Cleaner are both solid choices that actually dissolve fuel varnish.
What’s the difference between Briggs & Stratton, Tecumseh, and Clinton carburetors?
They differ in float bowl geometry, jet sizes, and needle valve seat design — meaning rebuild kits aren’t interchangeable between brands. Briggs & Stratton Walbro carbs use a different bolt pattern and typically larger jet orifices than Tecumseh. Clinton carbs are often brass-bodied and use proprietary jet sizes that don’t match either. Always buy a kit matched to your specific engine model number, not a “universal” kit. —
Get Your Vintage Mower Running Again
A carburetor rebuild isn’t the intimidating project it sounds like the first time. The tools are basic, the parts are cheap, and the payoff — a running vintage mower you fixed yourself — is genuinely satisfying.
The success rate when done carefully is 85–90%. The other 10–15% usually comes down to a secondary issue (rusty fuel tank, cracked fuel line, wrong rebuild kit) that’s just as fixable once you know what it is.
Grab a [AFFILIATE: carburetor rebuild kit] matched to your engine model, a can of [AFFILIATE: carburetor cleaner spray], and set aside a Saturday morning. That’s the right-to-repair spirit — the machine was built to last decades, and a $15 kit is all that’s standing between it and another ten seasons of use.
Got a question about your specific mower or carburetor model? Drop it in the comments below — we read every one.