


Vintage Sewing Machine Cabinet Restoration: DIY Guide
There’s something almost criminal about a Singer treadle cabinet sitting in a garage with peeling veneer and watermarked surfaces — especially when the cast iron machine inside still runs perfectly. Singer built these cabinets from walnut, oak, quartersawn veneer, and solid hardwood, with dovetailed drawers, brass hardware, and joinery that has genuinely lasted 100 years. The machines get all the attention, but the cabinets are often the rarer pieces. And they’re absolutely worth restoring.
Vintage sewing machine cabinet restoration covers everything from treadle stands built in the 1890s to the mid-century electric cabinets Singer produced through the 1960s. The techniques differ slightly depending on the construction — veneer work for the 1900s-1930s models, solid wood for some later pieces — but the fundamentals are the same: assess carefully, repair structurally, strip selectively, and finish authentically. This guide covers the whole process.
Assessing the Damage
Before buying materials or mixing stripper, spend 30 minutes with good light doing a thorough assessment. What you find determines which steps you need and which you can skip.
Veneer lifting or bubbling — press gently across all surfaces to find areas where veneer has separated from the substrate. You’ll hear a hollow sound and feel the give. Map these areas because they need repair before any stripping or sanding begins; stripping over loose veneer will make it worse.
Water stains and ring marks — the white haze of a water ring sits in the finish, not in the wood. White = fixable without stripping (often). Black rings have penetrated into the wood itself and require stripping and sometimes bleaching.
Surface checking and crazing — old shellac and lacquer develops fine cracks over time as it contracts with temperature changes. Crazing that hasn’t penetrated to the wood surface can sometimes be amalgamated (dissolved and re-fused) rather than stripped.
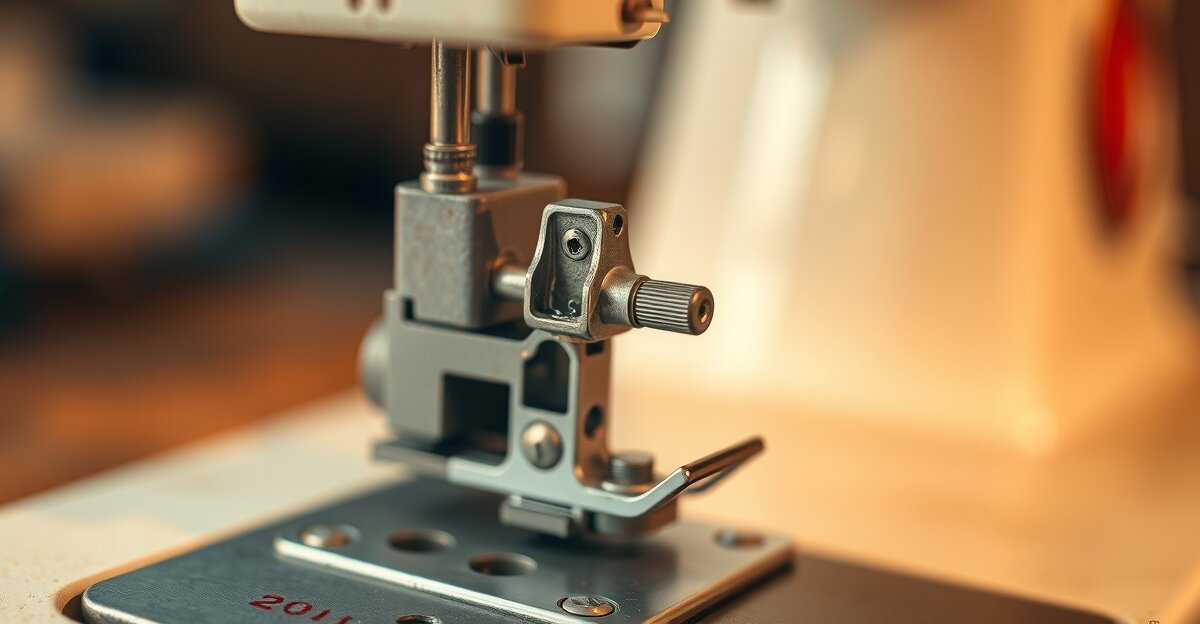
Hardware condition — assess the hinges, leaf supports, drawer pulls, and any decorative hardware. Brass that’s tarnished cleans up beautifully. Brass that’s pitted or corroded through may need replacement. Steel hardware that’s rusted surface-deep is salvageable; structural rust is not.
Hinge failure — check every hinge. Singer drop-leaf treadle tables are notorious for hinge failure because the hinges were mild steel and the leaf weight stresses them constantly. A hinge that’s bent, cracked, or has stripped screw holes needs addressing before the rest of the restoration.
Wood damage — look for splits, gouges, missing pieces, and previous repairs that may have been done badly. A filled gouge you don’t know about will take stain differently and ruin an otherwise clean finish.
Tools and Materials
For a complete cabinet restoration:
- Card scraper — for removing old finish without removing wood; takes practice but worth learning
- Sandpaper: 80, 120, 150, 180, 220 grit — you’ll use all of them
- Sanding block — flat sanding block is essential; sanding without a block rounds edges and creates uneven surfaces
- Wood glue — Titebond Original for general repairs; Titebond III if the piece will see any moisture
- Veneer patches — match the species as closely as possible; walnut veneer for walnut cabinets, oak for oak
- Veneer tape — paper tape for holding repairs in place during clamping
- Wax paper — essential for protecting cauls from sticking to glued repairs
- Chemical stripper — Citristrip is gentler and works on most finishes; avoid methylene chloride-based strippers on veneer (too aggressive)
- Denatured alcohol — for dissolving shellac and cleaning surfaces
- Acetone — for lacquer removal (test first)
- Stain — Minwax oil-based stain in Dark Walnut or Early American for most Singer cabinets
- Danish oil or shellac — for the final finish
- Brass polish — Brasso or Nevr-Dull for hardware
- 0000 steel wool — for finish rubbing and metal cleaning
Repairing Lifted Veneer
Do this before any other surface work. Stripping chemicals will get under lifted veneer and cause further delamination; sanding over loose veneer tears it.
The technique for a veneer bubble:
- Clean the area — if there’s wax or finish buildup around the bubble, clean it with a little mineral spirits first so your repair area is clear
- Inject wood glue — use a syringe (the type sold for glue injection at woodworking suppliers) to inject a small amount of wood glue under the veneer bubble. If the gap is too tight for a syringe, use a thin knife blade to lift the veneer edge slightly and work glue in with the blade tip.
- Spread evenly — with a toothpick or thin stick, work the glue toward all edges of the bubble, making sure there are no dry spots
- Press flat — press the veneer down and immediately wipe away any squeeze-out
- Clamp with wax paper — place a piece of wax paper over the repair, then a caul (flat block of wood or hardboard), then a clamp. The wax paper prevents the caul from sticking to the repair. Apply moderate pressure.
- Wait 24 hours — Titebond needs a full cure, not just an initial set. Don’t rush this.
- Remove and check — the repair should be flat. If there’s a slight ridge at the bubble edge, it will sand out. If the bubble re-lifted, the glue didn’t reach adequately — redo with more glue.
For veneer that’s completely missing, cut a patch from matching veneer sheet. Cut slightly oversized, position it over the void, then score around the edges with a sharp knife using the patch itself as a template. Remove the patch, cut out the damaged section to the scribed line, and fit the patch. It should drop in with minimal gap.
Removing Old Finish
First, identify what finish you’re dealing with. Singer used shellac on virtually all furniture produced before about 1940. Shellac from the 1940s-1960s was sometimes overcoated with lacquer or an early nitrocellulose finish. Understanding what’s there determines how you remove it.
Identifying shellac: Apply a few drops of denatured alcohol to an inconspicuous area. If the finish softens and gets tacky within 30 seconds, it’s shellac. Wipe it away — if the spot is clean, the whole finish is shellac and denatured alcohol will remove it.
Identifying lacquer: Apply acetone to a test spot. Lacquer softens quickly under acetone. If the denatured alcohol test left the finish intact but acetone softens it, it’s lacquer.
Shellac removal: The cleanest method is a denatured alcohol wash. Flood a section, let it sit for 2-3 minutes, and scrub with 0000 steel wool. The dissolved shellac will wipe away on a rag. Work in small sections. This method removes the finish without touching the wood and without the mess of paste stripper.
Lacquer and paint removal: Citristrip applied generously and covered with plastic wrap (to keep it from drying out) will soften most lacquer and paint in 1-4 hours. Scrape off with a plastic scraper, then clean up with mineral spirits or follow-up with denatured alcohol. On veneer: use Citristrip or similar slow-acting strippers only. Fast methylene-chloride strippers work too fast and can delaminate veneer edges irreparably.
Whatever method you use, finish by cleaning the surface thoroughly with mineral spirits to neutralize any stripper residue before sanding or staining.
Sanding Sequence
The sanding sequence is not negotiable if you want a smooth result. Skipping grits is the single most common mistake — going from 80 to 220 leaves deep scratches that stain darker than the surrounding wood and ruin the final look.
The sequence:
- 80 grit — only if there’s stubborn finish residue, deep scratches, or significant surface leveling needed. Don’t use 80 if 120 will do the job; coarser grits remove more material.
- 120 grit — primary material removal; removes scratches from 80-grit and does the bulk of surface prep
- 150 grit — transition grit; removes 120-grit scratches
- 180 grit — fine prep; surface starts to look finished at this stage
- 220 grit — final sanding; produces the surface that stain will penetrate evenly
Always sand with the grain. Crossgrain scratches catch stain and show up dramatically, especially on oak. Use a sanding block for flat surfaces. Use a flexible sanding sponge for curved sections and molding profiles.
Raised grain: After 220-grit sanding, wipe the surface with a damp cloth to raise the grain, let it dry completely, then sand lightly with 220 or 320 grit. This prevents the water in stain or finish from raising the grain after you’ve applied the first coat — which creates a rough surface mid-finish.
Staining to Match Original
Singer cabinets from the treadle era (1880s-1920s) were typically finished in dark walnut tones. The mid-century electric cabinets varied more — some were lighter oak tones, some were the classic dark walnut.
Always test stain on a hidden area — the underside of the cabinet top, inside a drawer, or on a scrap piece of matching wood. Stain behaves differently on different wood species and grain patterns, and the difference between “close enough” and “obviously wrong” only shows up on the real wood.
Recommended starting points:
- Minwax Dark Walnut (#2716) — the most common match for pre-1940 Singer treadle cabinets in walnut
- Minwax Early American (#230) — for lighter walnut and some oak-based cabinet models
- Minwax Provincial (#211) — warm medium brown, good for some mid-century electric cabinet models
Application technique: apply the stain liberally with a cloth or brush, working with the grain. Let it penetrate for 5-10 minutes (check the can’s instruction for the specific stain), then wipe back excess with a clean cloth. The more you wipe, the lighter the result. For an even darker tone, apply a second coat after the first has dried 24 hours.
Applying a New Finish
This is where authenticity matters most. The wrong finish will make a beautifully restored cabinet look obviously wrong — the plastic sheen of polyurethane on a Victorian-era treadle table is jarring in a way that’s hard to define but immediately obvious.
Danish oil is the easiest option and produces a beautiful, matte, low-sheen finish that suits most vintage pieces. It penetrates the wood rather than sitting on top, so it doesn’t have the plastic-film look. Apply with a cloth, let penetrate 20-30 minutes, wipe off excess. Apply 2-3 coats, lightly sanding with 320-grit between coats after the first has dried. Danish oil is particularly appropriate for mid-century cabinet pieces.
Shellac is the historically accurate choice for pre-1940 pieces. Dewaxed shellac (Zinsser SealCoat is a reliable pre-mixed dewaxed option) applied in thin coats builds a beautiful warm amber finish. Apply with a good natural-bristle brush or a pad, in thin coats. Sand between coats with 320-grit. The amber tone of shellac works beautifully with walnut — it enhances the warm undertones of the wood in a way no modern finish can quite replicate.
Avoid polyurethane on vintage furniture. It’s practical and durable, but it produces a thick, plastic-looking film. On a cabinet that’s meant to look like it was made in 1910, polyurethane is immediately anachronistic. Danish oil or shellac are the right choices.
Restoring Cabinet Hardware
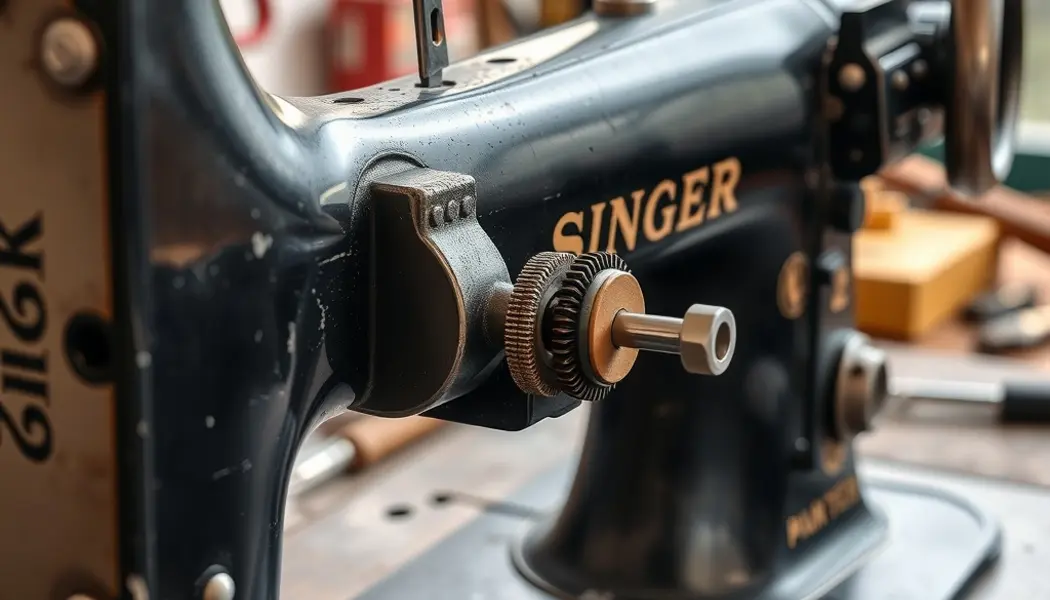
Singer cabinet hardware from the treadle era — hinges, leaf supports, drawer pulls, key escutcheons — was mostly cast brass or steel. The aesthetic is Victorian industrial, and the quality is generally excellent. Most of it can be saved.
Brass hardware: Remove from the cabinet before cleaning. Soak in a solution of white vinegar and salt for 30 minutes to loosen tarnish, then clean with Brasso or a paste of flour, salt, and white vinegar. Polish with 0000 steel wool. For heavily tarnished or corroded brass, a commercial brass cleaner (Flitz works well) applied with a cloth will cut through oxidation that lighter products can’t touch. After cleaning, apply a thin coat of paste wax to slow re-tarnishing.
Steel hinges: Wire-brush rust, then treat with a rust converter (Ospho or similar phosphoric acid product) to stabilize remaining rust chemically. After treatment dries, paint with a thin coat of black Japan paint or flat black enamel to restore the original look. Many Singer treadle hinges were originally black-japanned (a type of baked lacquer finish), so this is period-correct.
Replacement hardware: If hardware is missing or beyond repair, Singer treadle hardware is reproduced and widely available. Etsy sellers specializing in vintage sewing supplies, Van Dyke’s Restorers, and Horton Brasses are good sources. Measure the existing hardware before ordering — Singer used several hinge sizes across different decades.
Reassembling the Machine into the Cabinet
The machine goes back in last, after all finish work is complete and the hardware is reinstalled.
- Install the treadle irons or cabinet frame hardware first — if you removed them for refinishing, make sure they’re fully reinstalled and stable before placing the machine
- Check the machine mounting — Singer machines in treadle cabinets sit in a hinged mount that allows the machine to be folded down into the cabinet when not in use. This hinge mechanism needs to work smoothly. Clean and oil the pivot points.
- Connect the drive belt or treadle band — the leather or rubber belt that connects the treadle wheel to the machine balance wheel. If the original leather belt is cracked or broken, replacements are available. Leather cement works for joining cut leather belt ends.
- Check the treadle mechanism — the pitman rod (the connecting rod from treadle to drive wheel) should have some play but not so much that it bangs. Adjust the length if needed.
- Test the drive — before sewing, run the machine with no thread by treadle for a few minutes, watching for any binding or noise
A fully restored Singer treadle cabinet is genuinely a piece of functional furniture, not just a curiosity. They were made to last, and with proper restoration, they absolutely do. For a broader overview of vintage machine maintenance, the vintage equipment restoration guide covers the machine side of the equation, and the article on oiling a vintage sewing machine covers the first maintenance step once the machine is back in service.
Frequently Asked Questions
Can I refinish a Singer cabinet without stripping the original finish?
Sometimes. If the original finish is shellac and it’s just dull or mildly damaged, you can often rejuvenate it with a denatured alcohol wash, which partially dissolves the old shellac and allows it to flow and re-fuse. This is called “padding” or “amalgamating” the finish. It works beautifully for superficial wear and cloudiness. If the finish is cracked through, has deep water rings, or is peeling, you’ll need to strip and refinish.
How do I know if my cabinet is walnut or walnut veneer over a different wood?
Look at the edge profiles and any areas where the surface meets an end grain section. Solid walnut will show walnut grain on all faces including the edges. Veneer construction will show a lighter substrate wood (often poplar or birch) on the edges, with the walnut veneer on the faces only. Most Singer treadle cabinets from the major production eras were veneer over a secondary wood — this is normal and doesn’t affect value or the restoration approach significantly.
The leaf support on my treadle cabinet is broken. Can it be repaired?
Yes, almost always. The most common failure is a cracked or separated wooden support arm. This repairs with wood glue, clamping, and an internal dowel or spline for reinforcement on a structural joint. Metal leaf brackets are available from hardware restoration suppliers. Check Van Dyke’s Restorers and Singer-specific parts dealers before fabricating a replacement from scratch.
What’s the best way to deal with ink stains in drawer lining paper?
Don’t try to clean it — you’ll spread it. Old lining paper in Singer cabinet drawers is easy to replace. Craft paper or acid-free tissue paper cut to size and lightly adhered with a glue stick makes excellent new lining. The original paper was typically a speckled brown pattern; reproduction papers are available, or you can use plain craft paper for a clean utilitarian look.
One thought on “Vintage Sewing Machine Cabinet Restoration: DIY Guide”
Comments are closed.