

How to Replace a Broken Lawn Mower Pull Cord — Step-by-Step Guide
You grab the cord. Pull. Nothing. Just a frayed rope dangling in your hand and a completely dead engine. A professional repair runs $60–$150. But if the pull cord is your only problem, you can fix it yourself in 30 minutes for around $15. I’ve replaced pull cords on Briggs & Stratton engines, MTD decks, Toro walk-behinds, and a handful of Craftsman machines that people practically gave away because “it won’t start.” Every single one ran fine once the cord was sorted.
Replacing a lawn mower pull cord is a simple DIY repair that takes 30–60 minutes. Most homeowners can complete it for $15–$50 in parts, compared to $60–$150 in professional labor. You disconnect the spark plug, remove the recoil housing (2–4 screws), unwind the broken cord, and thread in new nylon rope. That’s genuinely most of it.
This guide walks you through exactly what causes pull cord failure, how to diagnose it in 5 minutes, and then gives you full step-by-step instructions for both repairs: rope-only replacement (the easy one) and spring plus rope replacement (when the spring gives out). Let’s get into it.
What Causes a Broken Lawn Mower Pull Cord?
Before you pull out a screwdriver, it helps to understand what you’re actually dealing with. Pull cord failure isn’t random — there are five common causes, and diagnosing which one you have takes about five minutes. Most of them are fixable at home.
Frayed or Snapped Nylon Rope (Most Common — 70%)
This is the good news scenario. The rope itself is just nylon — cheap, replaceable, and easy to work with. It degrades from UV exposure, friction against the housing, moisture, and the general violence of yanking it 200 times a season. In heavy-use situations (weekly mowing), you might see rope failure in 3–5 years. With lighter use, 8–10 years is realistic.
Warning signs are obvious: visible fraying at the rope edges, discoloration (usually gray-yellow instead of bright white), resistance when pulling, or a sudden snap mid-pull. If you’re seeing any of these, the rope is your culprit — and you’re in the easiest possible repair situation.
Recoil Spring Fatigue (20%)
The recoil spring is the coiled metal spring inside the housing that winds the rope back after each pull. After 8–12 years of use, it loses elasticity — it can no longer exert enough force to retract the cord fully. You’ll know immediately if this is your problem: the rope doesn’t snap back, it slowly creeps in over 5+ seconds, or it just hangs loosely out of the housing. The engine isn’t engaged — the rope just won’t retract.
Spring replacement is a bit more involved than rope-only replacement, but it’s still well within DIY territory. We cover it step by step in DIY Path 2 below.
Rope Installation Error (10%)
This one’s on the operator — but hey, it happens. If someone replaced the rope recently and wound it in the wrong direction, tied a loose knot, or tangled it during installation, it can jam on the very first pull. The giveaway: it just worked fine, then someone replaced the cord, and now it doesn’t. The fix is unwinding it and doing it correctly. This guide will make sure that doesn’t happen to you.
Pulley or Wheel Damage
The rope winds around a plastic or metal pulley inside the housing. If that pulley cracks, chips, or its bearings seize up, the rope can’t move smoothly — it jams, frays faster, or refuses to retract. Less common than rope or spring failure, but worth checking during any recoil repair. If the pulley is cracked, a new rope won’t help for long.
Housing Cracks
The recoil housing is usually injection-molded plastic, and it takes the mechanical stress of every single pull. Over time — especially after a decade of outdoor storage — it cracks from impact or UV degradation. A cracked housing weakens the entire recoil system and can cause the rope to snag. You can sometimes patch it with epoxy as a temporary measure, but if the crack runs through a structural area, a full housing replacement is the better call.
How to Diagnose What’s Actually Broken
Five minutes of inspection before you start disassembling will save you an hour of guesswork. Here’s the process.
Step 1 — Disconnect the Spark Plug Wire
Always first. Pull the rubber boot off the spark plug before touching anything else. It takes 10 seconds and prevents the engine from firing while your hands are near the housing. This is non-negotiable — don’t skip it because “I’m just looking.”
Step 2 — Inspect the Rope End
Look at the rope that’s still hanging out of the housing. Frayed at the edges? Rope deterioration — the most common scenario. Completely snapped with both ends visible? Severe wear or a weak point in the rope. Tangled and jammed inside the housing? Installation error or a pulley jam. Take a photo with your phone before you start pulling anything apart — it’s a useful reference for reassembly.
Step 3 — Check the Recoil Housing for Cracks
Run your fingers along the entire surface of the housing, paying close attention to the seams and around the rope exit hole. Cracks are often visible; sometimes they’re just stress lines you can feel with a fingernail. Note any discoloration or corrosion around the screws. If you see significant damage, you may need a full assembly replacement (part numbers: MTD 753-08173 or 753-08209; Briggs & Stratton 591734 or 499706; Toro 119-4676 or 119-4721).
Step 4 — Try a Slow Test Pull
Don’t yank it. Pull the rope slowly and feel for resistance. A healthy spring gives you firm, consistent tension on the pull and snaps the rope back quickly when you release. No resistance at all — or the rope pulls freely and just stays out — means the spring is probably dead. Firm and smooth on the pull, but the rope retracts slowly? Weak spring. Firm and smooth, rope retracts well, but the rope itself is frayed or broken? You’re in rope-only territory. That diagnosis tells you which path to take.
DIY Path 1 — How to Replace the Pull Cord Only (Easiest, 30–60 Minutes)
This covers the majority of pull cord failures. If your spring is working fine and just the rope is broken or frayed, this is all you need. It’s genuinely beginner-friendly — the only real skill involved is tying a decent knot.
Tools You’ll Need
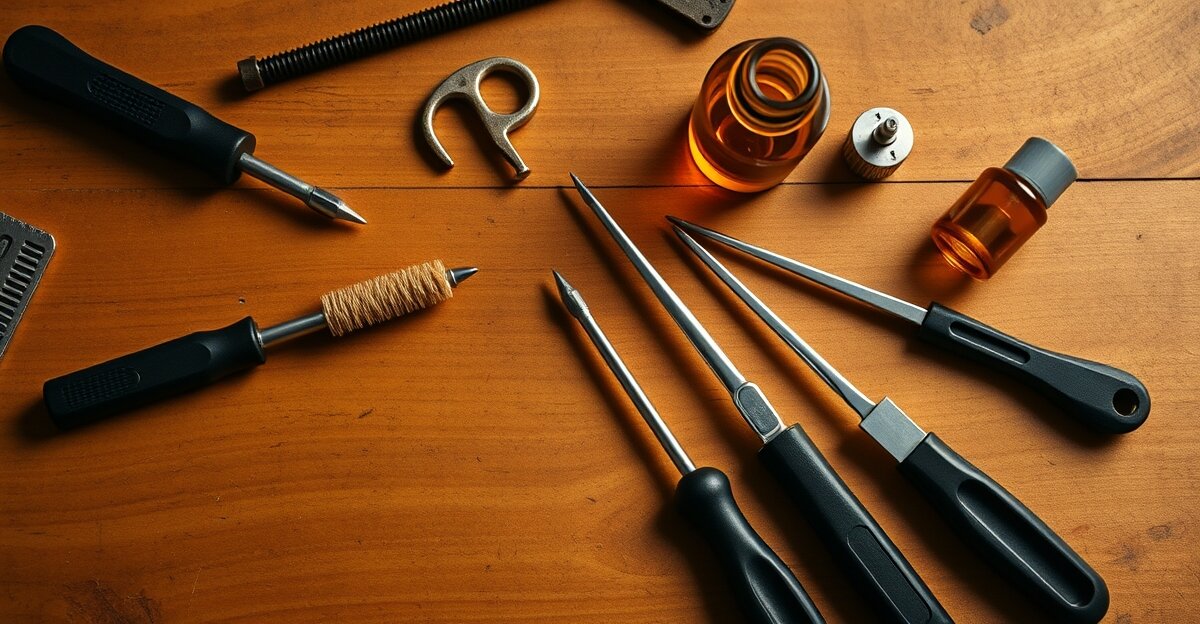
- Phillips screwdriver (or socket wrench for recessed bolts)
- Needle-nose pliers
- Scissors
- Lighter (to seal nylon rope cut ends — prevents fraying)
- Eye protection (smart practice any time you’re near spring mechanisms)
Don’t have needle-nose pliers? They’re worth picking up. [AFFILIATE: “needle-nose pliers set for small engine repair” | Amazon search: “needle nose pliers set”]
Parts You’ll Need
- Nylon starter rope — .155″ diameter is standard for most walk-behind mowers; buy a 100-ft spool and cut to length (usually 8–10 feet per cord). Expect $8–$12 on Amazon.
- T-handle or pull handle — Pre-made handles run $3–$5; they come in bulk packs of 5–10 which is smart if you’ve got multiple pieces of equipment.
[AFFILIATE: “100ft nylon starter rope spool .155 inch lawn mower” | Amazon search: “100ft nylon starter rope .155 lawn mower”]
Step-by-Step Instructions
- Disconnect the spark plug wire. Pull the rubber boot straight off the plug. Set it aside where it won’t accidentally fall back on.
- Remove the recoil housing. Look for 2–4 screws holding the housing to the engine. On most Briggs & Stratton and MTD engines they’re Phillips head; on Honda GCV models they may require a small socket. Take a photo of the housing position before removal. Set the screws in a cup or magnetic tray — losing them is annoying. With the housing off, take a quick look at the spring: if it’s intact and under tension, great. If it’s visibly broken or flopped flat, go to DIY Path 2 instead.
- Unwind the broken rope from the pulley. Note the winding direction — on most mowers it’s clockwise when viewed from the front of the housing. Remove the old rope entirely. If it’s tangled, work it out slowly; don’t force it, as that can damage the pulley flanges.
- Cut and seal your new rope. Measure about 8–10 feet from the spool (for a standard 21″ walk-behind). Cut cleanly with scissors, then touch each cut end briefly to the lighter flame — 1–2 seconds — until the nylon melts slightly and seals. This prevents fraying at the ends during installation.
- Feed the rope through the pulley and wind it. Thread one end of the rope through the starting hole in the pulley. Wind the rope around the pulley 4–6 times in the same direction you noted in Step 3 (typically clockwise). Keep the winds snug but not white-knuckle tight — the rope needs room to expand slightly when the spring pulls it back.
- Feed the rope through the housing exit hole. While holding slight tension on the wound pulley, feed the hanging end of the rope through the hole in the housing face. Make sure it sits in any rope groove present in the housing, and runs straight without kinks.
- Install the handle. Option A: Thread the rope through the pre-made T-handle, pull 3–4 inches through, tie a tight overhand knot, and melt the knot end lightly with the lighter to lock it. Option B: Tie a large overhand knot directly and melt it. Either way, tug firmly to make sure the knot won’t slip through the handle or housing hole.
- Reassemble the housing. Position the housing back on the engine, making sure no rope is caught between the housing and engine block. Snug up the screws — tight enough they won’t vibrate loose, but you’re not trying to strip plastic here.
- Reconnect the spark plug wire and seat it fully on the plug.
- Test the pull. Pull the cord gently 3–5 times. It should unwind smoothly, retract cleanly, and feel firm without requiring a grunt. If it jams: stop, remove the housing, and check for rope kinks or tangling around the pulley. If it won’t retract: check winding direction and spring condition. See the Troubleshooting section if needed.
That’s it. On a warm day with everything laid out, this whole job takes about 30 minutes, including the time to track down your screwdriver. If you want to see an excellent walkthrough for this repair on a Briggs & Stratton engine specifically, search YouTube for “Briggs Stratton pull cord replacement” — channels like Taryl Fixes All and Small Engine Warehouse have thorough videos covering the most common engine families.
DIY Path 2 — Replace the Spring and Cord (Moderate, 60–90 Minutes)
If your test pull revealed no spring tension at all, or if your rope keeps coming out without retracting, the spring is the real problem. Don’t just replace the rope — it won’t fix anything, and you’ll be back here in two weeks. Do the spring right the first time.
When You Need This Repair
- Rope doesn’t retract at all after you release it
- Spring is visibly broken, corroded, or popped out of its housing slot
- You replaced the rope and the problem persisted
- Rope keeps unwinding itself when the mower is not in use
Tools You’ll Need (Same as Path 1, Plus)
- Small flat-head screwdriver (for spring attachment points)
- Needle-nose pliers (critical for handling the spring)
- Eye protection — mandatory when working near spring tension
- Work gloves (optional but your hands will thank you)
- A clean rag (the old spring grease is messy)
Parts You’ll Need
You have two options here: buy a pre-assembled recoil starter kit specific to your engine, or buy an individual spring and rope and assemble it yourself. The pre-assembled route is usually worth the extra $10–$15 for anyone who hasn’t done this before — everything is positioned correctly already, the spring tension is set, and most kits come with decent instructions.
- Pre-assembled recoil starter kit (model-specific) — $25–$75 on Amazon or from a parts house. Look up your engine model number (stamped on the engine block) to get the right kit. For Briggs & Stratton engines, part numbers 591734 and 499706 cover a wide range of common models. For MTD, 753-08173 and 753-08209 are the most common. Toro uses 119-4676 and 119-4721 for their walk-behind series.
- Replacement rope — often included in kits; if not, grab the same .155″ spool from Path 1.
[AFFILIATE: “recoil starter assembly kit Briggs Stratton MTD Toro” | Amazon search: “recoil starter assembly replacement kit lawn mower”]
The recoil spring stores mechanical energy. Even an “old” or “weak” spring can snap free unexpectedly during removal and cause serious eye or hand injuries. Always wear eye protection before removing or handling the recoil spring. Work slowly, never force the spring, and keep your face away from the spring housing during disassembly. If the spring suddenly pops free, do not attempt to catch it — let it go, locate it on the ground, and retrieve it calmly. Wear gloves if the spring shows any corrosion or sharp edges.
Step-by-Step Instructions
- Disconnect the spark plug wire. Same as always — first step, every time.
- Remove the recoil housing and photograph everything. Before removing any spring components, take a clear photo of the spring’s anchor points in the housing and at the pulley. This is your assembly reference. The spring has a fixed end (anchored to the housing) and a free end (anchored to the pulley or pulley hub). You need to know where both are going before you start pulling.
- Carefully remove the old spring. Using needle-nose pliers, gently lift the spring’s free end off its anchor point first, then work the fixed end loose. The spring may still be under partial tension even if it’s weak — hence the eye protection. If it’s corroded or seized, work slowly and use the flat-head screwdriver to gently pry it free. Set it aside on your rag.
- Inspect the pulley and housing interior. With the spring out, look carefully at the pulley for cracks, worn flanges, or sharp edges. Run your finger along the inside of the housing to check for burrs that might fray the new rope. Sand down any rough spots with fine-grit sandpaper. If the pulley is cracked, you’ll need a full assembly replacement — a new spring alone won’t fix it.
- Install the new spring per the kit instructions. Most kits include a printed guide; follow it over my general instructions if they conflict — the kit is specific to your engine, this guide is general. Typically: anchor the fixed end in the housing slot first, then carefully position the coil, and hook the free end onto the pulley hub. The spring should curve smoothly in a consistent spiral without kinking. Don’t force it into position; if it won’t seat naturally, re-check orientation against the kit diagram or a YouTube video for your specific model.
- Wind and install the new rope. Follow Steps 4–7 from DIY Path 1 above. Cut your rope, seal the ends, wind 4–6 times clockwise around the pulley, feed through the housing hole, tie the handle knot.
- Reassemble the housing. Position the housing carefully — make sure the spring isn’t pinched between housing and engine, and the rope runs cleanly through the exit hole. Snug up the bolts. Reconnect the spark plug wire.
- Test slowly. Pull gently 3–5 times. A properly installed spring should retract the rope smoothly and fairly quickly — within 2–3 seconds of release. If the rope hangs out: the spring may not be anchored correctly at the pulley end. If the rope is extremely stiff and barely moves: you may have wound it too many times or the spring tension is too high — try removing one wind from the pulley. See the Troubleshooting section if you’re still having problems.
For Toro and Honda GCV120/GCV160 owners: these engines sometimes have the recoil assembly positioned differently than typical Briggs & Stratton units. On Honda GCV models, the housing bolts are often recessed and may need a 10mm socket. The spring mechanism is otherwise similar. If anything feels wrong during spring installation, stop and consult the kit instructions or a YouTube tutorial for your specific model before proceeding. It’s not worth risking injury over a $40 part.
When to Call a Professional Instead
Most pull cord problems are DIY-friendly. But there are situations where a shop visit is the smarter move — and recognizing them early saves you time and frustration.
Call a professional if:
- The recoil housing is severely cracked or corroded and unavailable as a replacement part
- The spring is welded or integral to the engine block in a way that makes access near-impossible (some older commercial units)
- You’re genuinely uncomfortable working around spring tension — this is a legitimate safety concern, not weakness
- You attempted the DIY repair and the mower still won’t start — that means the real problem isn’t the pull cord at all, and diagnosis is needed
- The mower is under warranty (DIY repair may void it)
- The model is old or uncommon enough that correct parts are difficult to source
What does professional repair cost? Parts plus labor typically runs $75–$200 total, with a 1–2 day turnaround. Before dropping the mower off, call a local shop for a free diagnosis quote — many will give you an estimate over the phone. Some will even walk you through a simple rope replacement on the spot if you bring the mower in. Worth asking.
If your mower won’t start even after the pull cord is fixed, the issue could be fuel, spark plug, air filter, or carburetor-related. Our guide on How to Clean Chainsaw Spark Plugs covers spark plug diagnosis and cleaning — much of the same logic applies to lawn mower plugs.
Tools and Parts Cost Breakdown
Here’s what this repair actually costs — and how it compares to handing it off to a shop. The numbers aren’t dramatic because I’m making a point; they’re just what parts actually cost.
Rope-Only Replacement
| Item | Cost Range | Notes |
|---|---|---|
| Nylon starter rope (100-ft spool, .155″) | $8–$12 | Amazon, Toro dealer, eBay — enough rope for 8–10 repairs |
| Pre-made T-handles (5-pack) | $3–$5 | Bulk packs are better value than single handles |
| Needle-nose pliers (if needed) | $5–$15 | Harbor Freight, Amazon — probably already own these |
| DIY total | $10–$15 | Assumes basic tools already on hand |
| Professional repair (labor + parts) | $60–$150 | Shop rate varies by region |
| Your savings | $45–$140 | Plus same-day turnaround vs. 1–2 days |
Spring + Rope Replacement
| Item | Cost Range | Notes |
|---|---|---|
| Pre-assembled recoil starter kit (model-specific) | $25–$75 | Briggs 591734, MTD 753-08173, Toro 119-4676 |
| Replacement rope (if not included) | $8–$12 | Same spool as above |
| Gasket/seal kit | $2–$5 | Usually included in quality kits |
| DIY total | $25–$50 | 60–90 minutes of your time |
| Professional repair (labor + parts) | $75–$200 | Spring replacement takes longer at shop rates |
| Your savings | $50–$150 | — |
Unless you need to buy a full tool set, a rope-only fix costs under $15 out of pocket. Even a full spring replacement runs $30–$50 and takes 60–90 minutes — versus paying a shop $100+ and waiting days. The math is pretty clear.
Common Mistakes and Troubleshooting
Even when you follow the steps, things can go sideways. Here’s what usually goes wrong and how to fix it.
The Rope Won’t Pull — It’s Too Stiff
Cause: Too many winds around the pulley, or wound too tight. Standard is 4–6 wraps. More than that and you’ve over-tensioned the system.
Fix: Remove the housing, unwind one or two loops from the pulley, reassemble, and test again. The pull should feel firm but not like you’re fighting it.
The Rope Pops Out of the Housing Exit Hole
Cause: The rope isn’t seated in the housing groove, or it’s not running straight through the exit hole — it’s catching on the housing edge instead of passing cleanly through.
Fix: Remove the housing and reposition the rope so it runs straight from the pulley through the exit hole without any angle. Before reassembling, pull gently on the rope end to confirm it’s secure and running cleanly.
The Rope Retracts Slowly or Hangs Loose
Cause: Weak or incorrectly installed spring, or the rope is wound in the wrong direction. If the spring is new and this is happening, double-check that both ends are properly anchored — it’s easy to miss the pulley-end anchor point on first installation.
Fix: If it’s a new spring that isn’t retracting, re-open the housing and verify both anchor points against the kit diagram. If it’s the original spring, it’s probably just worn out — time for Path 2.
The Rope Keeps Fraying or Snapping Again Quickly
Cause: The pulley has a crack or sharp burr that’s cutting into the rope on every pull. You can replace the rope as many times as you like — it’ll keep breaking until you fix the pulley.
Fix: Pull the housing and inspect the pulley closely. Run a finger around the rope channel looking for sharp edges. Sand down any burrs with fine-grit sandpaper, or replace the pulley entirely if it’s cracked. Also make sure you’re using quality .155″ nylon rope — cheap thin rope will fail faster regardless of pulley condition.
The Mower Still Won’t Start After the Repair
Cause: The pull cord is working fine — the problem is something else entirely. Fuel, spark plug, air filter, and carburetor issues are all separate from the recoil system.
Fix: Don’t assume the cord repair failed. If the cord pulls smoothly and retracts properly, your recoil system is good. Start diagnosing the starting system: check the fuel (old gas is a very common culprit), inspect the spark plug for fouling, and make sure the air filter isn’t clogged. See our Vintage Lawn Mower Blade Sharpening guide for broader lawn equipment maintenance context, or check the Briggs & Stratton website directly for engine-specific diagnostic guides.
Maintenance Tips to Extend Pull Cord Life
Once the repair is done, a few habits can double the lifespan of your new rope and keep the recoil system in good shape for years.
- Store under cover. UV and moisture are the two biggest enemies of nylon rope. A garage or shed extends cord life significantly compared to leaving the mower outside year-round.
- Pull smooth, not jerky. Sharp yanks create more friction and stress on the rope than a firm, steady pull. It’s not about being gentle — it’s about pulling efficiently. Teach everyone in the household the proper technique.
- Winterize the recoil system. At the end of the mowing season, manually wind the rope fully and hold it in — this pre-tensions the spring for storage and prevents the coil from going slack over winter. Takes 30 seconds.
- Check the pulley annually. Every spring, before the first mow of the season, pull the housing and run a finger around the pulley channel. Sand down any new burrs before they start eating rope.
- Use .155″ rope. Don’t substitute thinner rope to save a dollar. The slightly undersized cord wears faster and can jam in some pulleys. Stick to the standard diameter.
For a broader approach to lawn equipment maintenance, our Complete Guide to Vintage Equipment Restoration covers the maintenance mindset that keeps older machines running for decades. Same principles apply whether you’re working on a 1988 Craftsman or a three-year-old Toro.
When It’s Worth Replacing the Mower Instead
Occasionally the honest answer is: don’t fix the pull cord. If the mower deck is rusted through, the blade won’t engage, the carburetor is completely gummed up, and the frame has seen better decades — $50 in recoil parts is throwing money at a problem that a $200 replacement mower (used, Craigslist) would solve more sensibly. In my experience, if a mower has more than two unrelated failing systems at once, the economics shift fast.
Pull cord alone? Fix it — easy money. Pull cord plus engine won’t idle plus blade engagement cable is snapped? Do the math before you start buying parts.
Ready to Fix That Pull Cord?
A broken lawn mower pull cord is one of the most fixable equipment failures you’ll run into. Rope only: you’re 30 minutes and $15 from a running mower. Spring plus rope: 90 minutes and $40. Either way, you’re not paying a shop $100+ for something you can confidently handle with a screwdriver, some nylon rope, and this guide.
Start here: disconnect that spark plug wire, pull the housing, and look at what you’ve actually got. Most of the time it’s just the rope — and you’ll be done before lunch.
Need the supplies? A good 100-ft nylon rope spool covers 8–10 rope replacements and costs under $12: [AFFILIATE: “100ft nylon starter rope spool .155 inch” | Amazon search: “100ft nylon starter rope 155 lawn mower pull cord”]. For spring repairs, grab a model-specific pre-assembled recoil kit: [AFFILIATE: “pre-assembled recoil starter kit lawn mower Briggs Stratton” | Amazon search: “recoil starter assembly kit Briggs Stratton MTD Toro”]. And if you’re starting from scratch on tools, a decent needle-nose pliers set covers you for this and a dozen other small engine jobs: [AFFILIATE: “needle nose pliers set small engine repair” | Amazon search: “needle nose pliers set mechanics”].
As an Amazon Associate, profvolt.com earns from qualifying purchases. We only recommend products we’ve found useful for this type of repair.
Frequently Asked Questions
Why won’t my lawn mower pull cord retract after I pull it?
A pull cord that won’t retract almost always means a failed recoil spring. The spring is the coiled metal mechanism inside the housing that winds the rope back. If it’s lost tension, broken, or popped off its anchor point, the rope just stays out after each pull. DIY Path 2 in this guide covers spring replacement step by step. Expect a 60–90 minute repair and $25–$50 in parts for a pre-assembled recoil kit.
How long does it take to replace a lawn mower pull cord?
A rope-only replacement takes 30–60 minutes for most people doing it for the first time. Once you’ve done it once, you’re under 20 minutes. A spring plus rope replacement takes 60–90 minutes, including careful spring handling and testing. Neither repair requires special tools beyond what most homeowners already have.
How much does it cost to replace a lawn mower pull cord?
A rope-only replacement costs $10–$15 in parts: a 100-ft nylon rope spool ($8–$12) and a T-handle ($3–$5). A full spring plus rope replacement using a pre-assembled recoil starter kit runs $25–$50 depending on your engine model (Briggs & Stratton, MTD, Toro kits are all in that range). Compare that to professional repair: $60–$150 for labor plus parts. The DIY savings are real.
Can you repair a frayed pull cord, or do you need to replace it?
Replace it. A frayed rope is already compromised — sealing the frayed end or taping it is a temporary patch that will fail mid-pull, often at the worst moment. Nylon rope is cheap (a 100-ft spool handles 8–10 replacements) and the installation takes about 30 minutes. There’s no good reason to salvage a frayed cord when replacement is this easy.
When should I call a professional for pull cord repair?
Call a pro if the recoil housing is severely cracked or corroded beyond what replacement parts can fix, if the spring is integral to the engine block and nearly inaccessible, if you attempted the repair and the mower still won’t start (which means a separate engine issue needs diagnosis), or if you’re uncomfortable working with spring tension. The spring genuinely can pop free during removal — it’s not a dangerous job if you follow proper precautions, but if it makes you nervous, a shop visit is $60–$150 well spent.
How to Replace Pull Cord on a Honda Lawn Mower (GCV160, GCV190, GX Series)
Honda lawn mowers — particularly the GCV160 and GCV190 engine variants found on Honda HRX, HRR, and HRN models — are among the most common pull cord replacement jobs. The process follows the same steps as the generic guide above, with two Honda-specific differences worth knowing.
Honda-specific step 1: The Honda GCV recoil starter uses a left-hand thread on the center bolt. Turn clockwise to loosen (opposite of standard). Getting this wrong is the most common mistake on Honda pull cord replacement — you can strip the bolt before realizing it.
Honda-specific step 2: Honda recoil starters have a secondary return spring inside the pulley housing that often flies out when you open the assembly. Before disassembling, place the entire starter housing in a plastic bag while you open it — contains any springs that escape. Replacement Honda recoil springs are ~$8–12 on Amazon if yours breaks during removal.
Correct cord for Honda GCV160/GCV190: #4.5 or #5 diameter, approximately 68–72 inches long. The pre-cut Honda replacement cord kits (around $6) include the correct diameter and a pre-formed handle knot — worth buying over generic rope for a clean install.
Fixing a Broken Lawn Mower Pull Cord vs. Replacing the Full Starter
A broken lawn mower pull cord — where the rope snapped but the recoil mechanism is intact — is a 20-minute fix following the steps in this guide. If the cord broke because the recoil spring is broken (you pull and it doesn’t retract), that’s a different repair: the spring needs replacement, which requires full disassembly of the starter pulley. Spring replacement adds 15–20 minutes but uses the same tools.
If the starter housing itself is cracked or the pawls (the teeth that engage the flywheel) are damaged, replace the entire recoil starter assembly as a unit — they run $15–35 for most brands and install in under 10 minutes. Repairing individual starter components past the cord and spring is rarely cost-effective.