
Fix a Sticky Canon AE-1 Shutter in 15 Minutes: The Complete Diagnostic & Repair Guide
Your Canon AE-1 shutter is stuck. It sounds like it’s grinding, or it won’t advance past a certain speed, or maybe it just won’t fire at all. Before you assume your 50-year-old camera is broken beyond saving, I have good news: a sticky shutter is usually fixable — and you might solve it in 15 minutes without taking the camera apart.
Fixing a sticky Canon AE-1 shutter involves three steps: replace the SR44 batteries and clean the battery contacts with a pencil eraser, spray a small amount of Ronsonol lighter fluid into the shutter chamber and let it fully evaporate, then test the shutter at every available speed. This non-invasive Canon AE-1 sticky shutter fix resolves 70–80% of sticky shutter complaints. For stubborn cases involving torn curtains or spring fatigue, professional repair typically costs 50–00.
Now, you’re probably wondering why your beautiful AE-1 — one of the best-selling cameras in history, with over five million units sold — is behaving like a grumpy antique. That’s exactly what we’re going to figure out together.
How the Canon AE-1 Shutter Works (And Why It’s Vulnerable)
The Canon AE-1 was released in April 1976 as a revolutionary camera: it was the first mass-market SLR with a microprocessor. Canon sold it hard, and buyers responded. But to hit their price point, Canon made some design compromises that still haunt owners today.
The horizontal cloth focal plane design
Unlike modern cameras with titanium or steel blade shutters, the AE-1 uses a horizontal cloth focal plane shutter. Two fabric curtains — a front curtain and a rear curtain — travel left-to-right across the film plane when you press the shutter button. The gap between those two curtains determines your exposure.
At 1/60s and slower, the front curtain fully clears the film plane before the rear curtain starts moving. At faster speeds like 1/500s or 1/1000s, both curtains are moving simultaneously, creating a narrow slit of light. That’s why shutter timing accuracy matters so much — even slight friction throws off your exposures at the fast end.
Why Canon chose fabric over titanium in 1976
In the mid-1970s, titanium shutter blades were expensive and hard to machine in volume. Cloth was cheaper, easier to work with, and adequate for the AE-1’s intended market of enthusiast photographers. The tradeoff? Cloth absorbs moisture, attracts dust, and deteriorates with age. After 40–50 years, the original cotton/nylon blend can fray, stiffen, or develop tiny holes that let light leak onto your film.
Canon’s own Wikipedia entry notes that “cost concerns resulted in the use of plastic in some of the moving and operating mechanisms” — and the cloth shutter is part of that cost-cutting story. It’s not a flaw so much as a product of its era.
The battery-dependent trigger system (often overlooked)
Here’s what surprises most first-time AE-1 owners: the shutter is electromagnetically controlled. It doesn’t fire mechanically like older all-manual cameras. It requires battery power to release the mirror and trigger the shutter sequence.
This means a weak or corroded battery doesn’t just affect metering — it directly causes slow or non-functional shutters. The AE-1 takes four SR44 silver oxide cells (6V total), and when those cells drop below a working threshold, the electromagnet doesn’t have enough power to release cleanly. The result looks exactly like a mechanical sticky shutter.
We’ll address this first in the diagnostic section, because it’s the most common and cheapest fix.
Why Canon AE-1 Shutters Fail: 5 Root Causes
Let’s be honest about what’s happening inside your camera. Fifty years of sitting in a drawer would make anyone slow. Here are the five most common culprits, roughly in order of frequency.
#1 — Dried lubricant buildup (most common culprit)
The original factory lubricants in the AE-1’s shutter mechanism were fine in 1976. By 2026, they’ve had five decades to oxidize, thicken, and turn into something closer to molasses than oil. The shutter curtain rails, the curtain spring assemblies, and the timing cam all run on these lubricants — and when they seize up, so does your shutter.
You’ll usually see this as sluggishness at fast speeds. At 1/1000s, the shutter sounds wrong: too slow, like it’s dragging. At 1/60s it might fire fine. That speed-specific behavior is a classic dried lubricant signature.
#2 — Cloth curtain deterioration and fraying
After decades, the curtain fabric itself can develop problems. Tiny frays at the edges catch on the shutter rails. Pin-hole light leaks develop from deteriorated coating. In severe cases, the curtain tears partially and physically can’t complete its travel.
You can often spot curtain damage by removing the lens and looking into the mirror box with an LED light (more on that in the diagnostic section). Look for uneven edges, discoloration, or small holes along the curtain seams.
#3 — Weak or dead batteries (80% of cases)
I’m putting this third in the list but first in the repair sequence — because it’s the most overlooked cause and the cheapest fix. The AE-1’s electromagnetic trigger needs those four SR44 cells to be fresh and making clean contact. Old batteries lose voltage slowly; you might not notice the meter is slightly off, but the shutter is struggling every single time you fire it.
While you’re in there: clean the battery compartment contacts with a soft pencil eraser. The graphite gently removes oxidation from the brass contacts without scratching them. It takes 30 seconds and can resurrect a camera that’s been sitting for years.
#4 — Spring fatigue and mechanical wear
The return springs that reset the shutter curtains after each exposure have a finite number of cycles. After 40+ years of use (and disuse — springs can fatigue from being under tension even when not fired), these springs lose tension and can’t return the curtains to their correct starting position.
Spring fatigue is harder to diagnose without opening the camera, but you can suspect it when the shutter fires but doesn’t advance the film properly, or when the curtain feels like it’s “catching” before the next exposure is ready.
#5 — Sludge and oxidation from old oil
This one is related to #1 but distinct: over time, the original lubricant doesn’t just thicken, it combines with airborne dust and microscopic debris to form a gummy residue on the shutter rails. Think of it like the difference between stale honey and honey with dirt mixed in. The sludge creates friction that no amount of fresh lubricant can overcome without first cleaning it away.
This is where Ronsonol lighter fluid earns its reputation in camera repair circles.
Diagnose Your Sticky Shutter: The 3-Minute Test
Before you buy anything or attempt any fix, spend three minutes diagnosing what’s actually happening. Your symptoms point to specific causes, and fixing the wrong thing wastes time.
Step 1 — Battery test first (often solves the problem)
Remove the battery door — carefully, because the AE-1’s battery door is a known weak point and snaps if you force it. Take out the four SR44 batteries. Use a white pencil eraser to gently polish each battery contact in the compartment until they’re shiny. Insert four fresh SR44 batteries (or SR44W equivalents, which are slightly more stable at low temperatures).
Fire the shutter at 1/60s three times while listening carefully. Then try 1/500s and 1/1000s. If the behavior changed — even slightly — battery voltage or contact corrosion was at least part of your problem. If your camera has been sitting for years with old batteries inside, this step alone often brings it back to life.
Step 2 — Speed-specific symptom mapping
The speed at which your shutter misbehaves is diagnostic:
- All speeds stick or drag equally: Likely cloth issue — fraying or physical obstruction.
- Slow at fast speeds only (1/500–1/1000s): Classic dried lubricant signature. The curtain needs more force to travel quickly, and the old oil is resisting.
- Shutter won’t fire at any speed: Battery, electronic contact failure, or catastrophic mechanism failure. Start with batteries; escalate from there.
- Shutter fires but sounds grinding or scraping: Debris on the curtain rail, or curtain edge physically catching. Don’t keep firing — you risk tearing the curtain.
- Works fine at 1/60s but not 1/125s or faster: Timing calibration issue, or classic lubricant buildup affecting high-speed timing.
Write down your specific symptom before proceeding. It’ll help you choose the right fix.
Step 3 — Visual inspection without opening the camera
Remove the lens. Cup your hand around the lens mount opening to block ambient light, then shine an LED penlight or headlamp into the mirror box while looking at the shutter curtains. You’re checking for:
- Fraying or tears along the curtain edges (horizontal lines in the fabric)
- White residue on the rails (calcium from old lubricant deposits)
- Uneven curtain position (one side lower than the other suggests rail binding)
- Visible debris — dust, film fragment shreds, old foam light seal material that’s disintegrated
If the curtains look physically intact — no tears, no obvious residue — proceed to the DIY fix. If you see tears or holes in the cloth, skip ahead to the professional repair section. Torn curtains cannot be field-fixed.
The 15-Minute DIY Fix (No Disassembly Required)
This is the fix that actually works for the majority of AE-1 sticky shutter complaints. It doesn’t require opening the camera, voiding anything, or risking mechanical damage. You need batteries, a pencil eraser, Ronsonol lighter fluid, and patience.
Step 1 — Replace batteries and clean contacts
You’ve already done this if you ran the diagnostic above. If not: fresh 4×SR44 batteries, pencil eraser on the contacts, done. This step costs under 0 and solves a large percentage of sticky shutter issues outright.
If you notice green or white corrosion in the battery compartment — actual crusty buildup, not just dullness — don’t use an eraser. Use a cotton swab dipped in 99% isopropyl alcohol instead. Let it dry completely before inserting fresh batteries. Severe corrosion means the contacts themselves may be damaged; check out our Canon AE-1 Battery Corrosion Fix guide for that specific repair.
Step 2 — Chemical flush with Ronsonol lighter fluid
Ronsonol is refined naphtha — a very light petroleum solvent that evaporates cleanly and leaves no residue. Camera repair technicians have used it for decades to dissolve old lubricant deposits without harming the shutter cloth or electronic components (when used carefully).
Here’s exactly how to do it:
- Remove the lens from the camera.
- Point the lens opening downward, then hold the camera at a slight angle.
- Give the Ronsonol can one short spray (half a second) aimed into the lens mount opening toward the shutter curtains. You’re not soaking anything — a light mist is enough.
- Immediately turn the camera upright and fire the shutter 10–15 times at 1/60s. The movement helps the fluid work through the curtain rail mechanism.
- Then fire 5 times each at 1/125s, 1/250s, 1/500s, and 1/1000s. Work up to fast speeds as the solvent loosens the old lubricant.
What not to do: Do not use compressed air. It pushes debris deeper into the mechanism instead of flushing it out. Don’t use gasoline, acetone, or electronics cleaner — these are too aggressive and can damage curtain coatings.
Step 3 — Let it dry completely (patience = success)
This is where most people fail. They do the flush, fire the shutter a few times, declare victory, and load film. Then they get blurry, incorrectly exposed photos because the solvent is still in the mechanism, temporarily lubricating things that aren’t properly cleaned yet.
Set the camera down in a warm, dry location — not direct sunlight, but a room-temperature surface with decent air circulation. Leave it for at least two hours. Ronsonol evaporates quickly in open air, but inside a camera body with less airflow, it needs time. I usually leave mine overnight to be safe.
Step 4 — Test and document your results
After drying, test the shutter across all speeds. Fire at least five shots at each speed: 2s, 1s, 1/2s, 1/4s, 1/8s, 1/15s, 1/30s, 1/60s, 1/125s, 1/250s, 1/500s, 1/1000s.
Listen carefully. The shutter should sound crisp at each speed, with the firing sound distinctly shorter as you increase speed. If 1/1000s sounds like 1/60s, the curtain is still dragging. Run the Ronsonol flush a second time.
For the truly committed, a Sensitest or similar focal plane shutter tester (around 0–100 to buy, or 0–20 to rent from a local camera shop) lets you measure actual shutter timing against spec. But honestly, the ear test is 90% of the way there for most film shooters.
Tools You’ll Need (And Where to Buy Them)
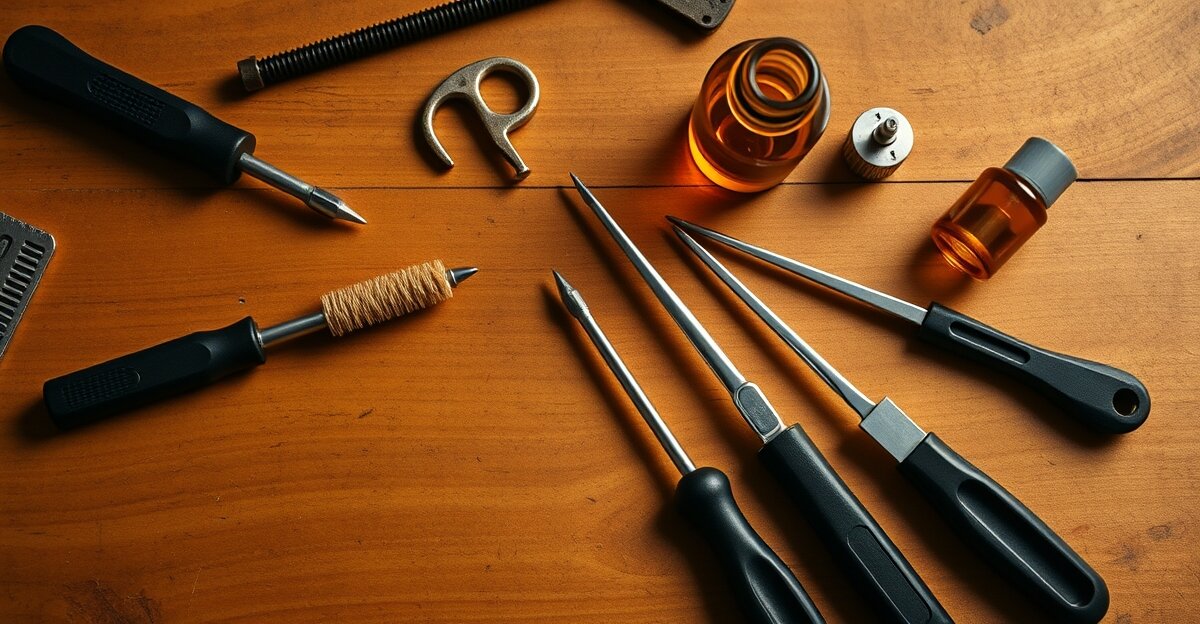
Here’s exactly what you need, with current pricing. The basic kit covers diagnostics and the chemical flush; the advanced kit is only needed if you’re comfortable opening the camera.
Basic diagnostic kit (2–51)
| Item | Source | Approx. Cost | Notes |
|---|---|---|---|
| 4×SR44 batteries (fresh) | Amazon, local pharmacy | –8 | Essential first step; buy two sets |
| Pencil eraser (soft, white) | Any stationery | For battery contact cleaning | |
| Ronsonol lighter fluid (small can) | Amazon, camera supply | –12 | Safer than gasoline; evaporates cleanly |
| Flashlight (LED headlamp) | Amazon | 0–20 | For mirror box inspection |
| Cotton swabs (sterile) | Pharmacy | For gentle cleaning | |
| Isopropyl alcohol (99%) | Amazon, pharmacy | –8 | For corrosion cleaning (optional) |
| Total Basic Kit | 2–51 | Handles 70–80% of sticky shutter cases |
➤ Grab the SR44 battery pack and Ronsonol from Amazon before the weekend — most issues are solved in an afternoon.
Chemical cleaning supplies (–12)
The Ronsonol is really the star here. A small can runs –12 and contains enough fluid for dozens of flush treatments. Buy from Amazon or a hardware store — Ronsonol (or Zippo lighter fluid, which is chemically identical) is widely available and cheap.
Do not buy the generic “lighter fluid” from the checkout counter at a gas station. Those sometimes contain additives or are mineral spirits, not naphtha. Stick to name brands for this one.
Optional advanced kit (internal repair, 6–58)
| Item | Source | Cost | Notes |
|---|---|---|---|
| Sewing machine oil (synthetic) | Amazon, fabric store | –10 | Very thin viscosity; ideal for shutters |
| Zeiss Immersion Oil (1oz bottle) | B&H Photo, eBay | 5–25 | Professional-grade alternative |
| Small jeweler’s screwdrivers set | Amazon | 2–18 | For mirror box screws if needed |
| Lens cleaning cloth (microfiber) | B&H Photo | –5 | Non-abrasive; safe on coatings |
| Advanced Kit total | 6–58 | Only needed for internal work |
If you need to choose an oil, synthetic sewing machine oil wins on practical grounds — it’s thin enough for camera use (ISO 15 viscosity range), widely available, and cheap. Zeiss Immersion Oil is excellent but overkill unless you have it already. For a deeper comparison of camera-safe lubricants, see our Complete Guide to Vintage Equipment Restoration.
Important: For internal lubrication, less is more. You’re applying micro-drops using a single human hair as an applicator — not a cotton swab, not a brush tip. The curtain rail needs less lubricant than you think. Overapplication creates the very sticky residue you’re trying to eliminate.
When to Seek Professional Repair
Not every sticky shutter problem ends with Ronsonol and fresh batteries. Knowing when to stop DIY and call in a technician is as important as knowing the DIY steps.
Signs your shutter needs a pro
- Torn or pinholed curtain cloth — Once the fabric tears, no amount of cleaning or lubricant helps. The curtain needs physical replacement, which requires complete shutter disassembly and reassembly to factory tolerances.
- Shutter won’t fire even with fresh batteries — If the electromagnetic trigger itself has failed, or the mirror mechanism has seized, you’re past non-invasive territory.
- Shutter fires but exposures are consistently wrong at all speeds — Timing is off throughout the range, which indicates a calibration issue rather than a lubrication issue.
- Grinding or scraping sound on every shot — A physical obstruction is damaging the curtain with each fire. Stop immediately.
Cost-benefit analysis (repair vs. replace)
A full professional CLA (Clean, Lubricate, Adjust) on a Canon AE-1 typically runs 50–00 depending on the technician and the scope of work. Shutter curtain replacement, if needed, is at the high end of that range or above.
Compare that to current market values: a working AE-1 in good cosmetic condition sells for 00–80 on eBay. A non-working “for parts or repair” body runs 0–60.
The math: if your camera body is cosmetically clean and the lenses are in good shape, a 50–200 CLA makes economic sense — you’re restoring something worth more than the repair cost. If the body is beat up and the FD lenses aren’t worth much, a donor body from eBay might be more practical.
Finding a reputable camera technician
The camera repair industry has been shrinking for decades. PetaPixel reported in January 2026 that “vintage camera repairers are retiring” with few trained replacements entering the field. This makes finding a good tech harder than it used to be.
Your best options:
- Local camera shops with a repair department (call ahead; ask specifically about mechanical SLR experience)
- Online repair services like Sover Wong (UK-based, specializes in Canon FD cameras)
- Camera repair communities on Reddit’s r/analog — they often maintain lists of trusted technicians by region
What to expect in a full shutter service
A full CLA on an AE-1 involves: complete disassembly of the mirror box and shutter assembly; ultrasonic cleaning of mechanical parts; replacement of the foam light seals (these deteriorate along with shutters in cameras of this era — ask whether this is included); fresh lubrication; reassembly; and timing verification with a focal plane shutter tester.
A good tech will return the camera with documented shutter timing measurements. If they can’t tell you what speeds the shutter is actually hitting post-repair, ask why.
Preventing Future Shutter Problems
The best Canon AE-1 sticky shutter fix is the one you never have to do. A small amount of regular maintenance keeps the mechanism healthy for another 50 years.
Storage best practices (humidity, temperature)
The two biggest enemies of cloth shutters are humidity and temperature extremes. Store your AE-1 with:
- Battery removed. This prevents slow battery drain, contact corrosion, and the battery acid disaster that can happen if a cell eventually leaks. The damage from leaking SR44s in an unattended camera is extensive and expensive to fix.
- Relative humidity below 50%. A cheap silica gel packet in the camera bag is enough. If you live in a humid climate, consider a dry cabinet (available from B&H Photo in the 0–150 range).
- Away from direct sunlight. UV degrades the curtain cloth and coatings faster than almost anything else.
- In a camera bag, not a sealed airtight box. Some airflow is good; completely stagnant air in high humidity conditions breeds mold on glass elements and foam seals.
Monthly maintenance ritual (5 minutes)
If you’re not shooting the camera regularly, do this once a month:
- Insert fresh batteries.
- Fire the shutter 20–30 times across the full speed range.
- Remove batteries.
- Store.
That’s it. The firing motion keeps the lubricant mobile and prevents it from settling and hardening on the rail surfaces. Think of it like running an engine briefly to circulate oil — you wouldn’t let a car sit for two years without starting it.
If you are shooting regularly, just keep the batteries fresh and don’t leave the camera loaded with film for more than a few weeks without shooting.
When to retire a camera gracefully
Sometimes the right answer is to acknowledge a camera has reached the end of its useful repair life. Signs it’s time:
- Multiple components failing simultaneously (shutter, light seals, battery door)
- Curtain replacement needed on a camera with marginal collector value
- You’ve repaired it twice already and it’s failing again in the same way
In those cases, the camera makes an excellent display piece, source of parts for better bodies, or teaching tool. Retiring a camera isn’t abandoning it — it’s giving it a dignified second purpose.
Common Mistakes That Make It Worse
This section might be the most important one in the guide. The repair techniques above work well. These mistakes undo all of that work and sometimes cause permanent damage.
Using compressed air (pushes debris deeper)
This is the most common mistake and the one I see mentioned most often in r/analog threads. Compressed air pushes debris through the shutter curtain gap and deeper into the mechanism. It can also dislodge light seals and drive foam fragments into the curtain rails. Put the can of compressed air away.
Over-lubricating (creates sticky residue)
One drop is too much. One micro-drop applied with a hair is the right amount for most shutter rail lubrication points. The viscosity of even thin sewing machine oil is dramatically higher than the original factory lubricant — excess oil migrates onto the curtain cloth, stiffens it, and recreates the very problem you were trying to solve.
If you’ve over-lubricated: flush with Ronsonol and start over.
Forcing a stuck shutter (causes permanent damage)
If your shutter is physically stuck — won’t fire at all — do not keep pressing the shutter button. The mechanism is seized, and forcing it risks tearing the curtain fabric or bending the curtain rods. Stop. Diagnose first.
Using the wrong oil (WD-40, household oils)
WD-40 is a water displacer, not a lubricant. It evaporates leaving a thin, sticky film that attracts dust and creates exactly the sludge you’re trying to remove. 3-in-1 oil and household machine oil are too thick. Olive oil is absurd but people try it. Silicone spray leaves residue on optical elements.
The only acceptable lubricants for camera shutters are very thin, ISO 15-grade or lighter: pure synthetic sewing machine oil or Zeiss Immersion Oil. That’s it.
Disassembly without knowledge (voids repairability)
The AE-1’s shutter mechanism is precision-toleranced. The two curtains are timed to within milliseconds of each other. Reassembly without a shutter timing tester means you’re guessing — and an incorrectly assembled shutter produces consistent overexposure, underexposure, or completely inconsistent results. If you open the mirror box, have a plan for how you’re going to verify timing afterward.
For a broader perspective on restoration principles — when to DIY, when to call a pro, and how to approach vintage equipment systematically — our Complete Guide to Vintage Equipment Restoration covers the decision framework in detail.
Decision Tree: Should You Fix Your Canon AE-1?
Not sure if this repair is worth your time or money? Walk through this logic:
If it’s a cosmetic issue
Your AE-1 looks rough but fires fine? Clean it up and shoot it. Cosmetic wear on a 50-year-old camera is normal and doesn’t affect performance. Light scratches on the body, worn leatherette, a scuffed prism — none of this matters for photography.
If it’s a mechanical issue but camera still fires
Worth fixing. Run the battery test and Ronsonol flush first — total cost under 5, and the success rate is high. If DIY doesn’t work, a CLA at 50–200 is still economically reasonable for a camera in otherwise good shape. The Canon FD lens ecosystem is excellent, and a working AE-1 paired with an FD 50mm f/1.4 is a genuinely capable shooting setup.
If the shutter won’t fire at all
Start with batteries and contacts. If that doesn’t fix it, the repair is beyond non-invasive techniques. Get a quote from a technician before committing — describe the symptom specifically (“shutter won’t trigger at any speed, fresh batteries installed, contacts cleaned”).
If you’re considering this as a starter repair camera
The AE-1 is a reasonable choice for learning camera repair. Bodies are plentiful, service documentation exists, and parts (curtains, foams) are still findable on eBay and in donor bodies. The shutter mechanism is more complex than, say, a fully mechanical Pentax K1000, but it’s well-documented. If you’re new to camera repair, read through our lens fungus removal guide first — it’s a lower-stakes introduction to camera disassembly technique.
Frequently Asked Questions
Why is my Canon AE-1 shutter so slow?
A slow Canon AE-1 shutter is almost always caused by one of two things: weak or depleted SR44 batteries, or dried lubricant buildup on the shutter curtain rails. Weak batteries are the most overlooked cause — the AE-1’s electromagnetic trigger needs clean voltage to release crisply, and even batteries that test “okay” can underperform under the load of a shutter firing. Start by installing four fresh SR44 cells and cleaning the battery contacts with a soft pencil eraser. If the shutter is still slow, particularly at fast speeds (1/500s or 1/1000s), you’re dealing with old lubricant hardening on the curtain rails — a job for Ronsonol lighter fluid. This is completely normal for a camera that’s been sitting for decades. It doesn’t mean your camera is broken; it means it needs a service.
How much does a professional Canon AE-1 shutter repair cost?
A full professional CLA (Clean, Lubricate, Adjust) on a Canon AE-1 typically costs 50–00 depending on the technician, your location, and the scope of the repair. At the lower end, you’re getting a basic cleaning, fresh lubrication, and timing check. At the higher end, that price includes shutter curtain replacement and foam light seal replacement — both often needed on cameras of this age. Compare that to current AE-1 market values: a working body in good cosmetic condition sells for 00–80 on eBay. If your camera is cosmetically clean and paired with good FD glass, the repair is worth the investment. If the body is rough and the lenses aren’t much, weigh repair cost against sourcing a better donor body.
Can I clean my Canon AE-1 shutter myself without opening it?
Yes — and Ronsonol lighter fluid is your tool. The non-invasive flush technique described in this guide (one short spray into the lens mount opening, followed by repeated shutter firings across all speeds, then a 2-hour dry time) resolves the majority of sticky shutter cases without opening the camera body. What you should not do: use compressed air (pushes debris deeper into the mechanism), household oils (too thick and leave sticky residue), or WD-40 (leaves a film that attracts dust). If you follow the steps carefully, you won’t damage the shutter cloth or the electronics. The only caveat is torn curtain fabric — if you can see physical tears or holes when inspecting through the lens mount, non-invasive cleaning won’t help and you’ll need professional repair.
What’s the best lubricant for a Canon AE-1 shutter?
The best lubricants for the AE-1 shutter mechanism are pure synthetic sewing machine oil or Zeiss Immersion Oil — both thin enough to penetrate the rail assembly without migrating onto the curtain cloth. Sewing machine oil (ISO 15 viscosity or lighter) is the practical choice: it’s –10 on Amazon, widely available, and chemically stable. Zeiss Immersion Oil is professional-grade, runs 5–25 per small bottle from B&H Photo, and is what many camera repair technicians use. What to absolutely avoid: WD-40 (water displacer, not lubricant), 3-in-1 oil (too thick), silicone spray (leaves residue on optical surfaces), and any cooking or vegetable oil. For internal lubrication specifically, apply micro-drops with a single human hair as the applicator — you need far less than you think, and overapplication recreates the sticky problem.
Is my Canon AE-1 worth repairing?
In most cases, yes — especially given the cost of entry into the analog photography world today. A working AE-1 with a clean 50mm FD lens is a capable, enjoyable camera that produces excellent results. The repair math depends on condition: if the body is cosmetically good and the issue is a sticky shutter, the 5 DIY fix (batteries + Ronsonol) or even a 50–200 professional CLA makes sense. If the curtains are torn and the body is rough, a donor body from eBay for 0–60 might be more practical. Sentimental value counts too — if this was your parent’s camera, or the first SLR you ever shot with, that’s worth factoring in. The right-to-repair principle applies directly here: if a device is mechanically repairable, fixing it is almost always the more sustainable and satisfying choice. —
Wrapping Up: Your Camera Deserves a Second Life
The Canon AE-1 is one of the most important cameras ever made. Five million units sold between 1976 and 1984. A generation of photographers learned to shoot on one. If yours has been sitting in a drawer with a sticky shutter, the odds are genuinely good that it’s one Ronsonol flush and a fresh set of batteries away from working perfectly.
Start simple. Replace the batteries, clean the contacts, do the flush, let it dry. That sequence fixes more cameras than it misses. If it doesn’t work, you haven’t lost anything — and you’ll know the problem is mechanical enough to warrant professional attention.
If you’ve already been through a repair and have your camera back in shooting condition, you’re part of keeping analog photography alive. Every fixed camera is one less device going to a landfill, and one more reason for the next person to try film for the first time.
The Canon FD mount is still excellent. The glass is still sharp. And a well-maintained AE-1 will outlast every smartphone camera ever made.
Have you fixed your AE-1’s shutter? Did the Ronsonol flush work, or did yours need a professional CLA? Tell me about it in the comments below — the specific symptoms you had, what fix worked, and what it cost. Your repair story might be exactly what someone else needs to hear to tackle their own sticky shutter.
Tools mentioned in this guide are available through our affiliate links. When you purchase through these links, you support profvolt.com at no extra cost to you — which helps us keep writing repair guides like this one.