



Replace a Turntable Belt: Thorens, Audio-Technica & Technics Guide
How to Replace a Turntable Belt: Thorens, Audio-Technica & Technics Guide
Your platter is slowing mid-song. The motor hums along just fine, but the record drags to a crawl — or stops entirely. That’s not a catastrophic failure. That’s a worn drive belt, and it’s one of the easiest fixes in all of DIY audio repair.
A turntable belt is a rubber-like elastomer loop that transfers motor rotation to your platter at precise speeds — 33-1/3 or 45 RPM. Most turntable belts last 3–5 years before stretching, glazing, or cracking. Replacement takes 15–30 minutes and costs $15–50 in parts, compared to $100–300 for professional repair.
⚠️ Belt-Drive Turntables Only — Check Before You Start
This guide covers belt-drive turntables only. If your turntable is direct-drive — like the Technics SL-1200 series (SL-1200MK2, SL-1200GR, SL-1210, and all variants) — it has no belt and this guide doesn’t apply. Direct-drive motors couple directly to the platter; if those platters stop spinning, you’re dealing with a motor or control-board fault, not a belt.
>
Not sure which type you have? Check the underside of the plinth — the model sticker will confirm. Belt-drive models say so explicitly in the manual or spec sheet.
This guide covers turntable belt replacement for the Thorens TD 160/166, Technics SL-BD22, and Audio-Technica AT-LP120/AT-LP60 — three of the most popular belt-drive turntable models among hobbyists and restorers. Whether you’ve never opened a turntable before or you’ve done a dozen of these, you’ll find the model-specific steps, part numbers, and tension guidance you need to get back to spinning records today.
Signs Your Turntable Belt Needs Replacement
You don’t always hear the belt go. Sometimes it’s a slow, creeping degradation — weeks of slightly off-tempo playback before you notice. Here’s what to look and listen for.
Visual & Audio Indicators
Visual signs:
- The belt appears shiny or glazed — fresh belts have a matte, slightly tacky surface; a glazed belt has lost grip
- Visible cracks or fraying along the belt surface (hold it up to the light)
- The belt looks stretched or baggy — if it sags noticeably when off the pulleys, it’s past its prime
- Belt residue or black smudging around the motor pulley area
Audio and performance signs:
- Speed wobbles — the pitch drifts up and down during playback (called “wow and flutter”)
- Platter slows mid-song, especially on bass-heavy passages that require steady torque
- Motor runs but platter doesn’t spin — classic sign of a fully failed or snapped belt
- Subtle inconsistency in tempo that you notice more with vocals or piano than with rock
Quick Speed Test (DIY Verification)
If you’re not sure whether the belt is the culprit, a strobe disc test takes two minutes. Download a free turntable speed app (RPM Speed & Wow on iOS, SpeedX on Android), place your phone microphone near the spinning platter, and check the readout. A healthy turntable stays within ±0.2% of target speed. Anything drifting more than that under normal load? Start with the belt.
| Visual Indicator | Likely Cause | Urgency |
|---|---|---|
| Glazed/shiny belt surface | Belt has hardened and lost grip | Replace soon |
| Visible cracks or fraying | Material fatigue — age or UV damage | Replace immediately |
| Platter slows under load | Belt stretching, losing tension | Replace soon |
| Motor runs, platter won’t spin | Belt broken or completely off pulleys | Replace immediately |
| Speed wobbles (confirmed by app) | Belt worn OR tension incorrect | Diagnose and replace |
Understanding Turntable Belt Types & Part Numbers
Here’s where most people go wrong. They order a “turntable belt” online, get something that’s 20mm too long or 1mm too thin, and wonder why the platter still slips. Belt sizing matters — a lot.
Belt specifications to know:
- Circumference: The total loop length in millimeters. This is the critical dimension. Even 10mm off can mean the belt won’t hold tension.
- Thickness: Usually 2–4mm in diameter. Thinner belts are more responsive; thicker belts hold torque better on heavier platters.
- Material: Most modern replacement belts are elastomer (rubber-like synthetic). Some higher-end replacements use silicone, which resists heat degradation better but costs more.
OEM vs. aftermarket: Original Equipment Manufacturer belts are made to spec and are the safest choice for vintage or audiophile-grade turntables. Aftermarket belts vary wildly in quality — some are excellent, others stretch immediately. When in doubt, pay the extra few dollars for OEM.
Here’s a reference table for the most common models. Always cross-check against your specific serial number range, as some models had mid-run production changes:
| Model | Belt Type | Approx. Size | Aftermarket Options | Cost Range |
|---|---|---|---|---|
| Thorens TD 160/166 | Flat rubber belt | ~200mm × 4mm | Multiple vendors | $18–$35 |
| Thorens TD 125 | Flat rubber belt | ~130mm circumference | Various aftermarket | $20–$40 |
| Technics SL-BD22 | Flat rubber belt | ~160mm × 4mm | Generic compatible | $15–$28 |
| Audio-Technica AT-LP120 | Flat rubber belt | ~280mm × 4mm | AT8000LB or generic | $15–$30 |
| Audio-Technica AT-LP60 | Flat rubber belt | ~280mm × 2.5mm | AT8000 or generic | $12–$25 |
| Yamaha TT-500 | Flat rubber belt | ~300mm circumference | Various aftermarket | $20–$40 |
[AFFILIATE: Thorens TD 160 replacement belt] · [AFFILIATE: Technics SL-BD22 replacement belt] · [AFFILIATE: Audio-Technica AT8000LB belt]
Don’t know your exact model? Flip the turntable over — the model and serial number are on a sticker or plate on the underside of the plinth. If the belt is still in one piece, you can also measure it with a piece of string: wrap it around the loop, mark where it meets, then measure the string against a ruler.
Tools You’ll Need (Before You Start)
Good news: you probably already own everything required. This is not a precision watchmaking job.
Essential:
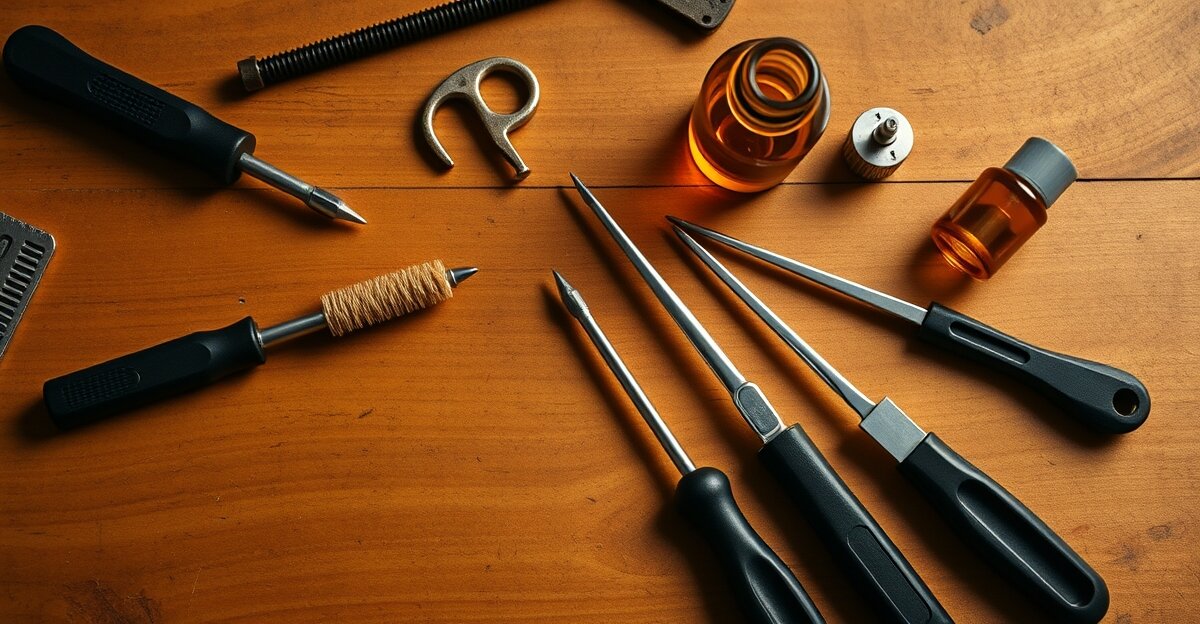
- Screwdriver set (Phillips and flat-head, sizes #1 and #2) — for platter removal and accessing motor covers
- Replacement belt (correct model — see table above)
- Lint-free cloth — keeps dust and fingerprints off the motor pulley and platter bearing during work
- Small bowl or tray — holds screws so they don’t roll away
Optional but genuinely helpful:
- Needle-nose pliers — for routing the belt around the motor pulley without getting your fingers in tight spaces
- Flashlight or headlamp — turntable interiors are darker than you’d think, especially on Technics models
- Compressed air canister — blast out dust from the motor cavity before installing the new belt
[AFFILIATE: Precision screwdriver set] · [AFFILIATE: Lint-free microfiber cloths] · [AFFILIATE: Compressed air canister]
A precision screwdriver set is worth having anyway — turntable work involves small, easy-to-strip screws that deserve better than a cabinet flathead.
How to Replace Your Turntable Belt: Step-by-Step
The process is fundamentally the same across all belt-drive turntables: remove platter, swap belt, reassemble. But the specifics — how the platter comes off, where the motor sits, how much tension the belt needs — vary enough by model to matter. Read your model’s section carefully before touching anything.
Thorens TD 160/166 (Direct-Access Method)
The Thorens TD 160 is probably the most widely serviced belt-drive turntable in existence. Produced through the 1970s and into the early 1980s, it combines a suspended sub-chassis design with a dead-simple belt path: a flat rubber belt loops from the motor sub-platter pulley directly to the main platter. No idler wheels, no intermediate stages. If you’re servicing a TD 166 (the TD 160’s upgraded sibling with an improved arm), the procedure is identical.
Belt spec: approximately 200mm circumference × 4mm wide. Multiple aftermarket options exist from vendors such as Thakker, LP Gear, and generic suppliers.
- Unplug the turntable and wait 2–3 minutes for the motor to fully stop. Don’t rush this step — a spinning motor creates static that attracts dust to the new belt.
- Remove the platter. Grip it firmly with both hands and lift straight up. The TD 160 platter sits on a main bearing spindle — lift with even pressure to avoid cocking it sideways. It releases cleanly with no clips.
- Inspect the motor area. With the platter off, you’ll see the motor sub-platter — a smaller inner platter sitting over the motor assembly, with a stepped pulley visible at its edge. Wipe both the motor pulley and the platter’s inner rim down gently with a lint-free cloth. Any belt residue (black smudge) should come off with a light pass.
- Remove the old belt. It loops around the motor sub-platter pulley and the inner rim of the main platter. If the platter is off, the belt will be sitting loose in the plinth. Fish it out carefully and set it aside for measuring — useful if you ever need to reorder.
- Route the new belt. First, hang the belt loosely around the outer groove of the motor sub-platter. Then, holding the main platter just above the bearing spindle, stretch the belt over the inner rim of the platter and lower the platter onto the spindle. A small flathead screwdriver or blunt pencil helps guide the belt into place without stretching it unevenly.
- Check tension before reassembling. Press the belt gently at its midpoint with your thumb — see the “Adjusting Belt Tension” section below. Thorens models are particularly sensitive to this step.
- Reseat the platter. Lower it carefully, aligning the center bore with the spindle. It’ll settle with a soft click or thud.
- Plug in and test. Let it run at 33-1/3 RPM for at least 5 minutes. Listen for any noise and verify speed stability with your strobe app.
⚠️ Common mistake on Thorens models: Over-tightening the belt by pulling it too hard onto the platter. The rubber stretches to accommodate, but a belt installed under tension will wear out 30–40% faster. Let it sit naturally after routing.
Technics SL-BD22 (Mid-Access Method)
The Technics SL-BD22 is one of the most overlooked belt-drive turntables in the hobbyist community. Made in the late 1980s and early 1990s, it’s a consumer-grade fully automatic belt-drive unit with a quartz-controlled motor — not to be confused with the famous SL-1200 series, which is entirely direct-drive and has no belt whatsoever. The SL-BD22 (and its sibling the SL-B210) turns up frequently at estate sales and thrift stores, making it a popular restoration target.
Belt spec: approximately 160mm circumference × 4mm wide. Generic aftermarket belts are widely available and fit well.
A quick note for clarity before we start: if you own any Technics SL-1200 variant — MK2, MK5, MK6, GR, G, or otherwise — stop here. Every SL-1200 is a direct-drive turntable. There is no belt. If that platter won’t spin, you need motor or control-board diagnostics, not a belt kit.
- Unplug the turntable and allow the motor to stop completely.
- Remove the dust cover if attached, then lift the platter straight up. The SL-BD22 platter is lightweight and lifts off the main bearing spindle cleanly with no clips.
- Inspect the motor area. Unlike the Thorens floating sub-chassis, the SL-BD22 motor sits in a fixed mount visible toward the rear of the plinth. You’ll see a small stepped motor pulley and the belt channel that routes to the platter hub. Give the pulley a visual check for glazed belt residue.
- Remove the old belt. Lift it off the motor pulley first, then the platter inner hub. If it’s broken, fish out any fragments from the pulley area.
- Clean the motor pulley. Technics pulleys accumulate a thin glazed film from old belts over time. A lint-free cloth barely dampened with isopropyl alcohol cleans this up in seconds. Let it dry fully before proceeding — 60 seconds is enough.
- Install the new belt. Route the belt around the motor pulley first, then stretch it over the inner hub of the platter while holding the platter just above the bearing spindle. Lower the platter gently once the belt is seated on both pulleys.
- Verify routing — no twists. Spin the platter manually through one full rotation. The belt should run flat and smooth between the two pulleys with no lateral drift or kinking.
- Tension adjustment. See the section below — fixed-mount motors like the SL-BD22 don’t allow positional adjustment, so tension is determined entirely by belt length. If it sags, you need a slightly shorter replacement.
- Plug in and test. Run at 33-1/3 RPM for 5 minutes, then verify speed with your strobe app.
Note on the fully automatic mechanism: The SL-BD22 has an auto-return tonearm and auto-stop feature. These are driven by a separate mechanism and are not affected by the belt swap. If auto-return stops working after a belt replacement, it’s coincidental — check the auto-return lever and motor separately.
Audio-Technica AT-LP120 & AT-LP60 (Easiest Method)
If you’ve never opened a turntable before, the Audio-Technica AT-LP120 or AT-LP60 is the perfect first repair. Audio-Technica designed these for the mass market, and serviceability shows in the engineering. There are no hidden clips, no motor covers, and no fiddly tension screws.
- Unplug the turntable.
- Remove the platter. Unlike the Thorens TD 160, the AT-LP platter lifts straight up with no clips or resistance. Takes about five seconds. Set it aside on a soft cloth.
- Inspect the motor area. It’s completely exposed once the platter is off — clean, accessible, no mystery. Give it a quick visual check for debris or old belt residue.
- Remove the old belt. Lift it off the motor pulley, then the platter spindle hub. If it’s snapped, fish out any fragments from around the pulley.
- Install the new belt. Route around the motor pulley, then over the platter spindle hub. The AT-LP120 uses a ~280mm × 4mm belt (OEM: AT8000LB); the AT-LP60 uses a thinner ~280mm × 2.5mm version (OEM: AT8000). Installing the wrong one is the most common mistake — check before you order.
- Tension. The AT-LP motor is fixed-position, meaning belt tension is set by the belt length, not by adjusting motor position. If the belt sags noticeably, you’ve got the wrong size. A correctly sized belt sits taut but not drum-tight.
- Reseat the platter. Lower it straight down over the spindle. Done.
- Run-in period. Let it play for 5–10 minutes. The belt seats itself during the first few rotations, so don’t be alarmed if speed is very slightly off in the first minute.
Beginner tip: If you’ve never opened a turntable before, the AT-LP120 is genuinely the place to start. Minimal risk, maximum clarity. You’ll be done before your next record side finishes.
Adjusting Belt Tension (The Critical Step Most Guides Skip)
Here’s the thing most DIY guides miss entirely: installing a belt is easy. Installing a belt at the right tension is what makes the difference between a turntable that sounds like it used to and one that still drifts at 1–2 minutes into a side.
Think of the belt like a rubber band on two pulleys. Too tight, and you’re straining the motor bearing every rotation. Too loose, and the platter slips under load — especially during bass-heavy passages where the stylus needs the groove wall support of a steadily rotating record.
The 1cm deflection test:
With the belt in place and the platter seated, find the midpoint of the belt — halfway between the motor pulley and the platter spindle. Press down on the belt gently with your thumb. It should deflect about 1cm (roughly 3/8 inch). Not more. Not significantly less.
Tension adjustment process:
- Platter installed, belt seated, motor at rest.
- Find the belt midpoint and apply gentle thumb pressure.
- If the belt deflects more than 1.5cm (too loose): The motor position needs adjusting. Many Thorens and Technics models have a motor mounting bracket with 2–3 screws — slightly loosen these, shift the motor away from the platter spindle by 1–2mm, and retighten. Recheck.
- If the belt barely deflects at all (too tight): Move the motor slightly toward the platter spindle, or try the next belt size up.
- Verify with strobe app after adjustment: run the turntable for 2 minutes, then check RPM stability. It should stay within ±0.2% of 33.33.
⚠️ Audio-Technica note: AT-LP models have a fixed motor position. Tension is set entirely by belt length. If tension is wrong on these models, you need a different belt, not a motor adjustment.
Over-tight symptoms: Audible motor whine, platter drags when stopped manually, motor runs hotter than usual after extended play.
Under-tight symptoms: Speed drift on sustained notes, platter slows slightly during loud bass passages, belt visibly wobbles laterally during rotation.
Turntable Belt Lifespan & Preventative Maintenance
Three to five years is the standard figure, but that’s an average. I’ve seen belts on lightly-used turntables stored in cool basements last eight years without issue. I’ve also seen belts on daily-use tables in warm rooms go soft and glazed in under two years.
The variables that matter:
- Usage frequency: Daily use accelerates fatigue. A turntable played an hour per day will need a belt sooner than one played on weekends.
- Storage temperature: Rubber compounds degrade faster above 25°C (77°F). Keep your turntable away from amplifiers, radiators, and south-facing windows.
- UV exposure: Direct sunlight attacks elastomer belts hard. Even a few hours of daily sunlight exposure can cut belt life in half.
- Humidity swings: Extreme humidity changes cause rubber to swell and contract. Attics and garages are hard on belts.
To extend belt life:
- Keep the turntable covered with a dust cover when not in use — this blocks UV and reduces dust migration into the motor area
- Store in a room that stays between 15–25°C year-round
- Clean the motor pulley and platter hub annually with a lint-free cloth to remove any accumulated residue that accelerates belt wear
Practical maintenance schedule:
- Monthly: Visual check on belt through platter inspection hole (if your model has one); wipe platter exterior
- Quarterly: Remove platter, inspect belt for glazing or cracking, check motor area for dust
- Annually: Full tension verification with strobe app; clean motor pulley
- Every 4–5 years: Plan for belt replacement as preventative maintenance, regardless of visible condition
What If Your Belt Is Replaced But Problems Persist?
You’ve installed a new belt. The platter still slips. Or now there’s a new noise that wasn’t there before. Don’t panic — these are all solvable, and they’re almost always one of four things:
| Symptom | Likely Cause | Solution |
|---|---|---|
| Platter still slips (new belt installed) | Belt tension too loose | Re-check deflection test; adjust motor position if applicable |
| Motor noise increased after install | Belt too tight; motor working harder | Loosen tension by moving motor slightly toward platter |
| Speed wobbles or drifts | Wrong belt size, OR tension off | Verify part number; re-run tension adjustment |
| Speed drifts only under stylus load | Belt marginally under-tight | Increase tension slightly; verify correct belt thickness |
| Turntable won’t power on | Connector dislodged during work | Check all power connectors; inspect for dislodged wiring |
| Platter wobbles physically | Platter not seated correctly on spindle | Remove platter and reseat; check for debris under hub |
When to call a professional:
The belt is almost never the only issue on a vintage turntable that’s been sitting for a decade. If you replace the belt and the motor still runs rough, makes a grinding or clicking sound, or the platter physically wobbles, it’s worth a full service. Motor bearings can be re-lubricated — that’s a 30-minute job for someone familiar with the specific model. Speed regulation circuits on older Thorens and Technics units occasionally need recapping. These are all DIY-able, but they’re different guides. For now: if the belt replacement solved the problem, enjoy your records.
Cost Breakdown: DIY Belt Replacement vs. Professional Repair vs. New Turntable
A $30 belt and half an hour of your time will almost always beat a $500 replacement — unless the motor, tonearm, or platter bearing is fundamentally damaged. Here’s the honest math:
| Repair Method | Cost | Time | Outcome |
|---|---|---|---|
| DIY belt replacement | $15–$50 | 15–30 min | Belt replaced; turntable returns to baseline performance |
| Professional repair (belt only) | $100–$200 | 1–2 weeks | Belt + inspection + calibration by a technician |
| DIY belt + professional fine-tuning | $80–$150 | 30 min + 1 week | Best of both: you save on labor, pro optimizes the rest |
| New mid-range turntable | $250–$800 | N/A | New equipment, but you lose the vintage character |
Decision framework:
- Is the turntable sentimental or genuinely vintage (pre-1985)? → Repair it. These don’t come back after you throw them away.
- Is everything working except the speed/platter spin? → DIY belt replacement first.
- Has it been more than 10 years since any service? → Replace the belt yourself, then consider a professional full service.
- Is the motor silent (not even humming)? → That’s not a belt problem. Professional diagnosis needed.
For related repair context, the same logic applies to mechanical watch mainspring replacement — small investment in a part, big return in extending a piece of equipment’s life by years.
Frequently Asked Questions
How long does a turntable belt last?
Most turntable belts last 3–5 years under normal use. Storage temperature, humidity, usage frequency, and UV exposure all affect lifespan. A belt in a cool, dry room used only on weekends may last 7+ years. One exposed to daily sunlight and warm temperatures might need replacing every 2 years. Checking your belt visually every 12 months catches degradation before it becomes a problem.
Can you replace a turntable belt yourself?
Yes — and it’s one of the most beginner-friendly DIY audio repairs there is. It typically takes 15–30 minutes, requires only a screwdriver and lint-free cloth, and is completely reversible if anything goes wrong. Audio-Technica AT-LP models are the easiest starting point. Thorens and Technics models require a bit more care around belt tension, but nothing that a first-timer can’t handle with this guide.
How much does it cost to replace a turntable belt?
DIY cost: $15–$50, depending on whether you buy OEM or aftermarket and what model you own. Professional repair typically runs $100–$300, which includes labor, a full inspection, and calibration. OEM belts (from the original manufacturer) cost $25–$50; good aftermarket options run $12–$30. Most online retailers ship within 1–2 days, so your turntable can be running again by the weekend.
What happens if a turntable belt breaks while playing?
The motor keeps spinning, but the platter stops immediately — the record keeps rotating only from momentum, which fades within seconds. The stylus may skip or drag across the groove if it hasn’t been lifted. More importantly: if the motor runs continuously without a belt load, it can overheat over time. If your platter suddenly stops while the motor is running, unplug the turntable immediately and don’t run it again until you’ve replaced the belt.
How do I know what size belt my turntable needs?
Start with your model number — check the underside of the plinth for a label. Then cross-reference with the part number table in this guide. If your current belt is still intact, measure its circumference (wrap a piece of string around the loop, then measure the string) and thickness with a ruler or calipers. The two dimensions that matter are circumference (loop length) and cross-section thickness. Buying the wrong size is the single most common belt replacement mistake — a belt that’s 15mm too long will slip regardless of how you adjust tension.
Should I replace my turntable belt even if it’s not broken?
If your turntable is 5+ years old and you use it regularly, yes — preventative replacement makes sense. Worn belts cause subtle speed instability long before they visibly crack or snap. Many audiophiles replace belts every 4–5 years as routine maintenance, the same way you’d change the oil in a car that’s running fine. You’ll notice the difference: tighter bass, more stable pitch, and the satisfaction of knowing you’re not one bad day away from a snapped belt mid-side. —
What Comes After Belt Replacement: Next Steps
The belt is in. Speed is stable. Now’s a good time to check a few other things while you have the platter off and the maintenance mindset active.
Let it run in. A new belt needs 5–10 minutes to seat fully into both pulleys. Don’t panic if the speed reads slightly high or low in the first minute — it settles. Verify with your strobe app after the run-in.
Check the stylus. You’ve restored stable platter speed, which is half the equation for good sound. The other half is the stylus tracking cleanly in the groove. If the turntable has been sitting unused for months or years, the stylus may be worn or contaminated. A worn stylus doesn’t just sound bad — it physically damages your records. The signs are similar to belt wear: distortion, sibilance, high-frequency harshness. If you’re not sure of the stylus age, replace it.
Consider a full service if the table is vintage. A belt swap is a great first step on a turntable that’s been sitting in a closet since 1988. But while you have it open, check the platter bearing for dry lubrication (a light drop of turntable bearing oil on the spindle tip), inspect the tonearm bearings for play, and listen for any motor noise during the run-in. These aren’t urgent, but they’re worth knowing about.
Related repairs you might find useful:
- If you enjoyed working through this kind of mechanical repair, our watch repair basics guide covers a similar mindset applied to timepieces
- For cleaning and lubricating precision mechanisms, how to oil a vintage sewing machine covers the same “right lubricant, right amount” principles
- Dust-free work environments matter for turntable work just as much as they do in camera lens cleaning — same principles apply
The Bottom Line
Turntable belt replacement for the Thorens TD 160, Technics SL-BD22, Audio-Technica AT-LP — across all three of these platforms, the process is fast, inexpensive, and well within reach of anyone willing to spend 30 minutes with a screwdriver. You don’t need to be an audio engineer. You don’t need a workshop.
What you do need: the right belt part number, a lint-free cloth, patience during the tension check, and five minutes of run-in time before you declare victory.
For the cost of a round of drinks, you can give a well-loved turntable another 3–5 years of stable, musical playback. That’s the right-to-repair math working exactly as it should.
If you run into a specific issue during your repair — or a model not covered here — drop a question in the comments. And if this guide saved you a trip to the repair shop, share it with someone who’s got a turntable gathering dust in a corner. They’ll thank you for it.
[AFFILIATE: Thorens TD 160 replacement belt kit] · [AFFILIATE: Technics SL-BD22 compatible belt] · [AFFILIATE: Audio-Technica AT-LP belt replacement kit] · [AFFILIATE: Turntable maintenance kit]